background image


15 

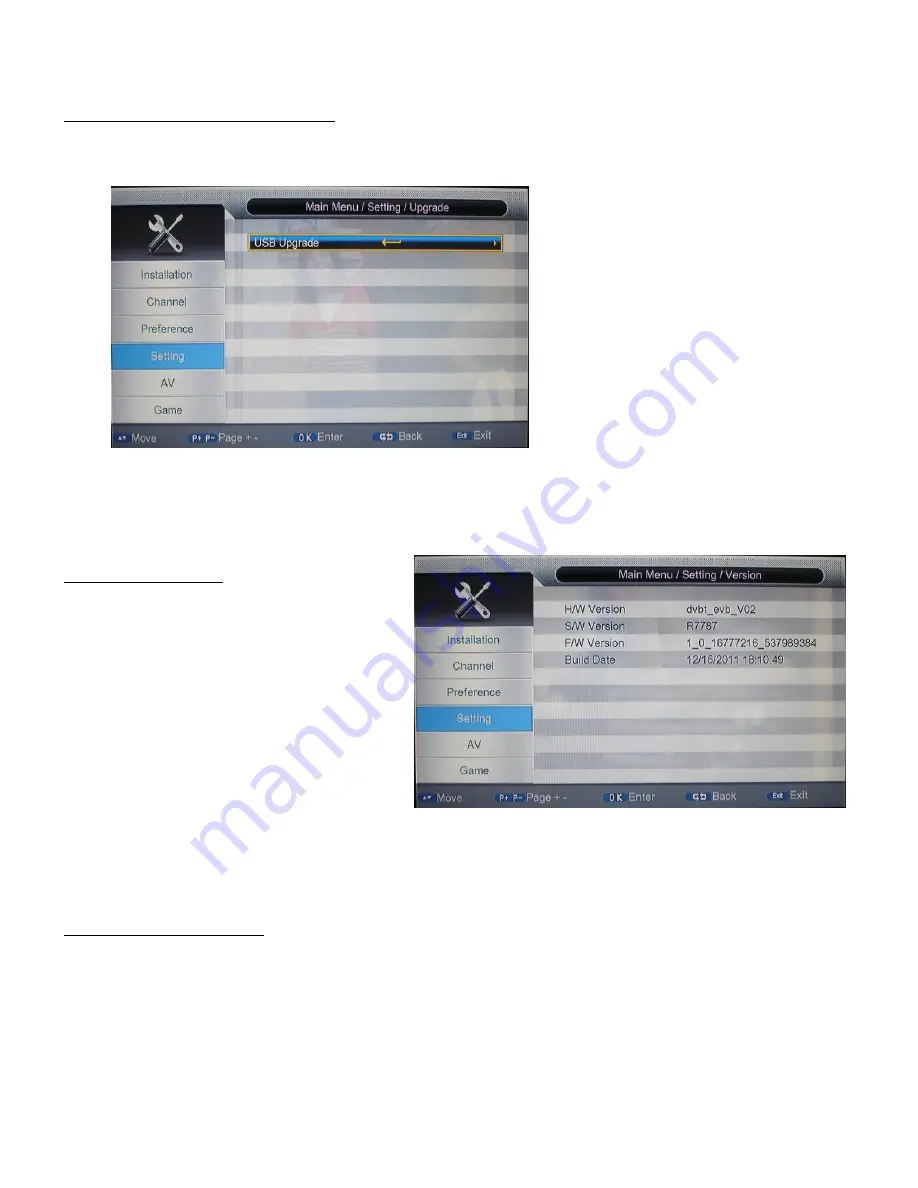
2.4.5 Upgrade 

Menu>Setting>Upgrade>USB upgrade 


Upgrade software by USB. 


 Insert a USB device with new firmware/software installed. 

 Select software file on the USB device to upgrade   


2.4.6 Version 

Menu>Setting>Version 


This will show the information of the units 

software and hardware versions. These details 

are important for the user to check any new 

updates about software. 


2.4.7 Auto Standby 

Menu>Setting>Auto Standby 


This will give you the option to have the unit turn to standby automatically after the selected time. The options 

include 1hour, 2hours, or 3hour. If the selection is set to 

“off” the unit will not turn on to standby unless the 

<

power

> button is pressed.         


Summary of Contents for aerialBox-DVD T5050

Page 1: ...1 USER MANUAL...

Page 2: ...ime 2 4 4 Auto search in standby 2 4 5 Factory reset 2 4 6 Upgrade 2 4 7 Version 2 4 8 Auto standby 2 5 AV 2 6 Game 3 Media 3 1 Movie 3 2 ISO 3 3 Music 3 4 Photo 3 5 Record Manager Games Disk Manager...

Page 3: ...on or pinched particularly at the plug receptacles and the point where they exit from the unit 7 Only use attachments accessories included within this package 8 Unplug this unit during lighting storm...

Page 4: ...ng the unit in areas of Direct sunlight or heating radiators High temperature over 35 or high humidity over 90 Dust as the internal parts may be seriously damaged 3 Non use periods When the unit is no...

Page 5: ...5 IDENTIFY YOUR SET TOP BOX Front Panel Rear Panel...

Page 6: ...ss to view connected device list 17 ZOOM Set zoom mode in full screen display 18 ANGLE Camera angle selection 19 OPEN CLOSE Open Close DVD tray 20 DVD Enter into DVD mode 21 EPG Electronic Program Gui...

Page 7: ...llowing the On Screen instructions to install channels 1 Plug in the receiver 2 Turn on your TV and select AV IN or the correct HDMI input 3 Select the correct data according to users setup by press u...

Page 8: ...manual search before searching for channels the user can change the other options on screen which are Channel filter Country and LCN Press menu on remote control press OK and enter the password 0000 t...

Page 9: ...Auto Search 1 Press OK to select auto search a window will appear saying This will re install channels Select yes to delete all channels Selecting yes will also begin the search 2 The unit will displ...

Page 10: ...TE Press the green key to set delete status press it again to cancel selection Default password is 0000 a new window delete selected channels would be displayed when user exits the current window choo...

Page 11: ...at will be displayed OSD Timeout Set the length of time banners are displayed Range between 1 6 Seconds Time On OSD Option to turn on or off a permanent clock on screen OSD Transparency Select the tra...

Page 12: ...to enter the timer edit window Menu Setting Timers Timer Edit Date Select the date you would like the timer to begin Program name press Right to select the channel you like to recorded or displayed St...

Page 13: ...n the remote control to view the record subtitles during playback Teletext Record When this option is set to ON the Teletext will be included in the recording Note Make sure the OK key is pressed to s...

Page 14: ...e Time Zone and Day light Saving In the Manual mode the only options accessible are Date and Time 2 4 4 Factory reset Menu Setting Factory Reset This will delete all settings and restore the unit back...

Page 15: ...the information of the units software and hardware versions These details are important for the user to check any new updates about software 2 4 7 Auto Standby Menu Setting Auto Standby This will give...

Page 16: ...o set screen pic aspect ratio 16 9 PB To view 4 3 programs on a 16 9 television 4 3 LB 4 3 Letterbox for use with 4 3 television 4 3 PS 4 3 Pan and Scan for use with 4 3 television 16 9 For use with 1...

Page 17: ...ovie ISO Music Photo Native32 NES Games Ebook Record manager and Disk Manager Note This option requires an external USB hard drive to be connected When navigating through the media menu please remembe...

Page 18: ...ie 3 2 ISO This is called the virtual DVD player and can support iso files Copy the movie on the USB device from a DVD Insert the USB drive into the USB slot of the unit Navigate to the inserted hard...

Page 19: ...o turn over picture Press the NEXT or PREV keys to view the next or previous picture Press the recall key to stop viewing the pictures and go back to the previous window 3 5 Record Manager Games Disk...

Page 20: ...WiFi Config All available networks will be recognized and listed automatically Press the Red key to re search for WiFi signal The manual add function can ba available by pressing the Green key separat...

Page 21: ...into the interface four functions will be available They are N32 Photo Google Map and Weather 4 2 1 1 N32 More games functions are supported after network connection has been successful There will be...

Page 22: ...sa Yellow Flickr The user can browse through the thumbnails using the directional keys and can view the image in full screen by pressing OK on the selected image There will be 5 functions avilable the...

Page 23: ...the current information 4 2 1 4 Weather With the Weather item user can also check the daily weather information of the places where they preferred based on the selection in the State Country Province...

Page 24: ...he device and select the desired item by pressing the ok key on the remote control 5 Convenient Functions 5 1 Ways of selecting channels Your DishTV receiver provides four ways to select channels Pres...

Page 25: ...IO key on remote control to enter Multiaudio page Press Left Right to switch among stereo left right Press OK EXIT to confirm the selection and return to live TV 5 5 SUBTITLES if broadcast Display sub...

Page 26: ...EC key on remote control to start recording the program that is playing Press REC again to display the duration window user can set duration time for the recording Note The maximum recording duration...

Page 27: ...e remote to open the DVD tray Insert a disk then press the Open Close button again to close the DVD tray The Disk should automatically start playing To play a USB storage device insert the device into...

Page 28: ...put CVBS INTERLACE YUV and P SCAN YpYbPr RESOLUTION Setup the output resolution 480p 576p 720p 1080i 1080p TV TYPE Set the screen output type 4 3PS 4 3LB 16 9 Some TVs are unable to display wide scree...

Page 29: ...Down Mix Switch the audio output between LT RT Mono Stereo and VSS Virtual surround sound Stereo Setup OP MODE Setup it to Line out or RE REMOD DYNAMIC RANGE Set the DYNAMIC range from OFF to FULL DU...

Page 30: ...e there is nothing obstructing the UHF antenna This could be due to bad interference in your area and you may need to install a filter to solve the issue Make sure you are using RGB coax to an outdoor...

Page 31: ...reliability of the product In the unlikely event that your product fails to work normally please contact your supplier and have your receipt of purchase on hand This warranty is subject to the followi...

Reviews: