


Page 25
Receiver Back Panel
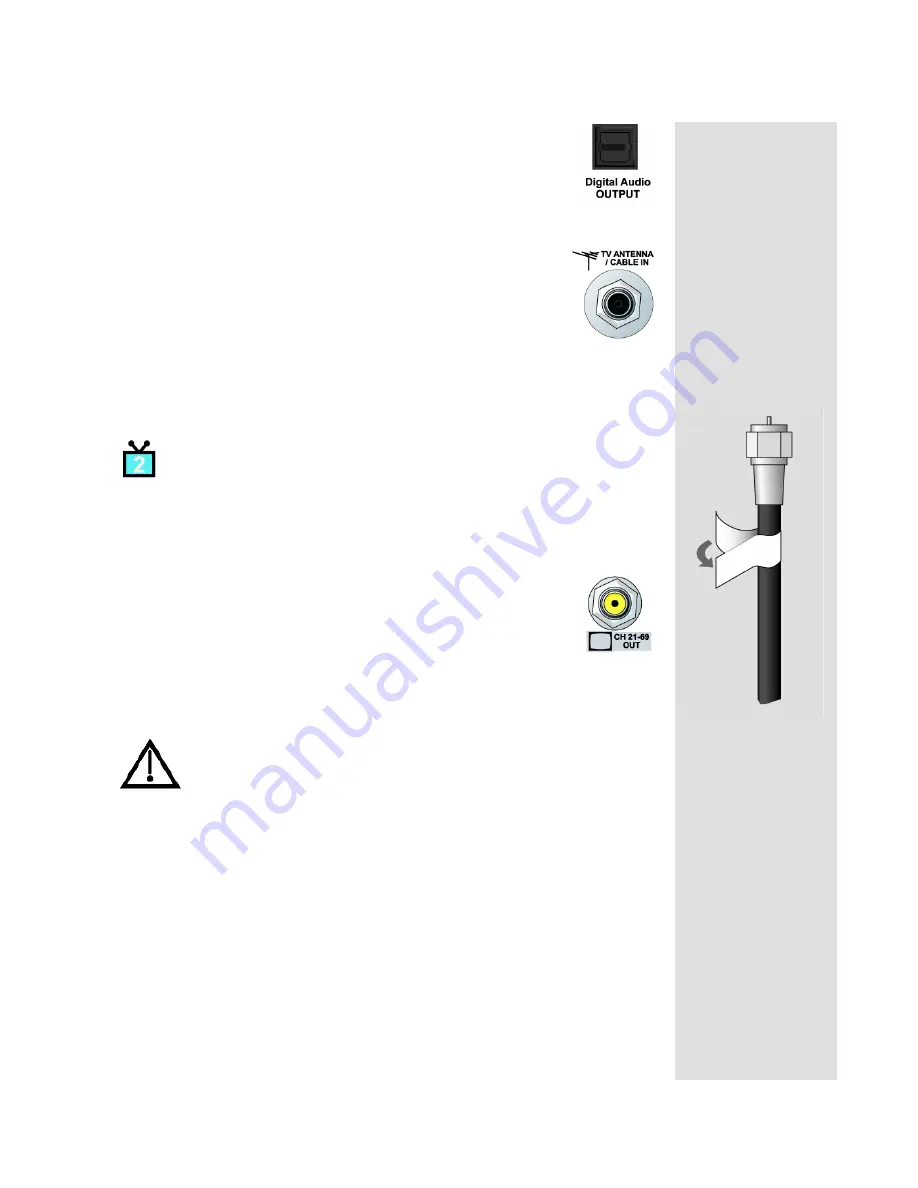
Digital Audio Out
The
D
IGITAL
A
UDIO
O
UTPUT
is for use with high-quality digital
sound decoding systems. Connect the
D
IGITAL
A
UDIO
O
UTPUT
with a Digital Audio Optical cable (available at consumer
electronics stores).
TV Antenna/Cable In
The
TV A
NTENNA
/C
ABLE
I
N
is used if you want the satellite
receiver to connect the tuner of the nearby TV to an off-air
antenna or cable TV system when the satellite receiver is turned
off or when using the
TV/VIDEO
button on Remote Control 1.
Use a coaxial cable to make this connection to an off-air antenna
or cable TV system. The
TV A
NTENNA
/C
ABLE
I
N
connection is
color coded black. Your nearby TV must be connected to the
C
HANNEL
3-4
output to use this feature.
TV2 Connections
The following connections provide menus and programming to the remote TVs.
These connections are active when the satellite receiver is in
Dual Mode
or in
Single Mode
with
Shared View
enabled.
CH 21–69 Out
The
CH 21–69 O
UT
connection provides good quality video and
stereo audio for the remote TV(s). Use a coaxial cable to make
this connection to your home cable system. Remote TVs
connected to the home cable system can receive programming
from this receiver output. The
CH 21–69 O
UT
connection is
color coded yellow.
Note
: When connecting to the home distribution (
CH 21-69 O
UT
)
coaxial port, you must meet requirements covered under
FCC
Compliance
in the
Appendix
. To meet these requirements, an in-line
coaxial attenuator has been included with your receiver and may
need to be installed using the following guidance:
• If connecting directly to a TV tuner port, you must install the
attenuator in the cable between the
CH 21-69 O
UT
port and the
TV tuner.
• If connecting to your in-home cabling system to distribute the
signal to a TV(s) in other rooms, in most cases you will not have
to install the attenuator for typical in-home cabling systems.
Tip: If you connect
a cable to the TV/
Antenna In port,
attach the black
cable sticker to the
cable near where it
attaches to the
receiver. The
stickers are
located inside the
front cover of this
guide.


