background image

Page 23

Chapter 2

Receiver Description and Installation

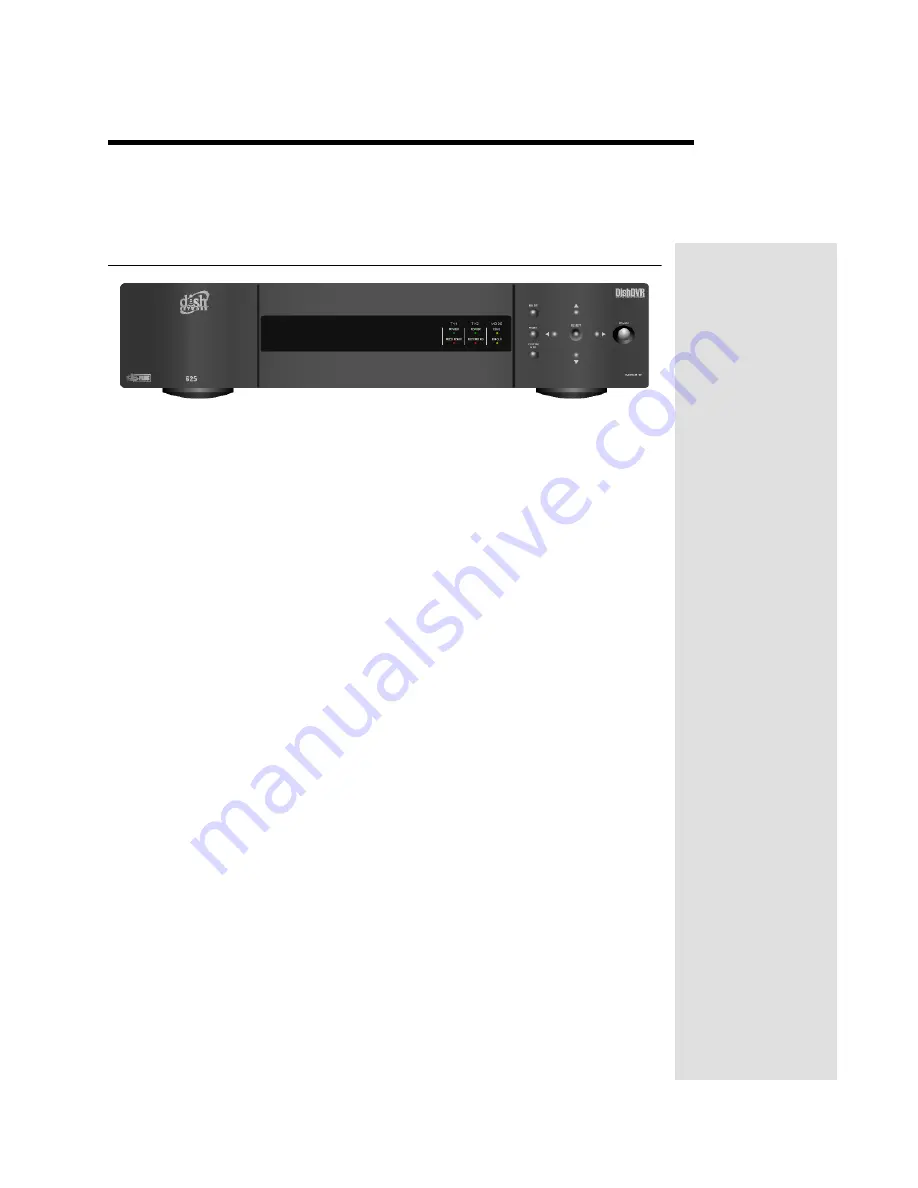
Receiver Front Panel

Smart Card Door

Behind this door is a slot for a future smart card. No smart card is included with 

this receiver.

Indicators

TV1 Power

 - The green light indicates that the receiver is providing 

programming to the nearby TV through the 

TV1

 output connections.

TV2 Power

 - The blue light indicates that the receiver is providing 

programming to the remote TVs through the 

TV2

 output connections.

Recording

 - Indicates that the receiver is recording. 

TV1

 and 

TV2

 each 

have recording indicators.

Mode

 - Indicates if the receiver is in 

Single

 or 

Dual

 mode (see page 49 for 

details).

Buttons

The buttons on the receiver give you some control of the receiver. Most of the 

time you will want to use the remote controls that came with your receiver.

Mode

 - Press the receiver 

MODE

 button to switch between 

Single

 and 

Dual

 mode (see page 49 for details).

System Info

 - Displays the 

System Info

 screen on the nearby TV.

Menu

 - Displays the 

Main Menu

. After you press this button, use the 

ARROWS

 and 

SELECT

 buttons to navigate through 

TV1

’s menus.

Arrows/Select

 - Use the 

ARROWS

 and 

SELECT

 the same way as the 

ARROW 

and 

SELECT

 buttons on Remote Control 1.

Power

 - Press the 

POWER

 button to turn the 

TV1

 programming on or off 

to the nearby TV.

IR Sensor

The 

INFRARED (IR) SENSOR

 receives IR signals from Remote Control 1.

Summary of Contents for DISH 625

Page 1: ...f the receiver is in Single or Dual mode see page 49 for details Buttons The buttons on the receiver give you some control of the receiver Most of the time you will want to use the remote controls tha...

Page 2: ...o your nearby TV if your TV has these connections Use an RCA type cable assembly to make the connection If the TV has only one input for this type of audio connect it to the right R phono RCA audio ou...

Page 3: ...69 Out The CH 21 69 OUT connection provides good quality video and stereo audio for the remote TV s Use a coaxial cable to make this connection to your home cable system Remote TVs connected to the h...

Page 4: ...Antenna The REMOTE ANTENNA port receives UHF signals from the Remote Control 2 so that it can control TV2 menus from another room Connect the UHF antenna here and place it so that it does not touch a...

Page 5: ...line of sight This remote control is identified by the green number 1 at the bottom of the remote control Remote Control 2 uses UHF Pro signals to Control TV 2 menus for the remote TVs in Dual Mode C...

Page 6: ...nd slide the cover off 2 If you are changing the batteries take out all of the old batteries 3 Put the new batteries in Make sure you match the plus ends with the plus markings on the battery case 4 S...

Page 7: ...ceiver with the front panel power button and make sure the green TV1 indicator is lit 5 Turn on the nearby TV 6 Tune the TV to channel 3 7 You should see the Point Dish screen 8 If you do not see the...

Page 8: ...cord for the receiver 5 Turn on the receiver with the front panel power button and make sure the green TV1 indicator is lit 6 You should see the Point Dish screen Confirm Remote Control 1 Operation Af...

Page 9: ...aving this professionally installed Call DISH Network at 1 800 333 DISH 3474 Note When connecting to the home distribution CH 21 69 OUT coaxial port you must meet the FCC requirements in the Appendix...

Page 10: ...cted in step 3 Write that channel down in the blank provided in the margin by step 5 For example if the three channels you picked in the preceding step were air channels 60 61 and 62 pick channel 61 a...

Page 11: ...is on 12 Select the Modulator Setup MENU 6 1 5 With the Modulator Setup screen displayed on the nearby TV use Remote Control 1 to do the following a Under TV2 Out select either Air for off air channe...

Page 12: ...e is capped or otherwise protected from the weather 19 Disconnect the cable coming from the receiver CH 21 69 Out port from the splitter If you do not know which cable this is go to the next step Othe...

Page 13: ...From a remote TV use the Remote Control 2 arrow keys to move around the Point Dish screen If you are able to move around in the Point Dish screen you confirmed that Remote Control 2 is controlling th...

Page 14: ...2 programming The following instructions describe how to program the RECOVER button to tune your remote TV back to a selected channel Programming the Recover Button Channel 1 Program Remote Control 2...

Page 15: ...21 and 69 Cable Mode Select a channel between 73 and 125 7 Select Done to save the changes 8 Change the channel on your TV s to match the channel s you selected 9 If desired to remind you of which TV...

Page 16: ...Run a telephone cable with a standard RJ 11 connector from the receiver s back panel Phone Jack to an active telephone connection Phone System Setup You must also set up the receiver for your telephon...

Page 17: ...em See the wiring diagrams in Chapter 4 for appropriate receiver connections in your system Note If you are installing your receiver into a system with DISH Pro LNBFs and or switches you can have as m...

Page 18: ...nt Dish menu An Attention screen will open asking the mounting and positioning of your dish is complete with a Locked indication in the Point Dish screen If the answer is yes select Yes 9 After you se...

Page 19: ...the nearby VCR s tuner port 2 Connect a coaxial cable from the output on the VCR to the nearby TV s tuner port 3 Plug in and turn on the nearby VCR and TV 4 Set the VCR output to Channel 3 or 4 as se...

Page 20: ...VCR to in step 6 8 Write the channel number you tuned your TV to in the previous step on one of the TV2 channel stickers Place the sticker on or near the TV This sticker will remind you which channel...

Page 21: ...ntrol TV1 use the instructions on page 46 to change the address To handle this situation you can change address on Remote Control 2 and the receiver as follows 1 Make sure you turn on the TV 2 Press t...

Page 22: ...control s range try any or all of the following Place the receiver higher than all of the other equipment in your entertainment center Provide room above the receiver so that the antenna can be instal...

Page 23: ...Optimize Your Remote Controls 1 Take the UHF antenna off of the receiver s back panel UHF Remote Antenna input 2 Put the attenuator onto the UHF Remote Antenna input 3 Put the UHF antenna onto the att...

Page 24: ...going to use to control TV1 a Press and hold the SAT mode button about three seconds until all the mode buttons light up and then let go of the SAT button The SAT mode button will blink b Use the NUM...

Page 25: ...g MENU 6 1 8 on the remote control b Select Disable from the TV1 UHF Pro Setup screen c Select System Info to open the System Information screen 2 Perform the following with an IR remote control such...

Page 26: ...Chapter 2 Page 48 Receiver Description and Installation Notes...

Reviews: