background image

7

Operating Instruction

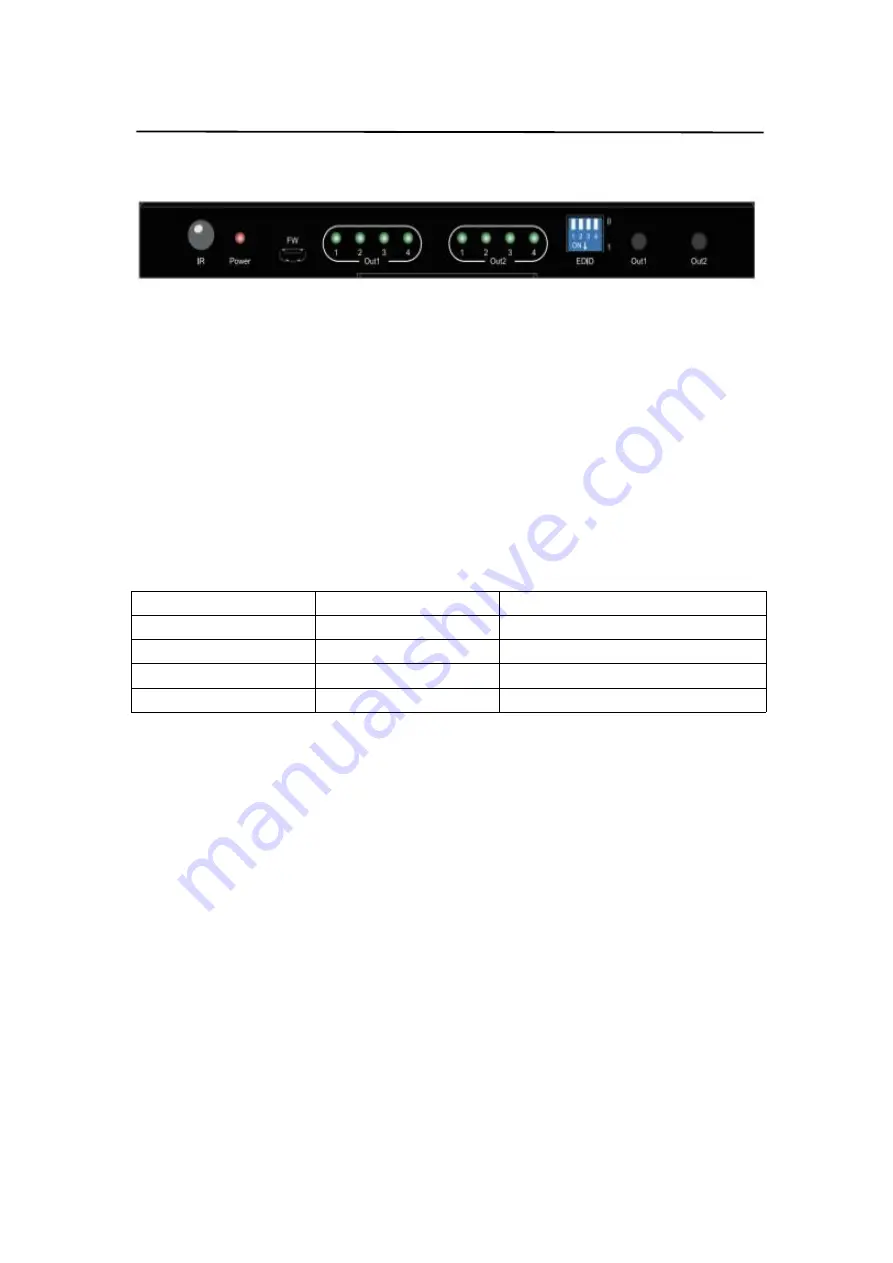
8. EDID DIP Switch

8.1 DIP Switch function

DIP Switch include:EDID Copy mode and build-in EDID mode.

(DIP Switch 1 to 4 for HDMI input1 to input4)

8.2 EDID Copy mode

EDID DIP switch to “0”,means using the EDID copy mode,when HDMI out1/ out2 port select any

one channel of HDMI input,EDID input will copy and follow EDID of TV.

If HDMI out1 /out2 select same HDMI input,mix EDID would be auto generated according to TVs.

8.3 Build-in EDID mode

EDID DIP switch to “1”,means using the build-in EDID mode, there is four kinds of EDID for

setting:

Indicator light of Out2

Build-in EDID NO.

Explanation of EDID

1

1

4K@60Hz,YUV4:4:4,30/36Bit,PCM

2

2

4K@60Hz,YUV4:2:0,30/36Bit,PCM

3

3

4K@30Hz,30/36Bit,PCM

4

4

1080P,30/36Bit,PCM

Operation steps:

1. Long press “Out1” button at front panel to enter build-in EDID mode setting,indicator light of

out1 turn to quick flashing status.

2. Short press “Out1” button to select input channel for setting that you need(with indicator light on

at panel out1 for selected input accordingly).

3. Short press “Out2” button to select the build-in EDID No. in above sheet(with indicator light on at

panel out2 for selected EDID accordingly).

4. Then long press “Out1” button to save the setup and back to normal usage mode,indicator light

turn back to normal.

5. At last,EDID DIP switch to “1” for the input that just set,then finish the setup of build-in EDID.

Note:When select build-in EDID No.1 (4K@60Hz,YUV4:4:4,30/36Bit,PCM) for input,it will auto

downscale to suitable resolution if TV do not support HDCP2.2.

Summary of Contents for 25-0572

Page 1: ...1 25 0572 4x2 HDMI2 0 Matrix Support 4K 60Hz YUV4 4 4 18Gbps HDCP2 2 ...

Page 2: ...ting or adjusting this product Please keep this manual for future reference SURGE PROTECTION DEVICE RECOMMENDED This product contains sensitive electrical components that may be damaged by electrical spikes surges electric shock lightning strikes etc Use of surge protection systems is highly recommended in order to protect and extend the life of your equipment ...

Page 3: ...fications 4 4 Panel Descriptions 5 4 1 Front Panel 5 4 2 Rear Panel 5 5 Connecting and Operating 6 6 Application Diagrams 6 7 Remote Control Description 6 8 EDID DIP Switch 7 8 1 DIP Switch function 7 8 2 EDID Copy mode 7 8 3 Build in EDID mode 7 9 Firmware Upgrade 8 Warranty Policy 9 ...

Page 4: ... Support OVP over voltage protection mode When input voltage over DC 6V Unit size L205XW103 8XH22mm 2 Package Contents 1 1x HDMI Matrix 2 1x 5V DC power supply 3 1x Remote control 4 1x CD 3 Specifications Bandwidth 18 Gbps Resolution 480p 60Hz 576P 50Hz 720P 60Hz 1080P 24Hz 1080P 50Hz 1080P 60Hz 4K 24Hz 4K 30Hz 4K 60Hz YUV4 2 0 4K 60Hz YUV4 4 4 Operating Temperature Range 5 to 40 C 23 to 104 F Ope...

Page 5: ...e EDID DIP switch for HDMI input1 2 3 4 0 for EDID copy mode 1 for build in EDID mode HDMI out1 button short press to select input1 2 3 4 Long press to enter build in EDID mode for more details please see 8 3 Build in EDID mode HDMI out2 button short press to select input1 2 3 4 Or short press to select build in EDID No for more details please see 8 3 Build in EDID mode 4 2 Rear Panel HDMI input p...

Page 6: ...onnect HDMI output ports to TV or other HDMI sink devices 3 Connect 5V POWER supply to DC power socket 4 Power on the matrix HDMI sources and displays 6 Application Diagram 7 Remote Control Description Short press to select HDMI input1 2 3 4 for HDMI out1 Short press to select HDMI input1 2 3 4 for HDMI out2 ...

Page 7: ...UV4 2 0 30 36Bit PCM 3 3 4K 30Hz 30 36Bit PCM 4 4 1080P 30 36Bit PCM Operation steps 1 Long press Out1 button at front panel to enter build in EDID mode setting indicator light of out1 turn to quick flashing status 2 Short press Out1 button to select input channel for setting that you need with indicator light on at panel out1 for selected input accordingly 3 Short press Out2 button to select the ...

Page 8: ...select correct usb port Note if PC is unable to identify the correct usb port please install the driver from CD first 3 Set the same baud rate with PC host default 115200 4 Type in A1 in PORT and select PATH with update file then click UPDATA wait for update till display Succeed in red frame Note When update progress bar stop before successfully finish upgrade please power off PC host and restart ...

Page 9: ...he length of the period indicated as below Parts 2 Year Labor 90 Days which starts with the date of original purchase Limited Warranty period at its option either a repair your product with new or refurbished parts or b replace it with a new of a refurbished product The decision to repair or replace will be made by the warrantor During the Labor Limited Warranty period there will be no charge for ...

Page 10: ...ITED WARRANTY COVERAGE THE WARRANTOR IS NOT LIABLE FOR INCIDENTAL OR CONSEQUENTIAL DAMAGES RESULTING FROM THE USE OF THIS PRODUCT OR ARISING OUT OF ANY BREACH OF THIS WARRNTY As examples this excludes damages for lost time cost of having someone remove or re install an installed unit if applicable travel to and from the service loss of or damage to media or images data or other recorded content Th...

Reviews: