Vehicle Tracking quick start guide
10
© 2011 ... Directions Ltd
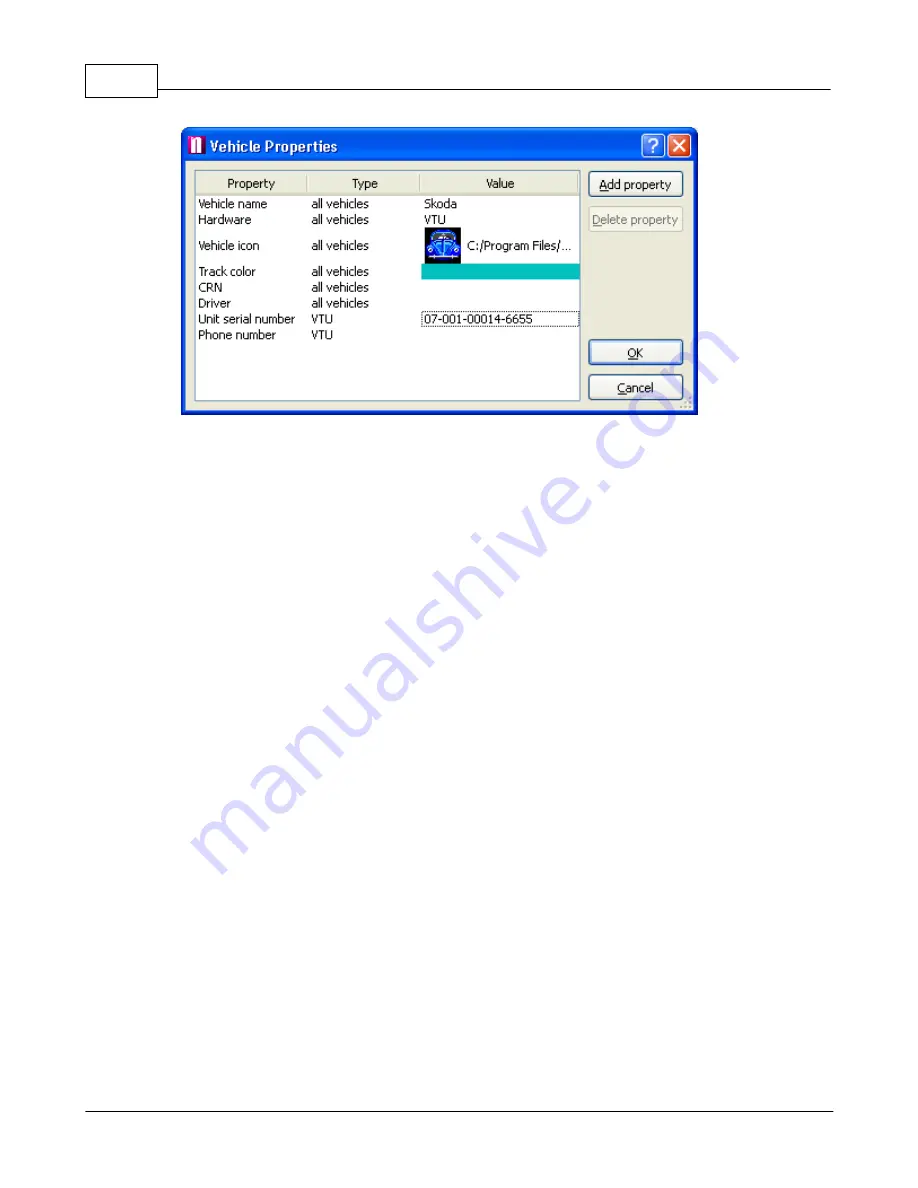
Make sure that you enter the correct parameters here.
Name
- a label under which the vehicle will be shown on screen.
Hardware
- Select which hardware unit you are using, for VTU009 select VTU.
Icon
- You must enter a valid icon which will be used to represent the vehicle on the map. Some
icons a available in the application folder (usually c:\Program files\Navigator\picts2\car_icons)
Track color
- the colour that the vehicle journeys will be represented in on the map. To make
different easily distinguishable you can select different track colours for different vehicles.
CRN
- Vehicle registration number
Driver
- name of the driver.
Unit serial number
- the serial number of the vehicle tracking unit. This part must be entered
correctly for GPRS communication.
Phone number
- Enter the phone number of the unit. Please remember that your SIM card must be
data enabled and the PIN removed or set to 0000. This number is the data number for the SIM
card not the voice number. If the unit came with a SIM card the number will be included for you.
When you enter a second vehicle some of the fields will be automatically filled in for you to save
time.
You can always edit
Vehicle Properties
by highlighting a vehicle from the list and selecting
Tracking / Edit
from the menu or clicking the
Edit
button underneath.
Next to each vehicle in the list is a check box. If you have enabled
zoom to selected vehicles
at
the top of the vehicle list then Navigator will automatically zoom the map to fit all vehicles that you
have checked.
7.2
Setting up a tracking unit
Caution! Setting up a tracking unit incorrectly can substantially change its behaviour.
We recommend that you take a note of the original settings before changing them.
Now select
Unit settings
from the context menu.


