Ins
ta
lling
the
Dr
ive
rs
Go to table of contents
DCS_Direct_Jet_1024UV_1014UV_Getting_Started_Guide_2.1.docx
15 |
P a g e
DRIVER INSTALLATION
Insert the orange USB security device (dongle).
You should connect it directly to your computer and
not to a hub. The dongle is required to run Color Byte. It must remain in the computer at all times. It
also contains documentation, software and driver files necessary to use your printer.
EIB
On the dongle, navigate to Data Disk 2>Direct Jet USB Drivers>EIB_5_2_2.
Run (double click on) DJ1320_EIB_VCPInstaller.exe and click Install. Click Continue Anyway
when you see the alert about the Windows Logo testing. Do not restart at this time.
YACB
Navigate to Data Disk 2>Direct Jet USB Drivers>YACB_5_2_2.
Run (double click on) DJ1320_YACB_VCPInstaller.exe. Click Continue Anyway when you see
the alert about the Windows Logo testing. Choose Yes to restart when finished.
Printer Drivers
Navigate to Epson Printer Drivers and choose the file associated with your operating system. Do not
rely on or use the Generic ESC default driver that Windows 7 may install on its own. You must install
the drivers provided on the dongle.
When the Security Warning screen appears, click on RUN. When the Self-Extractor window appears,
click OK. The Self-Extractor will automatically start to unzip the files into a temporary buffer area. The
setup utility will automatically start copying files.
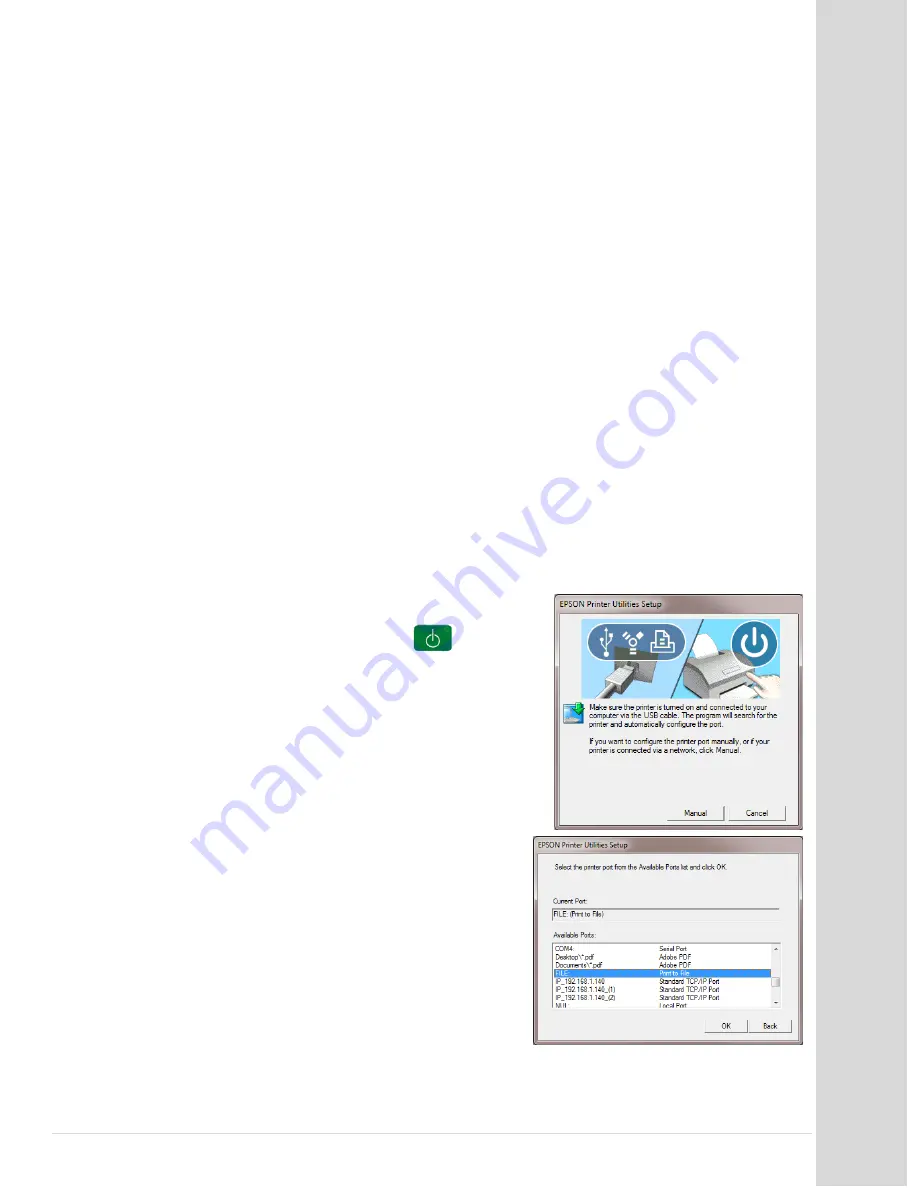
If you get to this screen, click the MANUAL button. If your
printer is connected and your print engine is on (
solid green
light ), you won't see this screen and it will automatically be
assigned to the default Epson port.
Select FILE for now and later in this manual the EPSON Stylus
Photo 1900 printer port will be selected. After the port is
selected, click OK.
Click OK at the successful installation screen.
For Instructions on installing Color Byte RIP 9, please refer to the Color Byte RIP 9
User Guide. If you have Color Byte RIP 8, please contact DCS Tech Support.


