background image

Plug&View IP camera  

׀

 Manual 

׀

 ML-201310


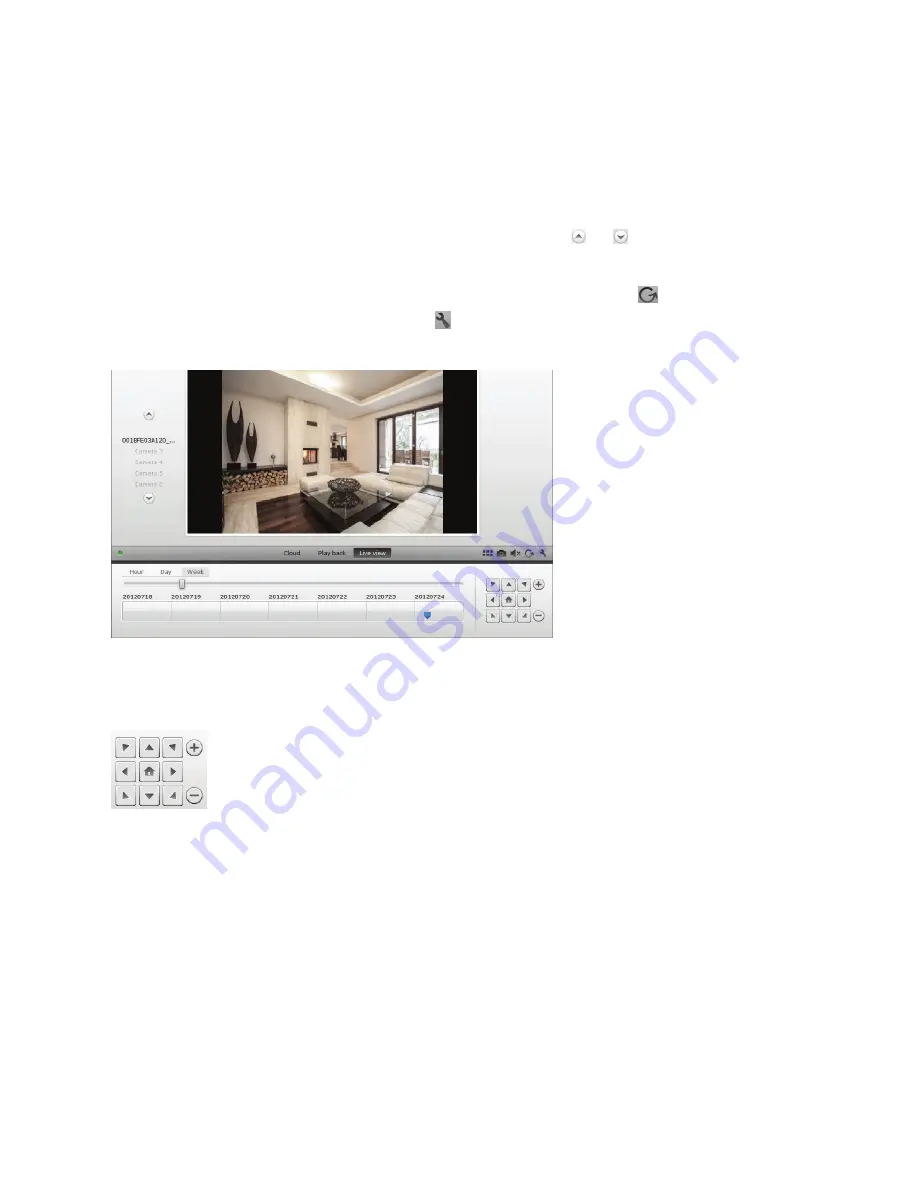
4.3  Live image and PTZ 

The button 

"Live View" 

will display the live-stream or images from the selected IP camera in real-

time. If you have multiple Plug&View cameras installed, you can switch between the different 

cameras using the display on the left-hand side of the screen. Use the arrow buttons 

 and 

 to 

select other IP cameras from the list. 

In the event of connection problems, e.g. because of a slow Internet connection, you can click on 


to reload the live-stream or real-time images. By clicking on 

, on the right side at the bottom of the 

screen, one can access the configuration controls for the selected camera.  


If the selected IP camera supports PTZ functions, the PTZ control panel, with which you can control 

the camera, can be selected. Otherwise the field will be grayed out to indicate that it has no function. 

Each motion adjustment requires a click. 


4.4 Playback 


The 

"Playback"

 function is only supported when an SDcard for media recording has been inserted 

into the IP camera. By using the blue tags on the time axis, all recorded events can be retrieved. All 

recorded events have been stored and tagged with a blue mark on the time axis. You can select to 

view them for different time periods, by clicking on the left side of the time axis, on hour (hour), day 

(day) or week (week). 


Summary of Contents for Plug&View

Page 1: ...DIGITUS Plug View IP cameras User Guide...

Page 2: ...in to your user account in http plug view com After a successful login you will see an overview of the images of your registered cameras 4 Description of the toolbar The toolbar can be found to the r...

Page 3: ...at the bottom of the screen one can access the configuration controls for the selected camera If the selected IP camera supports PTZ functions the PTZ control panel with which you can control the came...

Page 4: ...on opens up a special web user interface for the configuration of the IP camera Please log in with admin as the username and password Muting With the button you can switch the sound of the camera on o...

Page 5: ...your account Google Drive Backup To the right your Google Drive Account for the cloud backup is set up You must have a microSD memory card installed in your camera in order to be able to use Google b...

Page 6: ...es from the microSD card is loaded onto Google Drive This means that the videos triggered by movement or timer can be played from the cloud storage online using your browser Please log in to your Goog...

Page 7: ...ownload link will be displayed in the user interface if necessary 5 1 Home This page shows the live image from the camera Under Home you can also pan and tilt Plug View OptiArc or similar PTZ cameras...

Page 8: ...onfigure the resolution the quality and the frame rate for the video stream Quality supports 5 levels in the image quality settings from very high to very low Three streams are supported by the camera...

Page 9: ...1310 9 5 3 2 Audio Under Audio you can enable or disable the audio for the main and sub stream 5 3 3 OSD You can enable or disable the time stamp and camera name in the video picture of the camera You...

Page 10: ...If the default position is enabled the camera will automatically move back to the set position after the end of the set time 5 3 5 Network IP Settings Here you assign a fixed IP address to the camera...

Page 11: ...ss or host name of the SMTP server If you don t know the SMTP server settings please refer to the settings you are using in your e mail software or ask your network administrator or ISP Enter the SMTP...

Page 12: ...the motion detection with a click on Enable The colored area within the video image is the motion detection area i e the area in which a movement triggers a picture or a video recording In the origina...

Page 13: ...tal In and Output Alarm In Out 5 3 10 Alarm In Out If your camera has Alarm In and Out you can configure the settings here You can use a sensor to trigger the alarm in Please configure if the used dev...

Page 14: ...rding you can configure the schedule for week mode work mode or all time day 5 3 13 Privacy Mask Privacy Mask marks any specific area within the video image which is blacked out during a recording Act...

Page 15: ...Time Setting Manual setting Sync with computer time Sync with NTP and Time zone are optional Select the method you want to use Select the method you want to use Keep current Keep the current time whic...

Page 16: ...mera Restore Load backuped data to the camera Upgrade Load a new firmware to the camera 5 4 4 Device Info Shows camera name serial number hardware version software version start time and network infor...

Page 17: ...ess to configure the wireless settings A search window appears in which the available wireless networks in your environment will be displayed Please select the identifier SSID of your network and conf...

Page 18: ...arks or trade names mentioned in this manual are used to describe the operating steps and do not imply that they are freely available In any case they are the property of the respective holder of the...

Reviews: