38
The lower panel displays all the Powerline Ethernet devices, discovered on the current logical network (remote
devices). Displayed immediately above this panel is the number of remote devices found, the type of logical
network (Public or Private), and a message area that reports connectivity
and scan status. The following information is displayed for each of the devices discovered that appear in the lower
panel:
Device Name column shows the default device name, which may be user re-defined. A user may change the
name by clicking on the name and editing in-place, or by using the rename button. An icon is optionally shown
with the name. A distinction in icons is made between low-speed and high-speed devices . By default, the icon is
displayed with the name.
MAC Address column shows the device's MAC address.
Password column shows the user-supplied device password (initially left blank).
A user may enter the password by using the Enter Password button.
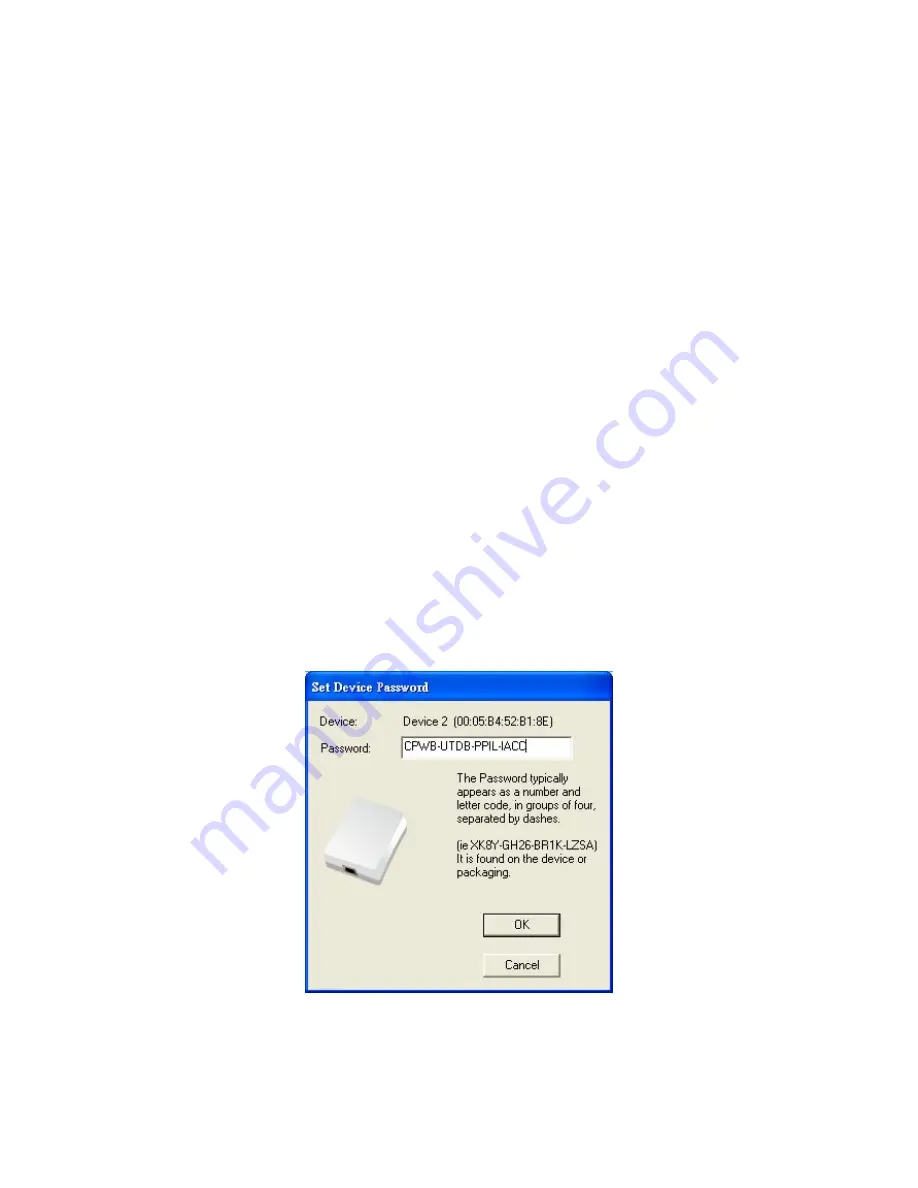
To set the Password of the device (required when creating a private network), first select the device by clicking
on its name in the lower panel and then click on the Enter Password button.
A dialog box will appear as shown in Figure 4 to type the password. The selected device name is shown above
the field for entering the password. Hit OK after entering the new password. A confirmation box will appear if the
password was entered correctly.
If a device is not found, the user will be notified and suggestions to resolve common problems will be presented.
Figure 4: Set Device Password
Summary of Contents for HIGH-SPEED 300N POWERLINE ACCESS POINT
Page 1: ...User s Manual DN 15018 1 HIGH SPEED 300N POWERLINE ACCESS POINT ...
Page 3: ...2 6 Trouble Shooting 49 Appendix A Glossary 50 Appendix B Cabling Connection 57 ...
Page 13: ...12 3 4 1 Wireless Basic Settings ...
Page 24: ...23 3 4 5 Wireless Station List Monitor Stations which associated to this AP Router here ...
Page 36: ...35 Figure 1 Install Shield Screen ...


