background image

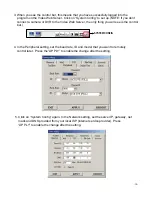
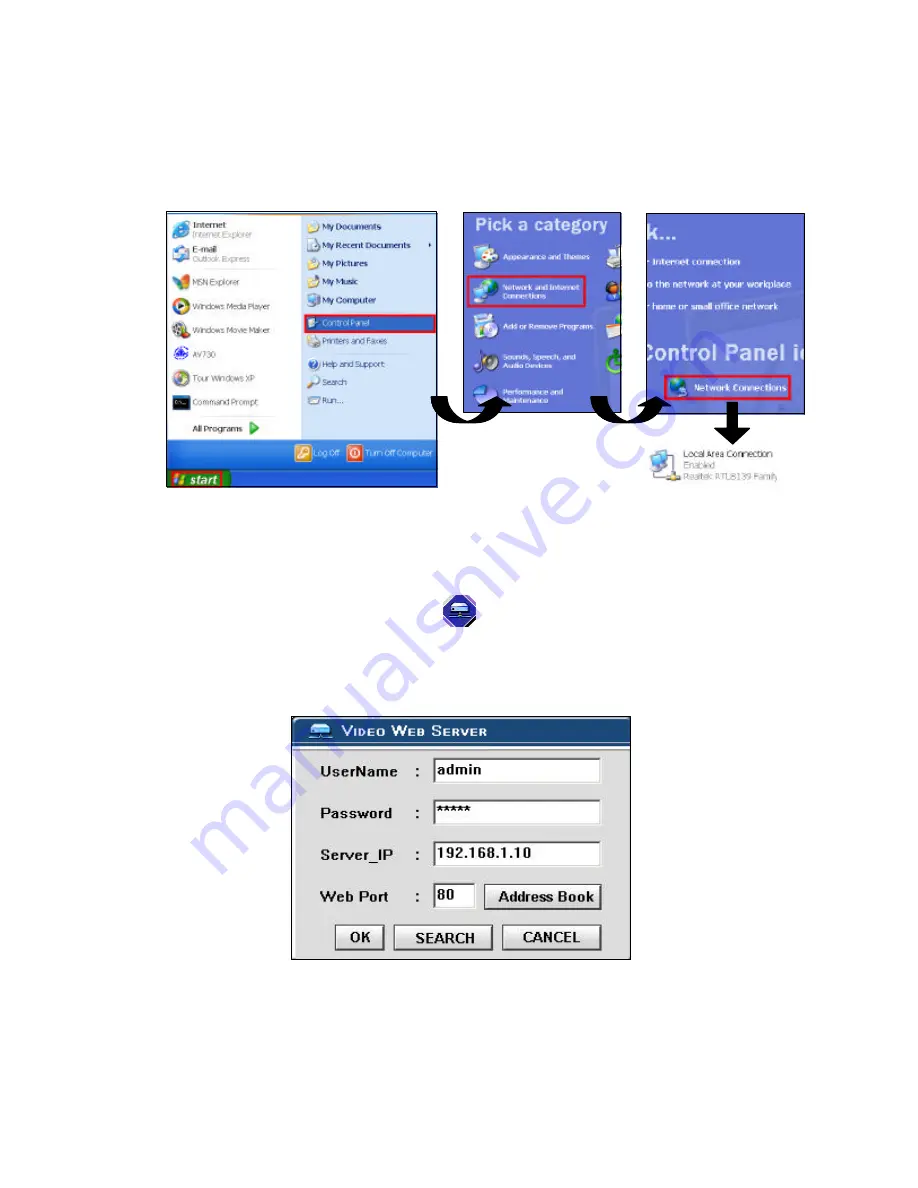
1. To configure the Server IP, please click             twice to enter the setup.

2. Key in the User Name, Password, and IP address (The default setting for the User

Name and Password are both “admin”; IP address is 192.168.1.10, Port : 80). Click OK
to connect

.

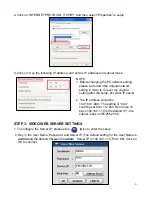
2. Network setting for PC.  (The instruction is based on Win XP O/S .  If your O/S is

Win 2000 or Win 2003, the setup procedure is similar to that on Win XP O/S.)

Click                                        twice

STEP 7: VIDEO WEB SERVER SETTING

-22-

Summary of Contents for D4202

Page 1: ...Digimerge Technologies Inc lP Video Router TLR DVR Controller Models D4202 Installation User Manual...

Page 2: ...to comply with the limits For a Class B digital device pursuant to Part 15 of the FCC Rules These limits are designed to provide reasonable protection against harmful interference ina residential ins...

Page 3: ...TEM RESET DDNS REGISTRATION FOR A DYNAMIC IP ADDRESS CONNECTING THE PC TO A ROUTER ROUTER LOGIN ROUTER SETTING IP SETTING VIDEO WEB SERVER SETTING DVR REMOTE SETTING PIN CONFIGURATION CONNECT ALL DEVI...

Page 4: ...f any kind on this product 15 Servicing Do not attempt to service this product yourself as opening or removing covers may expose you to voltage or other hazards Refer all servicing to qualified servic...

Page 5: ...as Explorer or Netscape The user friendly intuitive software allows for simple management configuration and monitoring The system contains an image compression chipset that is capable of delivering st...

Page 6: ...BOVE Power Adapter Cord GETTING STARTED Terminal block Crossover LAN cable Before installation contact your ISP Internet Service Provider for your own IP address Note The bundled software is compatibl...

Page 7: ...IDEO INPUT BNC 2 channels Connect to a video source such as a camera or DVR video output 4 ALARM I O optional for advanced applications Connect control devices such as a DVR Motion Sensors external al...

Page 8: ...onnect the video output of the camera or DVR to the video input of the Video Web Server 2 Connect the PC to the Video Web Server for IP setting 3 Connect the Video Server to the ADSL or CABLE MODEM wi...

Page 9: ...M The application program will install on your PC Note The CD contains a self running installation that automatically starts when the CD is inserted Follow the instructions for installation as indicat...

Page 10: ...shortcut setting and press Next 5 Press Next to begin copying the files 6 After the installation the following files listed below will appear in your assigned path or file folder There will be 6 file...

Page 11: ...e operating environments users might need the standard CAT5 cable RJ 45 POWER 2 Network setting for the PC The instruction is based on Win XP O S If your Operating System is Win 2000 or Win 2003 the s...

Page 12: ...r the setup for static IP users 2 The IP address should be 192 168 1 XXX The setting of XXX could be set from 1 to 254 Do not use 10 since 192 168 1 10 is the default IP the subnet mask is 255 255 255...

Page 13: ...e only thing you will see is the control bar SYSTEM CONFIG 4 In the Peripheral setting set the baud rate ID and model that you want to remotely control later Press the APPLY to enable the change after...

Page 14: ...setting set the baud rate and ID the same as the Peripheral setting in the Video Web Server Set the remote mode to RS 485 see example below REMOTE REMOTE MODE RS 485 BAUD RATE 2400 ID 001 MENU TIMER C...

Page 15: ...8 9 to receive the alarm input and then trigger the Video Server to send E mail to users for the auto e mail warning system Alarm 1 2 are for CH1 alarm 3 4 are for CH2 PIN 5 GND Ground PIN 2 3 NORMAL...

Page 16: ...setting to the original setting and link the PC to the internet 2 Click twice to enter your User name Password Note The default User Name and Password are both admin and the static IP which you have s...

Page 17: ...rnet This cuts down on the number of IP addresses large consumer providers need because not all of their customers are using the service at any given time It also cuts down on bandwidth usage by preve...

Page 18: ...n Create Account when the necessary information is completed 4 After registering your account you will receive an e mail which contains instructions to activate your account If you do not follow these...

Page 19: ...on Add Host to finish the setting NOTE Some routers don t support some DDNS HOSTs STEP 4 CONNECTING THE PC TO A ROUTER ROUTER LOGIN NOTE The following settings are different from router to router Ple...

Page 20: ...etwork setting for PC The instruction is based on Win XP O S If your O S is Win 2000 or Win 2003 the setup procedure is similar to that of Win XP O S 3 Click on Properties for TCP IP setup Click twice...

Page 21: ...4 Click on INTERNET PROTOCOL TCP IP and then select Properties to setup 5 Choose Obtain an IP address automatically 6 Enter the Command Prompt 18...

Page 22: ...e and key in the router s user name and password 7 In the setting window enter ipconfig and write down the router s gateway e g 192 168 1 1 NOTE In the router setting there are four steps to follow 1...

Page 23: ...of IP address For example if the IP address of your Video Web Server is 192 168 1 10 then 10 is excluded from the setting range Press save after you finish setting up 3 In the ADVANCED SETUP Virtual...

Page 24: ...e operating environments users might need the standard CAT5 cable RJ 45 POWER MENU TIMER CAMERA RECORD ALARM DWELL PIP MOTION DISPLAY NETWORK USER SYSTEM EVENT PTZ In the DVR Menu select Network NETWO...

Page 25: ...default setting for the User Name and Password are both admin IP address is 192 168 1 10 Port 80 Click OK to connect 2 Network setting for PC The instruction is based on Win XP O S If your O S is Win...

Page 26: ...up SYSTEM CONFIG 5 Click on System Config again In the Network setting set the gateway the same as the router s gateway 192 168 1 1 Press APPLY to enable the change after the setting 4 In the Peripher...

Page 27: ...TE ID 001 After the remote setting connect the DVR noting the following pins below PIN 1 6 RS485 A RS485 B Use the RS485 A RS485 B serial communication signals to control digital units such as a DVR P...

Page 28: ...ALL DEVICES 1 Change PC network setting to the original setting and link PC to the internet STEP 11 CONNECTING TO A PC VIA THE INTERNET 25 PIN 5 GND Ground PIN 2 3 NORMAL HIGH NORMAL LOW Use PIN 2 or...

Page 29: ...an remotely watch the video anywhere with a networkable computer Step 3 If you see the video screen then you have successfully connecting to the server NOTE 1 There are two ways to get the software on...

Page 30: ...eo input from the DVR the screen will show the operation interface shown above 2 Use the 16 CH DVR to explain the operation please refer to the DVR user manual APPENDIX 1 for details 3 After you press...

Page 31: ...Screen Display 2 Snapshot 3 Stop 4 Pause 5 Slow 1 2 1 4 1 8 6 PLAY 7 Fast 8 OSD show hide 9 System setting Path of snapshot text color progress color channel color 10 Back Video 11 Next Video 12 Play...

Page 32: ...pply After all setting changes press apply to refresh the data in the Video Web Server Reboot Press this button to restart the Video Web Server SYSTEM CONFIG 1 You can get all the data from the ISP co...

Page 33: ...USER LEVEL control advanced functions GUEST LEVEL control basic functions only 2 Life time During this time period users are allowed to control the Video Web Server Set up the user s account password...

Page 34: ...is upgrading the firmware 1 Alarm Enable or disable Alarm trigger function 2 Method Two selections Email or FTP 3 Resolution Image storing resolution for Email or FTP function 4 Alarm Duration Alarm...

Page 35: ...from your cameras and display the Video record on the PC 3 Can I use ISDN to connect the Video Server ANS Our Video Server could be connected via ADSL or CABLE modem It does not support ISDN connecti...

Page 36: ...240 Resolution 10 Max of user accounts 6 Max of remote accesses GPIO with triggers for E mail or FTP site TCP IP ICMP FTP HTTP Protocols Brightness Contrast Saturation Quality level adjustment Video A...

Page 37: ...UT 1 PIN CONFIGURATIONS FOR CONNECTION TO A 1CH DVR PIN CONFIGURATIONS FOR CONNECTION TO 4CH 9CH 16CH DMR Web Server DMR DVR Web Server GND ALARM INPUT2 ALARM INPUT1 ALARM INPUT3 NORMAL LOW ALARM INPU...

Page 38: ...er A 1 4 CH DVR B 4 9 16 CH DMR 3 Set the Peripheral Control in the system configuration of the Video Web Server MENU TIMER CAMERA RECORD ALARM DWELL REMOTE SYSTEM EVENT REMOTE REMOTE MODE RS 485 BAUD...

Page 39: ...uld set the mail list when the alarm is triggered NOTE 3 When the alarm is triggered you can find message showed on the screen The AP will start recording automatically and you can get the email with...

Page 40: ...ct the PC to the Internet and key in the Video Web Server s IP address ex 61 222 50 160 in the browser Then press ENTER Step 3 Click on Setup exe twice to install the application program Step 4 Click...

Page 41: ...you finish the setting 6 In step 5 4 Please make sure that you press save after you finish the setting 7 In step 7 4 Please make sure that the Peripheral setting is the same as the setting on the DVR...

Page 42: ...S LIMITED WARRANTY IS THE EXCLUSIVE REMEDY OF THE PURCHASER DIGIMERGE SHALL IN NO EVENT BE LIABLE FOR ANY SPECIAL INDIRECT INCIDENTAL PUNITIVE OR CONSEQUENTIAL DAMAGES OF ANY KIND OR CHARACTER INCLUDI...

Page 43: ...temperature environment Extreme temperatures can shorten the life of the electronic devices Handle the monitor carefully Dropping it can cause serious damage to the unit Occasionally clean the unit w...

Page 44: ...Digimerge Technologies Inc 300 Alden Road Markham Ontario L3R 4C1 www digimerge com...

Reviews: