3
Installing the Hardware
Installing the Hardware
Figure 4 (on page 4) illustrates all of the Docking Station hardware
properly connected.
1 Shut down the computer.
2 Locate the parallel port at the rear of the computer and disconnect
any printer that is attached.
✎
NOTE: The parallel port is the same size and shape as some SCSI
adapter connectors. However, a SCSI adapter will NOT support the
Docking Station.
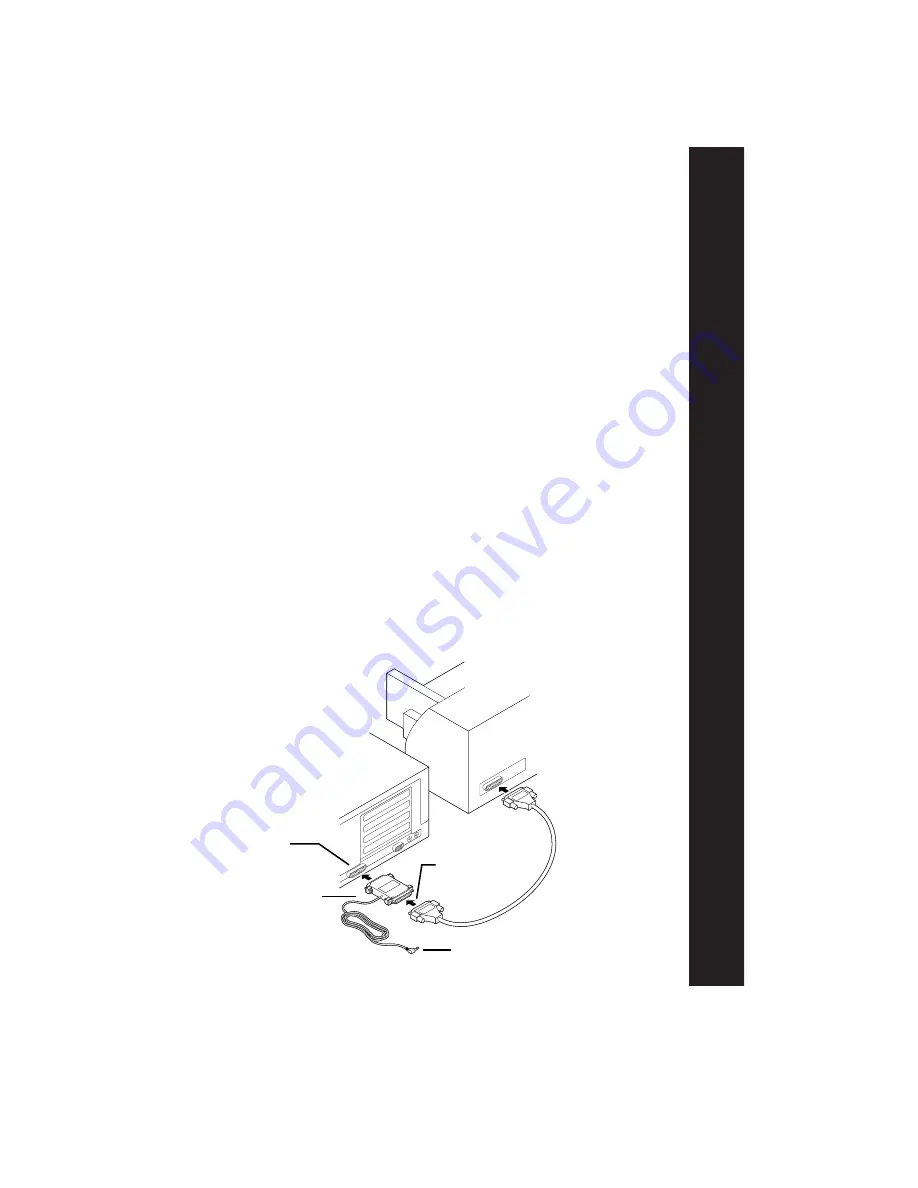
3 Plug the upload cable connector into the PC parallel port. If
appropriate, reconnect a printer to the printer adapter on the upload
cable (see Figure 2).
4 Plug the stereo-style connector at the other end of upload cable into
the bottom of the Stand (see Figure 3, on page 4).
5 Plug the AC Power Adapter’s connector into the bottom of the Stand
and the other end into an electrical outlet (see Figure 3).
6 Ensure that all connections are secure and turn on the computer.
✎
NOTE: If you will be using the Docking Station’s optional battery
recharging function, install the three AAA NiMH batteries in the
portable, observing the polarity (+/-) shown inside the portable’s battery
compartment. If you are not using NiMH batteries, you should install
three AAA alkaline batteries.
Figure 2: Parallel Port Connections
Parallel port
(25 pin)
Plug upload cable
connector into
parallel
Upload cable’s
printer adapter
Stereo-style connector
(plugs into bottom of Stand)
Summary of Contents for Walkabout TOUR
Page 1: ...Operating Instructions Connex Software and Charging Station Docking Station...
Page 2: ......
Page 23: ......


