


EasyPGX
®
qPCR instrument 96
Cat.Nr: RT800-96
9/21
2017/06
CONNECT KEYBOARD AND MOUSE TO THE INSTRUMENT (OPTIONAL)
The instrument has a touchscreen display that allows it to be used without the need to connect any additional accessory.
However, it is possible to connect a mouse and a keyboard to the instrument using the USB ports on both the front and
rear of the instrument.
BACKGROUD CALIBRATION
▪
Switch on the instrument by pressing the button on the bottom of the front panel.
▪
The instrument automatically performs a series of checks at each power up to ensure basic hardware
functionality. If an error is detected, perform a more accurate diagnostic test (see section "Performing a
diagnostic test"). When the checks are complete, the touchscreen display will show the Home screen.
▪
On the Home screen, press "Settings", then "System Settings" and finally "Backgroud Calibration".
▪
Select the optical module you want to calibrate and press "Calibrate". A window opens which contains
instructions for loading a 96-well plate contain
ing 20 μl of deionized water or TE buffer in each well of the heat
block.
To run the "Backgroud Calibration", use the dedicated consumables included in the RT800-96 Accessory set.
▪
Prepare the plate and load it into the heat block. Press "OK" to launch the test.
▪
At the end of the procedure, on the display appears a window that returns the result of the test, click the "OK"
button to close the window.
If the "Backgroud Calibration" procedure fails, contact Diatech Pharmacogenetics Technical Support (email:
; phone: +39 0731-213243).
DATE AND TIME SETTING
▪
In the lower-right corner of the display, press the displayed date and time.
▪
A menu window shows up, press "Change Date and Time".
▪
In the window that appears, set the correct date and time. Click on the "Help" icon to see detailed instructions
for setting the date and time.
DIAGNOSTIC TEST
▪
On the Home screen, press "Settings", then press "Instrument Diagnostic".
▪
Press "Run Diagnostic".
▪
Tick the "All Test" box and press "Run". A window opens that prompts you to make sure that no plate is
loaded on the heating block.
▪
Press "OK" to continue. A window that displays the installed optical modules opens.
▪
Check the boxes for the installed optical modules (FAM, HEX), and leave boxes for the other unopened optical
modules. Press "OK".
▪
The instrument begins to perform the scheduled tests. The first test is about interaction with the user.
▪
During this test, follow the instructions that appear on the display and answer the questions that are displayed.
At the end of this initial test, the procedure continues automatically without needing to interact with the user.
▪
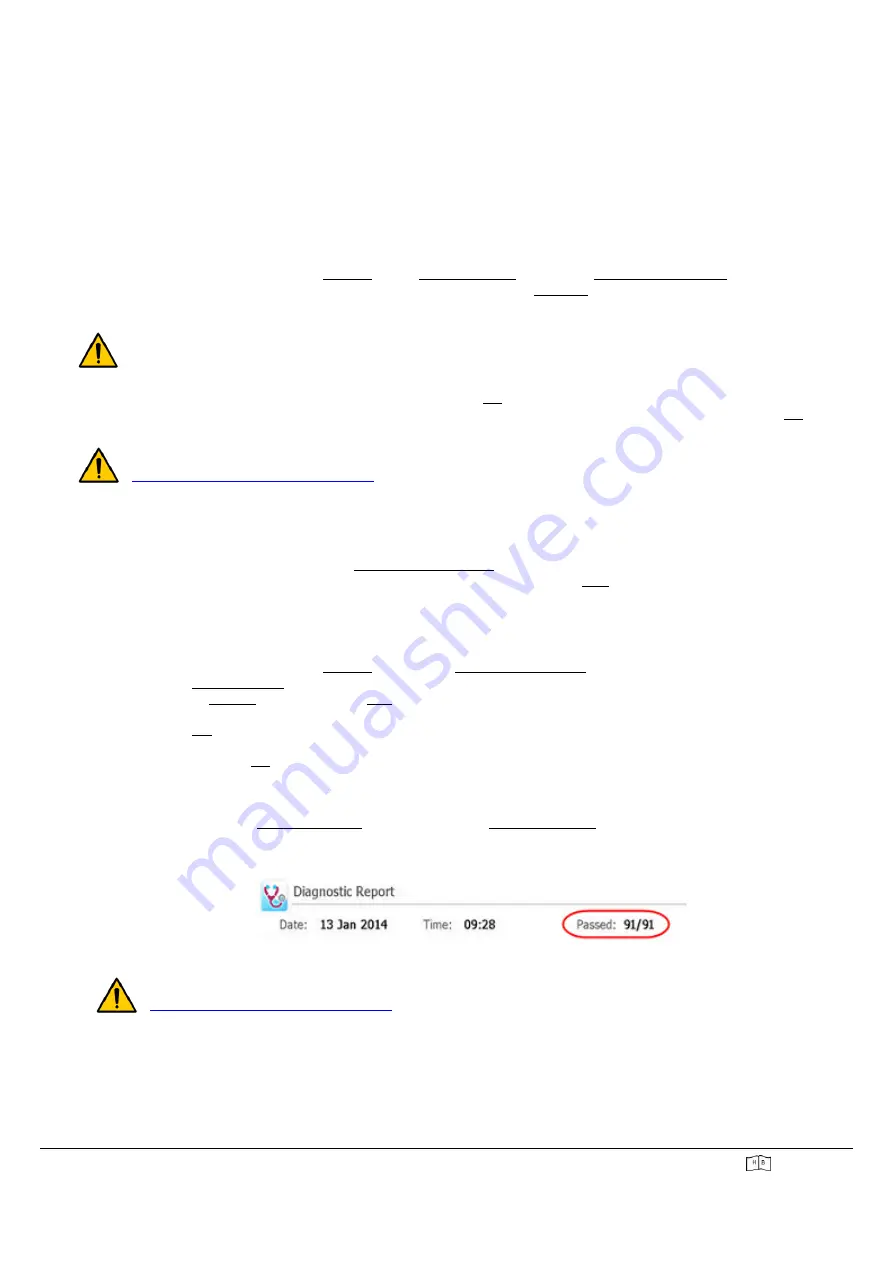
At the end of the "Diagnostic Check", the display shows "Diagnostic Report".
▪
Verify at the beginning of the report the number of successful tests performed on the total of tests, as shown in
the image below.
▪
Close the report, the instrument installation is complete.
If
one
or
more
tests
fail,
contact
Diatech
Pharmacogenetics
Technical
Support
(email:
; phone: +39 0731-213243).


