5
English
Charge
D
e
WALT
battery packs only with designated
D
e
WALT
chargers. Charging battery packs other
than the designated
D
e
WALT
batteries with a
D
e
WALT
charger may make them burst or lead to
other dangerous situations.
Do not incinerate the battery pack.
Package Contents
The package contains:
1 Battery charger
1 Instruction manual
• Check for damage to the tool, parts or accessories which may
have occurred during transport.
• Take the time to thoroughly read and understand this manual
prior to operation.
Markings on Charger
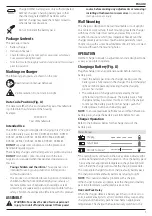
The following pictograms are shown on the tool:
Read instruction manual before use.
Visible radiation. Do not stare into light.
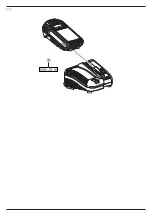
Date Code Position (Fig. A)
The date code
1
, which also includes
the year of manufacture,
is printed into the underside of the housing.
Example:
2020 XX XX
Year of Manufacture
Intended Use
The DCB115 charger is designed for charging 10.8V, 12V, 18V
Li-Ion XR battery packs (DCB122, DCB124, DCB125, DCB127,
DCB181, DCB182, DCB183, DCB183B, DCB184, DCB184B,
DCB185, DCB187, DCB189, DCB546, DCB547, DCB548).
DO nOT
use under wet conditions or in the presence of
flammable liquids or gases.
These battery chargers and battery packs are professional tools.
DO nOT
let children come into contact with the tool.
Supervision is required when inexperienced operators use
this tool.
•
Young children and the infirm.
This appliance is not
intended for use by young children or infirm persons
without supervision.
• This product is not intended for use by persons (including
children) suffering from diminished physical, sensory or
mental abilities; lack of experience, knowledge or skills
unless they are supervised by a person responsible for their
safety. Children should never be left alone with this product.
ASSEMBLY
WARNING: To reduce the risk of serious personal
injury, turn unit off and disconnect it from power
source before making any adjustments or removing/
installing attachments or accessories.
An accidental
start-up can cause injury.
Wall Mounting
This charger is designed to be wall mountable or to sit upright
on a table or work surface. If wall mounting, locate the charger
within reach of an electrical outlet, and away from a corner
or other obstructions which may impede air flow. Mount the
charger securely using screws (purchased separately) at least
76 mm long, with a screw head diameter of 8–9.5 mm, screwed
into wood through the mounting holes.
OPERATION
D
e
WALT
chargers require no adjustment and are designed to be
as easy as possible to operate.
Charging a Battery (Fig. A)
Plug the charger into an appropriate outlet before inserting
battery pack.
1. Insert the battery pack into the charger, making sure the
battery pack is fully seated in the charger. The red (charging)
light will blink repeatedly indicating that the charging
process has started.
2. The completion of charge will be indicated by the red
light remaining ON continuously. The battery pack is fully
charged and may be used at this time or left in the charger.
To remove the battery pack from the charger, push the
battery release button on the battery pack.
nOTE:
To ensure maximum performance and life of lithium-ion
battery packs, charge the battery pack fully before first use.
Charger Operation
Refer to the indicators below for the charge status of the
battery pack.
Charge Indicators
Charging
Fully Charged
Hot/Cold Pack Delay*
*
The red light will continue to blink, but a yellow indicator light
will be illuminated during this operation. Once the battery pack
has reached an appropriate temperature, the yellow light will
turn off and the charger will resume the charging procedure.
The compatible charger(s) will not charge a faulty battery pack.
The charger will indicate faulty battery by refusing to light.
nOTE:
This could also mean a problem with a charger.
If the charger indicates a problem, take the charger and battery
pack to be tested at an authorised service centre.
hot/Cold Pack Delay
When the charger detects a battery pack that is too hot or too
cold, it automatically starts a Hot/Cold Pack Delay, suspending
charging until the battery pack has reached an appropriate
temperature. The charger then automatically switches to the
Summary of Contents for XR DCB115
Page 1: ...DCB115 ...
Page 3: ...1 Fig A 1 ...
Page 28: ...26 Українська ...
Page 29: ...27 Українська ...
Page 30: ......
Page 31: ......
Page 32: ...530916 05 RUS UA 05 21 ...

