

7
Compressors are shipped without oil. A small amount
of oil may be present in the pump upon receipt of the
air compressor. This is due to plant testing and does
not mean that the pump contains the correct amount
of oil. Do not attempt to operate this air compressor
without first adding oil to the crankcase. Serious
damage can result from even limited operation un-
less filled with oil and broken in correctly. Make sure
to closely follow initial start-up procedures.
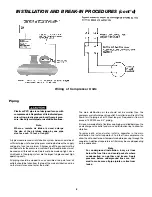
Place unit on a level surface. Remove oil fill plug and slowly add a
compressor oil such as Castrol Heavy Duty 30 weight until it is even
with the top of the oil fill hole. (It must not be allowed to be lower than
3/8" -- 6 threads down -- from the top at any time.) When filling the
crankcase, the oil flows very slowly into the pump. If the oil is added
too quickly, it will overflow and appear to be full.
Crankcase oil
capacity is 16 fluid ounces.
Replace oil fill plug and tighten.
NOTE
Drain and refill the compressor pump crankcase
after the first 100 hours of operation.
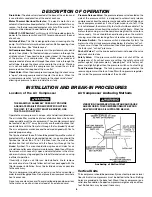
Additional Regulators and Controls
Since the air tank pressure is usually greater than that which
is needed, a separate regulator is usually employed to control
the air pressure ahead of any individual air driven device.
Separate air transformers which combine the function of air
regulation, moisture and dirt removal should be used
where
applicable.
This procedure is required:
1. Before the air compressor is put into service.
2. When the check valve is replaced.
3. When a complete compressor pump is replaced.
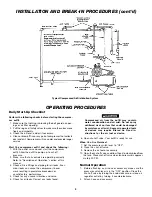
a. Set the pressure switch lever to the "OFF" position.
b. Connect compressor to power source. (See Wiring
Instructions).
c. Turn the regulator clockwise (or open the shut-off valve),
opening it fully, to prevent air pressure build-up in the tank.
d. Move the pressure switch lever to "ON/AUTO". The
compressor will start.
INSTALLATION AND BREAK-IN PROCEDURES (cont'd)
IMPROPER ELECTRICAL GROUNDING CAN RESULT
IN A RISK OF ELECTRICAL SHOCK. WIRING FOR THE
PRESSURE SWITCH AND ELECTRICAL MOTOR
SHOULD BE DONE BY A LICENSED ELECTRICIAN IN
ACCORDANCE WITH NATIONAL AND LOCAL CODES
AND ORDINANCES.
Serious damage may result if the following break-in
instructions are not closely followed.
Break-in Procedures
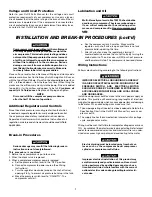
Wiring Instructions
Perform electrical wiring according to the following instructions:
Install the compressor outfit as close to the main power supply as
possible. This practice will avoid using long lengths of electrical
wiring for the power supply which can cause power loss and damage
to the motor. When connecting wires make sure that:
1. The amperage rating of the electrical box is adequate. Refer to the
Specification Chart in the Outfit Parts Manual for your air com
pressor outfit.
2. The supply line has the same electrical characteristics (voltage,
cycle, and phase) as motor.
Wiring must be such that full motor nameplate voltage plus or minus
10%, is available at the motor terminals during starting. Refer to local
codes for recommended wire sizes and maximum wire run; under-
sized wire causes high amp draw and overheating to the motor.
Electrical wiring must be located away from hot sur-
faces such as the compressor head, compressor
cylinder, or compressor outlet tube.
Improper electrical installation of this product may
void its warranty and your fire insurance. Have circuit
wiring performed by qualified personnel such as a
licensed electrician who is familiar with the current
national electric code and any prevailing local electri-
cal codes.
Lubrication and Oil
Multi-Viscosity motor oils, like 10W 30, should not be
used in an air compressor. They leave carbon depos-
its on critical components, thus reducing perfor-
mance and compressor life. Use air compressor oil
only.
Voltage and Circuit Protection
Refer to your Outfit Parts Manual for the voltage and circuit
protection requirements of your compressor. Use only a fuse or
circuit breaker that is the same rating as the branch circuit the air
compressor is operated on. If the compressor is connected to a
circuit protected by fuses, use only dual element time delay fuses,
as noted in that Outfit Parts Manual.
e. Run the compressor for 30 minutes. Make sure the
regulator, or shut-off valve, is open and there is no tank
pressure build-up during this time.
f.
After 30 minutes, close the regulator by turning it
counterclockwise or close the shut-off valve by turning the
knob clockwise. The air receiver will fill to cut-out pressure
and the motor will stop. The compressor is now ready for use.


