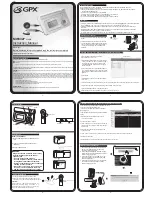
background image

SAFETY INSTRUCTIONS

CAUTION :  

TO PREVENT ELECTRIC SHOCK, MATCH WIDE BLADE OF PLUG TO WIDE SLOT, FULLY INSERT.

WARNING :  

TO REDUCE THE RISK OF FIRE OR ELECTRIC SHOCK, DO NOT EXPOSE THE APPLIANCE TO RAIN OR 

MOISTURE.

CAUTION:  TO    REDUCE  THE

RISK OF ELECTRIC SHOCK, DO

NOT    REMOVE  COVER  (OR

BACK). NO USER SERVICEABLE

PARTS      INSIDE.      REFER

SERVICING TO   QUALIFIED

SERVICE PERSONNEL.

The lighting flash with

arr

o

whead symbol, with

an equilate

r

al t

r

iangle is

intented to ale

r

t the user

of the presence of

uninsulated dangerous

v

oltage within the

product's enclosure that

may be of sufficient

magnitude to constitute a

r

isk of elect

r

ic shock to

persons

.

The

e

xclamation point

within an equilate

r

al

t

r

iangle to intended to

ale

r

t the user of

presence of impo

r

tant

ope

r

ating and

maintenance (se

r

vicing)

inst

r

uction

.

In the

lite

r

ature accompa

n

ying

the applianc

e.

CAUTION

RISK OF ELECTRIC SHOCK

DO NOT OPEN

ENG-2

Safety information

Please read the safety instructions carefully before using the product for the first time and keep

the instructions for future reference.

1.   This product is not a toy. Keep it out of reach of children.
2.   Keep product out of the reach of children and pets to avoid chewing and swallowing.
3.   Product operating and storage temperature is from 0 degree Celsius to 40 degree Celsius. Under and over this 

temperature might affect the function.

4.   Never open the product. Touching the inside electrics can cause electric shock. Repairs or service should only 

be performed by qualified personnel.

5.   Do not expose to heat, water, moisture, direct sunlight! 
6.   Please protect your ears against loud volume. Loud volume can damage your ears and risk in hearing loss.
7.   The unit is not waterproof. If water or foreign objects enter the unit, it may result in fire or electric shock. If water 

or a foreign object enters the unit, stop use immediately.

8.   The direct plug-in cable is used as disconnect device, the disconnect device shall remain readily operable. So, 

make sure there is space around the power outlet for easy access.

9.   Do not use non original accessories together with the product as this can make the product functionality 

abnormal.

Summary of Contents for 5706751023521

Page 1: ...CK PLL RADIO MODEL MCA 230MK2 BEFORE OPERATING THIS PRODUCT READ UNDERSTAND AND FOLLOW THESE INSTRUCTIONS Be sure to save this booklet for future reference VOLUME SKIP SKIP PLAY MODE PROG MEM STANDBY FUNCTION CLOCK SLEEP ALARM SNOOZE STOP M M www denver eu www facebook com denver eu ...

Page 2: ...ng the product for the first time and keep the instructions for future reference 1 This product is not a toy Keep it out of reach of children 2 Keep product out of the reach of children and pets to avoid chewing and swallowing 3 Product operating and storage temperature is from 0 degree Celsius to 40 degree Celsius Under and over this temperature might affect the function 4 Never open the product ...

Page 3: ...ENTS OR PERFORMANCE PROCEDURE HEREIN MAY RESULT IN HAZARDOUS RADIATION EXPOSURE NEC NATIONAL ELECTRICAL CODE Do not apply oil or petroleum products to this product EXAMPLE OF ANTENNA GROUNDING AS PER NATIONAL ELECTRICAL CODE ANTENNA LEAD IN WIRE ANTENNA DISCHARGE UNIT NEC SECTION 810 20 GROUNDING CONDUCTOR NEC SECTION 810 21 GROUND CLAMPS GROUND CLAMP ELECTRIC SERVICE EQUIPMENT POWER SERVICE GROUN...

Page 4: ... AUX jack 15 Phone jack 16 DC jack 17 FM antenna 18 Right speaker jack 19 Left speaker jack 1 3 5 7 6 9 11 10 13 4 2 14 15 16 8 17 18 12 1 Standby button 2 Function button 3 Stop button 4 Volume button 5 SKIP button 6 Play Pause button 7 M DN M button 8 Volume button 9 Alarm button 10 Memory button 11 Time button 12 Snooze button 13 Mute button 14 Mode button 15 SKIP button 16 M UP M button 17 Pro...

Page 5: ...K BUTTON on the unit or TIME BUTTON on the remote to confirm TO SET ALARM FUNCTION In Standby off mode 1 Press and hold the ALARM button the AL1 icon and HOUR time will blink 2 Then press the SKIP SKIP button to set the Desire Hour 3 Press the ALARM button The MIN time will blink 4 Then press again SKIP SKIP to set the Desire Minute 5 After setting the alarm time as your desired to press ALARM but...

Page 6: ...ss the STANDBY button the alarm will reset for next day RADIO OPERATION 1 Press the STANDBY FUNCTION button on the unit repeatedly until the frequency shown on the display OR press the STANDBY button on the remote to turn on the unit then press the FUNCTION button on the remote until the frequency shown on the display How to use the buttons for radio Manual Tuning Press the SKIP SKIP button to sea...

Page 7: ...until the normal time shown on the display REPEAT FUNCTION 1 Press the MODE button once during playback the sign will show on LCD Display The same track will be repeated over and over 2 Press the MODE button second time to repeat all tracks The ALL sign will show on the LCD display 3 To cancel REPEAT PLAY Press the MODE button repeatedly until the all sign disappeared RANDOM PLAY 1 IN CD Play mode...

Page 8: ...ntrol 2 Press the SLEEP Button The 90 will appear on the display 3 Repeatedly press the SLEEP Button for desired sleep time between 90 80 70 60 50 40 30 20 10 minutes 4 The unit will automatically switch off when the SLEEP time expires AUX INPUT JACK 1 Press the STANDBY FUNCTION button on the unit repeatedly until the AUX shown on the display OR press the STANDBY button on the remote to turn on th...

Page 9: ...slature and will not harm the environment All cities have established collection points where electric and electronic equipment and batteries can either be submitted free of charge at recycling stations and other collection sites or be collected from the households Additional information is available at the technical department of your city Hereby Denver A S declares that the radio equipment type ...

Reviews: