25
(5) Changing the order of the tracks
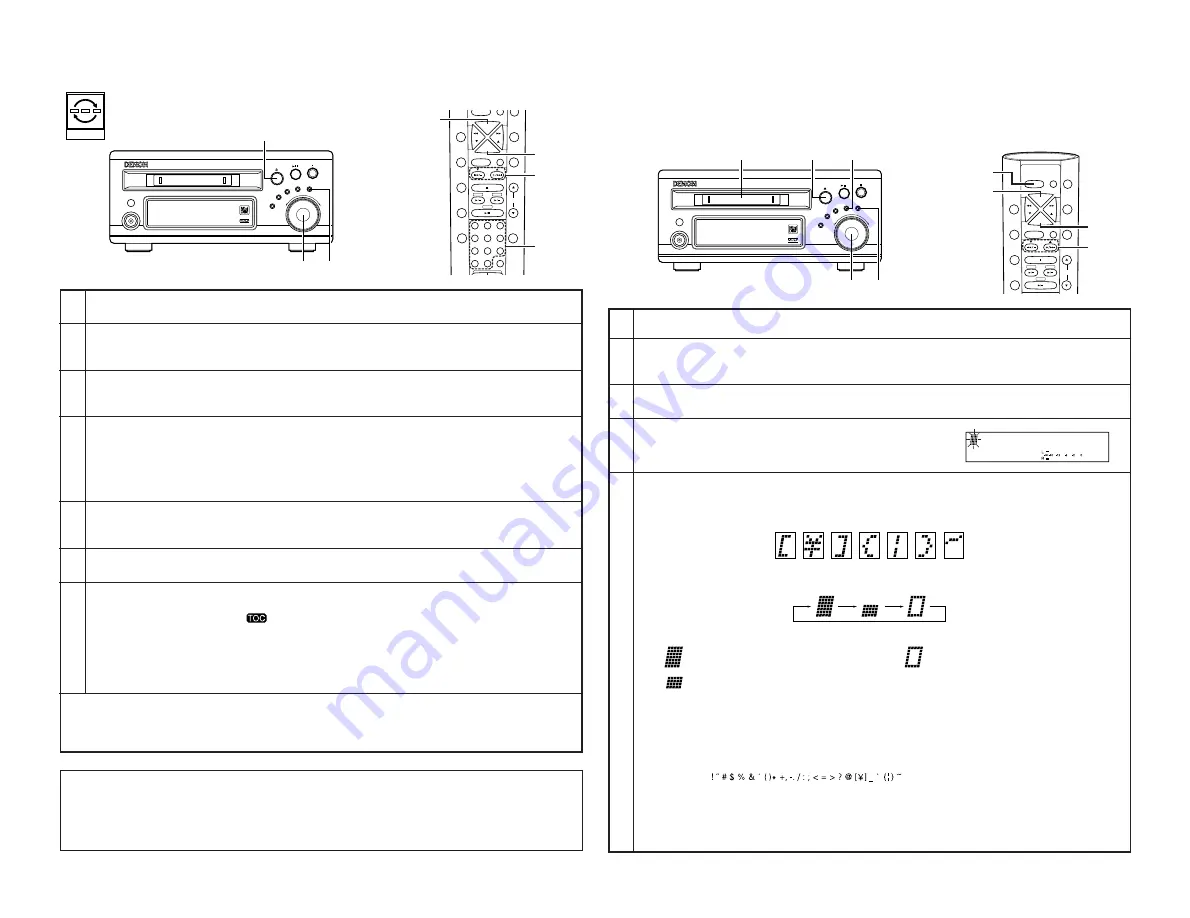
• Use this function to change the order of the recorded tracks on the MiniDisc.
1
2
3
4
5
6
7
In the stop mode, press the EDIT button.
• “
Edit Mode
” is displayed.
Either turn the jog dial on the main unit or press one of the automatic search buttons (
8
and
9
) on the
remote control unit.
• Display “
Program Move?
”.
Press the jog dial on the main unit or the ENTER button on the remote control unit.
• Display “
New 01<--Tr
”.
• Reprogram the first track.
After turning the jog dial on the main unit or pressing one of the automatic search buttons (
8
and
9
) or
the number buttons on the remote control unit, press the ENTER button and program the track to be moved.
• For example, to move the track that is currently third to the beginning, specify “3”. At this time “
New
01<03Tr
” is displayed. When the ENTER button is pressed, the mode for selecting the next track number
is set and “
New 02<--Tr
” is displayed.
• To program other track numbers, repeat step 4.
Press the ENTER button.
• To fix the program in step 4, press the ENTER button while “
New
CC
<--Tr
” is displayed.
• “
Prog. Move OK?
” is displayed.
Press the ENTER button to move the track(s).
• “
Complete
” is displayed.
Press the
5
(eject) button on the main unit.
• The TOC data is written and the disc is ejected.
• When TOC writing starts, the “
” indicator flashes. Do not shake the main unit, or unplug the power
supply cord while the TOC is being written. If the data is not recorded properly, it will not be possible to play
the disc.
• The TOC data can also be recorded by performing the following operations:
• Pressing the power button to set the power to the standby mode.
• In the stop mode, press the
2
(stop) button.
• Up to 25 tracks can be specified.
• Press the CLEAR button at step 5 to clear the track number that was last programmed.
• Press the CALL button at step 5 to check the program.
• To cancel the move operation, press the
2
(stop) button or the CLEAR button before step 6.
2
Up to 100 characters can be input for the track and disc titles.
1
2
3
4
5
Load the disc to which you want to give a title.
Press the EDIT button after the total number of tracks on the disc and the total playing time are displayed (in the
stop mode).
• “
Edit Mode
” is displayed.
Either turn the jog dial on the main unit or use the automatic search buttons (
8
and
9
) on the remote
control unit to display “
Disc Name In?
”.
Press the jog dial on the main unit or the ENTER button on the
remote control unit.
• The cursor flashes, indicating the title input standby mode.
Input the title.
• Either turn the jog dial on the main unit or use the automatic search buttons (
8
and
9
) on the remote
control unit to select the desired character.
• Some characters that can be input on this unit cannot be displayed on other models.
• The shape of the cursor changes each time the CHARACTER/MEMORY REC button on the main unit or the
TITLE/CHARACTER button on the remote control unit is pressed.
[Explanation of cursor:]
…………… Capital letter/number input mode
…………… Special character input mode
…………… Small letter/number input mode
[Available characters and numbers]
Capital letter/number input mode:
ABCDEFGHIJKLMNOPQRSTUVWXYZ0123456789
Small letter/number input mode:
abcdefghijklmnopqrstuvwxyz0123456789
Special character input mode:
(Space)
• When the
7
(manual search forward) button or the ENTER button is pressed, the selected character is
set, and the unit is set to the input standby mode for the next character.
• The cursor can be moved back by pressing the
6
(manual search reverse) button. Use this to correct input
characters.
MOVE
OPT 1
NOTES:
• Tracks that have not been programmed are moved behind the programmed tracks.
• It is not possible to program the same track more than once.
• On group registered discs, changing the order of the tracks of this section is not possible.
Please use “Moving tracks” of page 24.
+10
10
PANEL
CALL
DISC
SKIP
GROUP
CT
PTY
REPEAT
RDS
RANDOM
EDIT
TUNING
TUNING
ENTER
MEMORY
TONE/SDB
TUNER
PRESET
BAND
CD-R
MD
CD
1
2
3
6
5
4
9
8
7
CLEAR
DISPLAY
VOLUME
FUNCTION
SLEEP
PROG/
DIRECT
3~6
2,4
4
1
1
18Tr02m 46s
-60 -40 -30 -20 -12 -6 -2 0
L
dB
R
PUSH
ENTER
MINIDISC RECORDER DMD-M31
8
9
POWER LOADING MECHANISM
MULTI REC
CD SRS
MEMORY REC
CHARACTER/
TIME/INPUT
EDIT
ON / STANDBY
7
2~6
1
(Main unit)
(Remote control
(
unit)
2. Adding titles or erasing titles
(1) Adding disc titles
DISC
SKIP
GROUP
CT
PTY
REPEAT
RDS
RANDOM
TITLE/CHARACTER
TIME
EDIT
TUNING
TUNING
ENTER
MEMORY
TONE/SDB
TUNER
PRESET
BAND
CD-R
MD
CD
VOLUME
FUNCTION
SLEEP
SYSTEM
POWER
PROG/
DIRECT
4,5
3,5
2,6
5
1
18Tr02m 46s
-60 -40 -30 -20 -12 -6 -2 0
L
dB
R
PUSH
ENTER
MINIDISC RECORDER DMD-M31
8
9
POWER LOADING MECHANISM
MULTI REC
CD SRS
MEMORY REC
CHARACTER/
TIME/INPUT
EDIT
ON / STANDBY
7
5
1
3~5 2,6
(Main unit)
(Remote control unit)
Summary of Contents for DMD-M31
Page 32: ...32 MEMO ...
Page 33: ...33 MEMO ...


