16
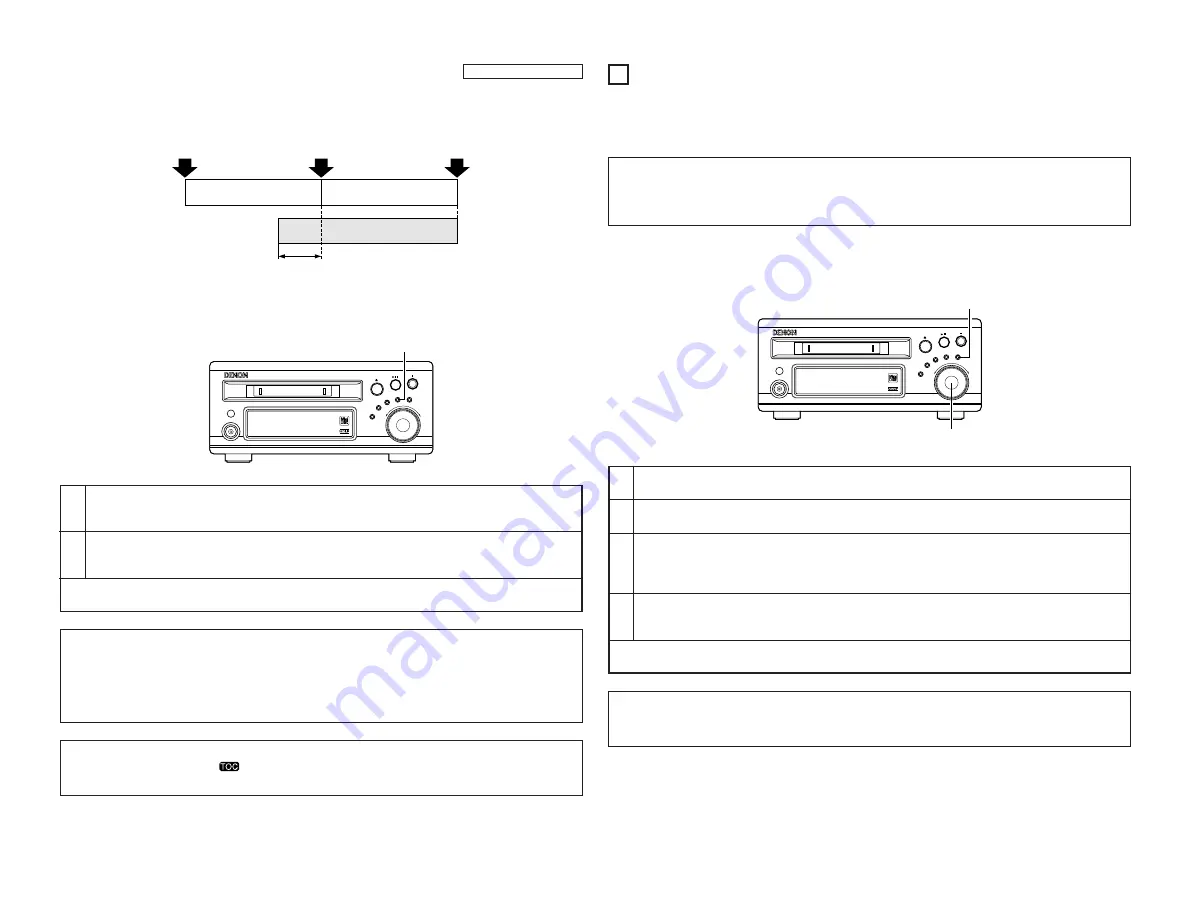
3. Recording from a point 6 seconds back ………………………………… Memory Recording
• Use this function to prevent missing the beginning of the satellite broadcast or other program you want to record using
the “AIR CHECK” function.
1
2
Perform the operations under “Starting recording” on pages 13 and 14.
• To record an analog input, perform steps 1 to 8 under “Analog recording”.
• To record a digital input, perform steps 1 to 7 under “Digital recording”.
Press the CHARACTER/MEMORY REC button.
• Recording starts from a point up to 6 seconds before the button was pressed.
• “
Memory Rec
” is displayed.
• To cancel the memory rec mode, press the
2
(stop) button.
• Recording stops and the TOC data is written on the MD.
(1) Press the MULTI
REC button.
(2) Press the CHARACTER/
MEMORY REC button.
(Recording stopped)
Set mode
Recorded section
6 seconds
1
18Tr02m 46s
-60 -40 -30 -20 -12 -6 -2 0
L
dB
R
PUSH
ENTER
MINIDISC RECORDER DMD-M31
8
9
POWER LOADING MECHANISM
MULTI REC
CD SRS
MEMORY REC
CHARACTER/
TIME/INPUT
EDIT
ON / STANDBY
2
REC PAUSE
REC
NOTE:
• The set stores in the memory the sound which is being input at the point when the recording pause mode is set.
Thus, the sound from 6 seconds ago cannot be recorded if recording is started more than 6 seconds after the
recording pause mode is set.
In addition, if the input is switched with the TIME/INPUT button in the 6 seconds before memory recording is
started, the sound recorded before the input was switched may be recorded.
NOTE:
• When TOC writing starts, the “
” indicator flashes. Do not shake the main unit, or unplug the power supply
cord while the TOC is being written. If the data is not recorded properly, it will not be possible to play the disc.
• With this function you can start recording from a point up to 6 seconds back in the sound that was being input to the
set when the recording pause mode was set.
11
LONG RECORDING (MDLP RECORDING)
• This unit is compatible with the MDLP (MD-Long Play) format, thereby allowing stereo recording for double or
quadruple the normal recording time (MDLP recording).
• Make the following settings to use the MDLP recording mode:
NOTES:
• It is not possible to play or edit tracks recorded in the MDLP mode on the other players that are not MDLP compatible.
• It is not possible to combine tracks recorded in the MDLP mode with tracks recorded in the normal mode.
• The recording mode cannot be changed during recording.
1
Press the EDIT button, turn the jog dial of the main unit, and select the MDLP mode.
• “
MDLP?
” is displayed.
2
Press the ENTER button.
• “
MDLP 2/4/Off
” is displayed.
3
Turn the jog dial and select the desired mode.
• “
2
” flashes when the LP 2 recording mode (double the normal recording time) is selected, “
4
” flashes when
the LP 4 recording mode (quadruple the normal recording time) is selected, and “
off
” flashes when the
normal recording mode is selected.
4
Press the ENTER button.
• “
MDLP 2
” (or “
MDLP 4
” or “
off
”) is displayed.
• LP 2 (or LP 4) lights when the MDLP recording mode is selected.
NOTE:
• The MDLP recording mode you have set remains in the memory after recording is completed. Be sure to check
the recording mode before starting to record.
• After setting the MDLP recording mode, record using the same procedure as for normal recording (analog, digital
recording or CD synchronized recording).
1
18Tr02m 46s
-60 -40 -30 -20 -12 -6 -2 0
L
dB
R
PUSH
ENTER
MINIDISC RECORDER DMD-M31
8
9
POWER LOADING MECHANISM
MULTI REC
CD SRS
MEMORY REC
CHARACTER/
TIME/INPUT
EDIT
ON / STANDBY
1
1,2~4
1. Setting the MDLP recording mode
Summary of Contents for DMD-M31
Page 32: ...32 MEMO ...
Page 33: ...33 MEMO ...


