background image

Specifications

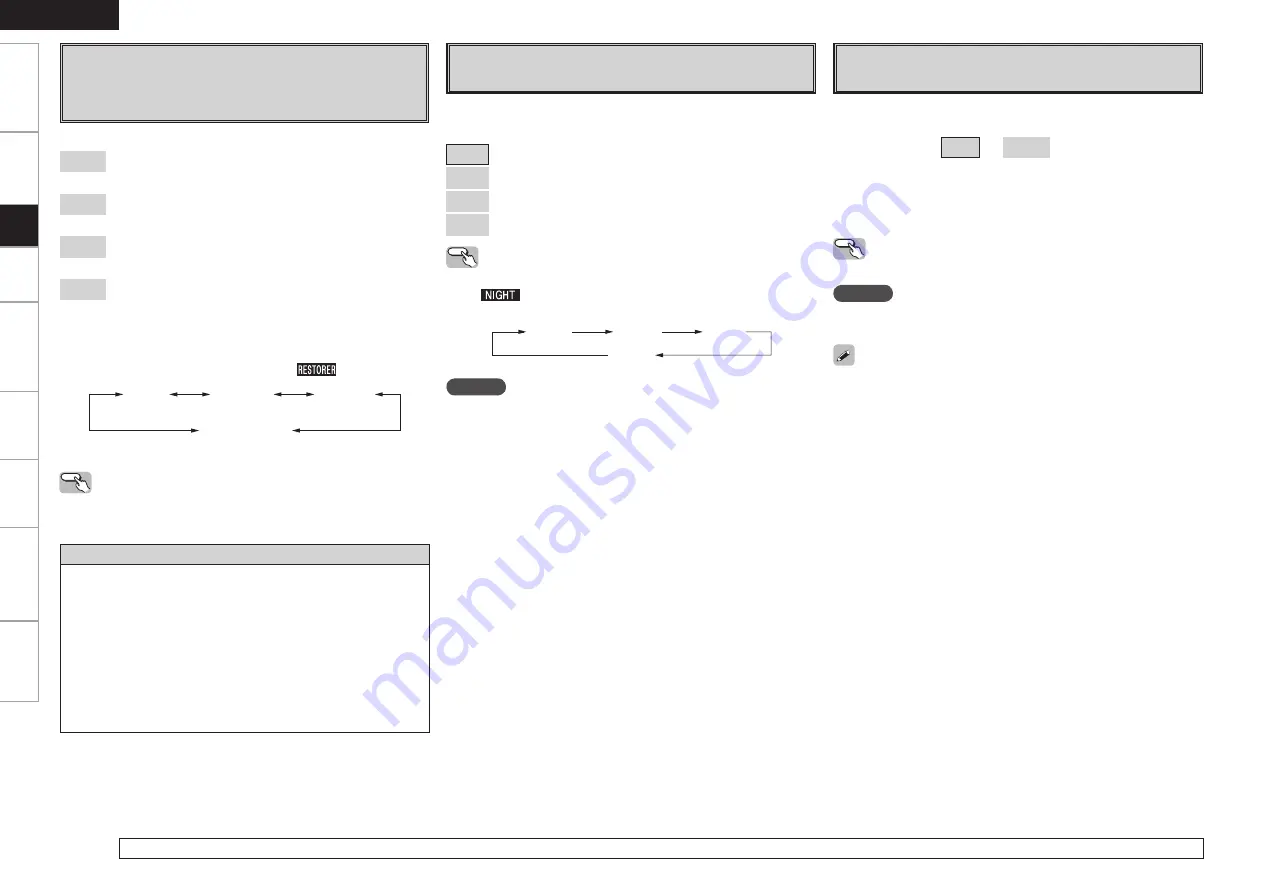
RESTORER

This  function  restores  compressed  audio  signals  to  how  they 
were  before  compression  and  corrects  the  sense  of  volume  of 
the bass and treble to obtain richer playback sound.

About the RESTORER function

• Such compressed audio formats as MP3, WMA (Windows Media 

Audio) and MPEG-4 AAC reduce the amount of data by eliminating 
signal  components  that  are  hard  for  the  human  ear  to  hear. The 
RESTORER  function  generates  the  signals  eliminated  upon 
compression, restoring the sound to conditions near those of the 
original  sound  before  compression.  It  also  corrects  the  sense  of 
volume of the bass to obtain richer sound with compressed audio 
signals.

• This is displayed on the menu and can be set when the input source 

is selected to “XM”, or analog signals (including FM/AM and SIRIUS 
signals) or PCM signals (fs = 44.1/48 kHz) are input.

When set to something other than “OFF”, “

” is displayed.

OFF

Mode 1

(RESTORER 64)

Mode 2

(RESTORER 96)

Mode 3

(RESTORER HQ)

The default setting for “iPod” is “Mode3”. All others are set to “OFF”.

[Selectable items]

OFF

 :

Do not use RESTORER.

Mode1

 (RESTORER 64):

 Optimized mode for compressed sources with very weak highs.

Mode2

 (RESTORER 96):

 Apply suitable bass and treble boost for all compressed sources.

Mode3

 (RESTORER HQ):

 Optimized mode for compressed sources with normal highs.

  Operating from the main unit or main remote 

control unit

Press 

RESTORER

.

Night Mode

Optimized setting for late-night listening.

Audio Delay

Compensate for mismatched timing between video and audio.

•  This  cannot  be  adjusted  when  playing  in  the  EXT.  IN,  DIRECT  or 

STEREO  mode  (with  “Front  Speaker”  set  to  “Large”,  “Tone 
Control” to “OFF” and “MultEQ”, “RESTORER” and “Night Mode” 
to “OFF”).

•  When the Auto Lipsync Correction function is operating, you can set 

within the range 0 ~ 100 ms.

•  Store “Audio Delay” for each input source.

Delay audio.
This sets the delay time for audio signals.

[Variable range] 

0 ms


~


200 ms

If  you  wish  to  adjust  the  “Audio  Delay”  while  playing  HDMI  or 
component video signals, press 

u

 to set “OSD” to “OFF”. This way 

the audio delay can be adjusted while watching the picture. (Press 

u


again to switch to the on-screen display.)

  Operating from the main remote control unit

Press 

[AUDIO DELAY]

,


then press 

o


p

 to adjust audio delay.

NOTE

When  operating  by  remote  control,  the  onscreen  display  is  not 
shown.

For details on adjusting individual parameters, see “Adjusting the parameters” (

v

page 46).

  Operating from the main remote control unit

Press 

[NIGHT]

.

The  “

”  indicator  lights  when  “Low”,  “Mid”  or  “High”  is 

selected.

OFF

Low

Mid

High

NOTE

•  When the “Dynamic EQ” setting is “ON”, setting is not possible.
•  When a HD-Audio (DOLBY DIGITAL Plus, DOLBY TrueHD, DTS-HD) 

signal is input, the “Night Mode” can not be selected.

Get
ting Star

ted

Connections

Set
up

Pla
ybac

k
Remot

e Contr

ol

Multi-Zone

Inf
or

mation

Tr

oubleshooting

ENGLISH

Set the dynamic range compression of the output audio.

[Selectable items]

OFF

 :   Turn night mode off.

Low

 :   Low setting.

Mid

 :   Middle setting.

High

 :   High setting.

Summary of Contents for AVR 1909 - AV Receiver

Page 1: ...AV SURROUND RECEIVER AVR 1909 Owner s Manual Manuel de l Utilisateur...

Page 2: ...ly to be walked on or pinched by items placed upon or against them paying particular attention to cords at plugs convenience receptacles and the point where they exit from the product 15 Outdoor Anten...

Page 3: ...st accept any interference received including interference that may cause undesired operation 2 IMPORTANT NOTICE DO NOT MODIFY THIS PRODUCT This product when installed as indicated in the instructions...

Page 4: ...Frequency 31 h Front Speaker Setup 31 HDMI Setup 32 a Color Space 32 s RGB Range 32 d Auto Lipsync 32 f HDMI Audio Out 32 g HDMI Control 32 h Power Off Control 32 Audio Setup 33 a EXT IN Subwoofer Lev...

Page 5: ...tellite Radio Programs 56 Basic Operation 56 Checking the XM Signal Strength and Radio ID 56 Presetting Radio Channels Preset Memory 57 Listening to Preset Channels 57 Searching Categories 57 Listenin...

Page 6: ...rating it NOTE The set may function improperly or the remote control unit may not operate if the remote control sensor is exposed to direct sunlight strong artificial light from an inverter type fluor...

Page 7: ...s in the same way as the ENTER button when pressed the knob Q4Cursor buttons ui 22 Q5MASTER VOLUME control knob 54 Q6AUDYSSEY DYNAMIC VOLUME indicator 50 Q7HD AUDIO indicator 45 Q8Master volume indica...

Page 8: ...ndicators Q0Recording output source indicator This lights when the REC OUT mode is selected Q1NIGHT indicator This lights when the night mode is selected Q2RESTORER indicator This lights when the REST...

Page 9: ...T IN connectors 17 tREMOTE CONTROL jacks 20 yPRE OUT connector 10 uZONE2 connectors 20 iAC OUTLETS 21 oPower cord 21 Q0Speaker terminals SPEAKERS 10 Q1FM AM antenna terminals TUNER ANTENNA 19 Q2COMPON...

Page 10: ...mote Control Unit RC 1099 NOTE If buttons on the front or rear are pressed strongly the button on the opposite side will be activated too q i o Q0 Q1 Q2 w b1 b2 e r t y u Q3 q Remote control signal tr...

Page 11: ...Input Output Cables Used for Connections Select the cables according to the equipment being connected Preparations NOTE Do not plug in the power cord until all connections have been completed When mak...

Page 12: ...signals cannot be output to anything other than component video connectors 480p 576p 1080i and 720p component video input signals cannot be converted into S Video or Video format When a non standard v...

Page 13: ...speaker 7 1 channels S S S S S S S S 6 1 channels S S S S S S S 5 1 channels S S S S S S 3 1 channels S S S S 2 1 channels S S S 2 channels S S NOTE For surround back speakers Since Amp Assign of AVR...

Page 14: ...cted Doing so could result in electric shock Protection circuit If the core wires touch the rear panel and the screws etc or the sides touch each other the protection circuit will be activated and the...

Page 15: ...pped with a DVI D connector connection is possible using an HDMI DVI converter cable but depending on the combination of components in some cases the video signals will not be output When connecting u...

Page 16: ...re to interconnect correctly Connecting the Playback Components Blu ray Disc player DVD player Select the terminal to use and connect the device Blu ray Disc player DVD player NOTE The component video...

Page 17: ...Information Troubleshooting ENGLISH iPod R L R L 4 8 iPod With the default settings the iPod can be used connected to the VCR iPod connector To assign the iPod to a connector other than VCR iPod make...

Page 18: ...065 Video Cassette Recorder Select the terminal to use and connect the device Video cassette recorder When recording via the AVR 1909 the playback device s cable must be of the same type as the cable...

Page 19: ...ou wish to record digital audio signals depending on the types of connectors on the components being used CD recorder MD recorder Tape deck R L R L 065 6 0 7 0 7 0 6 0 3 065 Video Camera Game Console...

Page 20: ...R 1909 is an XM Ready receiver You can receive XM Satellite Radio by connecting to the XM Mini Tuner and Home Dock includes home antenna each sold separately and subscribing to the XM service Plug the...

Page 21: ...S Satellite Radio Inc n Positioning the Antenna For a consistent satellite signal the antenna must be positioned correctly Use the following map to determine which area you are in and position the ant...

Page 22: ...close to the point of cable entry as practical AM loop antenna assembly Remove the vinyl tie and take out the connection line Connect to the AM antenna terminals Bend in the reverse direction a With...

Page 23: ...ing separately sold devices refer to the respective devices operating instructions To conduct multi zone playback see Amp Assign Multi zone Connections and Operations vpage 69 72 3 3 External Controll...

Page 24: ...cord To household power outlet AC 120 V 60 Hz Power cord Connection to the AC outlets These outlets supply power to external audio equipment The power supplied from these outlets turns on and off toge...

Page 25: ...ge then press o p to change the setting b To return to the previous item press RETURN b Select Default Yes then press o to reset to the default setting 5Press ENTER to enter the setting 6Press MENU or...

Page 26: ...nt Sp A Amp Assign Start Cancel Please place microphone main listening position 3 1 Assign Digital In OPT1 iPod Dock None Assign Digital OPT1 Screen title Submenu title Press o to execute Press op to...

Page 27: ...n ZONE2 Setup vpage 34 35 Level Lch Level Rch Volume Limit Power On Level Mute Level n Option Setup vpage 35 37 Amp Assign Volume Control Source Delete On Screen Display Quick Select Name Remote ID Se...

Page 28: ...29 31 About the main listening position M The main listening position refers to the most central position where one would normally sit within the listening environment MultEQ uses the measurements fr...

Page 29: ...tup Step 1 Speaker Detection NOTE Do not change the speaker connections or subwoofer volume after Step 1 The speaker connection and polarity are detected at the first measurement position main listeni...

Page 30: ...ayed e Press RETURN This returns you to analysis results items so repeat step q r Press i to select Next 0 then press o to proceed to Step 5 F Menu screen F q Auto Setup Step4 Check Audyssey MultEQ Pl...

Page 31: ...tallation and the direction in which the speakers are facing Adjust the subwoofer s volume Retry R None Cancel Front Auto Setup Caution Audyssey MultEQ Displayed speaker could not be detected The fron...

Page 32: ...r configuration and size bass reproduction capability Front Speaker Select front speaker size Selectable items Large Small Subwoofer Select subwoofer use Selectable items Yes No Center Speaker Select...

Page 33: ...ound back speakers with MAIN ZONE change the Amp Assign setting to 7 1ch vpage 35 s Subwoofer Setup Select low range signal to be reproduced by subwoofer This can be set when menu Speaker Configuratio...

Page 34: ...A B A B NOTE When set to Custom SPEAKERS does not operate g Crossover Frequency Select crossover frequency from which subwoofer handles low range signal Selectable items 40Hz 60Hz 80Hz 90Hz 100Hz 110H...

Page 35: ...ut When YCbCr is selected under Color Space RGB Range will have no effect s RGB Range Make settings for RGB output range f HDMI Audio Out Select HDMI audio output device d Auto Lipsync Automatic compe...

Page 36: ...yback of Dolby Digital sources Set this to ON if the sound from the front speakers seems distorted When not using the center speaker or surround speakers the playback sound is down mixed and output fr...

Page 37: ...Audyssey Flat correction curve n Adjust CH q Select speaker adjustment method Selectable items Each CH Adjust tonal quality for each speaker separately L R CH Adjust tonal quality for each L R speake...

Page 38: ...terminals FrontA Bi Amp The Front A channel for Bi Amp use is output from the speakers connected to the SURR BACK AMP ASSIGN terminals FrontB Bi Amp The Front B channel for Bi Amp use is output from...

Page 39: ...ot prevented Mode2 Prevents flickering of the on screen display when there is no video signal Use this mode if the on screen display does not appear in the Mode 1 as may happen according to the TV bei...

Page 40: ...nadvertent change When Setup Lock is set to ON the settings listed below can no longer be changed Also SETUP LOCKED is displayed if you attempt to operate related settings RESTORER Night Mode MultEQ D...

Page 41: ...elow can be made for these input sources when iPod Dock is set to Assign 1 Assign 3 Input Mode 2 Video 4 Rename 5 Source Level 6 iPod 3 Input Setup VCR VCR iPod Repeat Mode All Shuffle Mode OFF 3 6 iP...

Page 42: ...ote control unit Press VIDEO SELECT until the desired picture appears b To cancel press VIDEO SELECT to select Source NOTE It is not possible to select HDMI input signals When playing HDMI video input...

Page 43: ...Output at 480p 576p resolution 1080i Output at 1080i resolution 720p Output at 720p resolution 1080p Output at 1080p resolution Progressive Mode Select optimum progressive mode for video material Inpu...

Page 44: ...can be input Characters that can be input A Z a z 0 9 space Variable range 12dB 0dB 12dB For input sources for which HDMI In and Digital In are set at the menu Assign setting the analog input level an...

Page 45: ...ect digital input connector to assign to this source Input source CD CDR TAPE DVD HDP TV CBL VCR V AUX SIRIUS Selectable items COAX1 Assign COAXIAL 1 input connector COAX2 Assign COAXIAL 2 input conne...

Page 46: ...not change Edit Lock Code Change the password q Press ENTER w Input old password 4 digits using uio p and press ENTER e Input new password 4 digits using uio p and press ENTER r Input new password 4 d...

Page 47: ...sources recorded in XM HD Surround vpage 75 z DOLBY PLgx can be selected when surround back speakers are being used DOLBY PLg can be selected when surround back speakers are not being used Select the...

Page 48: ...surround modes in the Display column in the following table The mode changes depending upon factors such as the Input signal Whether or not surround back speakers are being used For details see page 7...

Page 49: ...To exit adjustment Press MENU or A MENU during adjustment Getting Started Connections Playback Remote Control Multi zone Information Troubleshooting ENGLISH Operating from the main unit Use SELECT EN...

Page 50: ...ter understanding Selectable items ON Cinema EQ is used OFF Cinema EQ is not used The Music mode is also effective for movie sources including a lot of stereo music a Mode Select the mode to match the...

Page 51: ...d using the surround back speakers you can set AFDM A3 AFDM Auto Flag Detect Mode Auto select surround mode by source This function only works for software containing a special identification signal I...

Page 52: ...lights After running Auto Setup if the Speaker Configuration Distance Channel Level and Crossover Frequency have changed without increasing the number of speakers measured only lights Audyssey Audyss...

Page 53: ...running Auto Setup if the number of speakers has increased or you pressed DYNAMIC VOLUME Run Audyssey is displayed In this case either perform Auto Setup or return to the setting after running Auto Se...

Page 54: ...RESTORER Night Mode Optimized setting for late night listening Audio Delay Compensate for mismatched timing between video and audio This cannot be adjusted when playing in the EXT IN DIRECT or STEREO...

Page 55: ...gram sources The correction value can be checked using STATUS The figure is the correction value when the standard level is corrected Items to be checked Surround Mode The currently set surround mode...

Page 56: ...source TUNER XM SIRIUS Items to be checked A1 G8 480p Color Space RGB 4 4 4 Pixel Depth 8bits Resolution 5 3 HDMI Signal Info 5 6 Preset Station A1FM 87 50MHz A2FM 89 10MHz A3FM 98 10MHz A4FM107 90MHz...

Page 57: ...VOLUME Variable range 80 0dB 18 0dB Operations During Playback Adjusting the Master Volume Press MUTING Plug the headphones into the PHONES jack on the main unit The sound from the speakers and pre o...

Page 58: ...H The remote control unit can be used to operate external devices See Remote Control Unit Operations vpage 65 4Tune in the desired broadcast station qTo tune in automatically Auto Tuning Press MODE to...

Page 59: ...Satellite Radio service in the U S online at http activate xmradio com or call 1 800 XMRADIO 1 800 967 2346 Activate your XM Satellite Radio service in Canada online at https activate xmradio ca or c...

Page 60: ...Press PRESET or CHANNEL to select the desired preset channel 1 to 8 Listening to Preset Channels Searching Categories 1Press o p 2Use o p to select the category then use ui to select the desired chann...

Page 61: ...n level can be checked by pressing STATUS The time default 30 sec for which the on screen display are displayed can be set at menu Manual Setup Option Setup On Screen Display vpage 36 Press uio p to r...

Page 62: ...SOURCE CONTROL 1 6 7 iPod 1 OFF SOURCE CONTROL 2 2 8 9 ENTER uiop iPod MODE TUNING ENTER Front Rear Button located on both the main unit and the remote control unit BUTTON Button only on the main unit...

Page 63: ...hen using an ASD 1R or ASD 11R TV Out at the iPod s Slideshow Settings or Video Settings must be set to On in order to display the iPod s photo data or videos on the monitor For details see the iPod s...

Page 64: ...ch Delete is selected at Source Delete cannot be selected SOURCE SELECT ZONE2 REC SELECT Button located on both the main unit and the remote control unit BUTTON Button only on the main unit BUTTON But...

Page 65: ...isten to TV audio by AVR 1909 connect optical digital or analog If the TV you are using has both connection jacks use the optical digital connection When using these functions set as follows menu Manu...

Page 66: ...ible with the HDMI control function vpage 62 2Put the power on for all the equipment connected to the HDMI 3Check the settings for all the equipment connected to the HDMI and make HDMI available to th...

Page 67: ...n the currently playing input source input mode surround mode MultEQ settings and volume can be stored in the memory 1Set the input source surround mode MultEQ Dynamic EQ Dynamic Volume Front Speaker...

Page 68: ...and year of manufacture this function cannot be used for some models even if they are of makes listed in the list of preset codes Some manufacturers use more than one type of remote control code Refer...

Page 69: ...e Pause 0 SKIP FAVORITE Disc skip b Favorites Direct Disc skip TUNING 6 7 Manual search fast reverse fast forward Manual search fast reverse fast forward Tuning down up Manual search fast reverse fast...

Page 70: ...out the menus Calling out the menus Calling out the menus SETUP Setup Setup uio p Cursor operation Cursor operation Cursor operation Cursor operation Cursor operation AUDIO Audio Audio BAND PICTURE AD...

Page 71: ...ower on SOURCE SELECT Switching the input source VOLUME Volume control CHANNEL Preset channel TUNING Tuning MUTE Muting SHIFT Switching the memory block 8 9 Auto search cue 2 Stop 1 3 Play Pause REPEA...

Page 72: ...sign mode at menu Manual Setup Option Setup Amp Assign vpage 35 Connect the speakers as described at Amp Assign mode setting and speakers connected to the various speaker terminals Z2L Z2R FL SW C FR...

Page 73: ...TER SURROUND SURROUND BACK AMP ASSIGN R L R L R L 7 1CH FR FL C SR SL SBR SBL n Amp Assign mode setting and speakers connected to the various speaker terminals n Amp Assign mode setting and speakers c...

Page 74: ...ONE2 Blu ray Disc player DVD player Input ZONE2 audio output AVR 1909 Pre main amplifier Multi zone audio cable Connectors for audio output Audio signals ZONE2 ZONE2 OUT Stereo Prepare pre main amplif...

Page 75: ...d only when ZONE2 is selected at menu Manual Setup Option Setup Amp Assign vpage 35 Turning off the Sound Temporarily q Set SOURCE CONTROL 1 to AUDIO and SOURCE CONTROL 2 to ZONE2 main remote control...

Page 76: ...them G1H Using surround back speaker s q When mainly playing movies Recommended when your surround speakers are single or 2 way speakers Surround back speakers Subwoofer Surround speakers Monitor Cen...

Page 77: ...conventional 5 1 channel audio signals is also possible according to the decoder DTS ES Matrix 6 1 DTS ES Matrix 6 1 is a 6 1 channel discrete digital audio format inserting a surround back SB channe...

Page 78: ...iorating sound quality as volume is decreased by taking into account human perception and room acoustics Audyssey Dynamic EQ works in tandem with Audyssey MultEQ to provide well balanced sound for eve...

Page 79: ...dB S ON S S OFF A A A A A A DOLBY TrueHD S D D D D S OFF S 0dB S ON S S OFF A A A A A S Auto DTS SURROUND S D D D D S OFF S 0dB S ON S S OFF A A A A A A DTS 96 24 S D D D D S OFF S 0dB S ON S S OFF A...

Page 80: ...FF S OFF S DOLBY DIGITAL A A A A A S 0dB S OFF S OFF S OFF S OFF A DOLBY DIGITAL Plus A A A A A S 0dB A S OFF S OFF S OFF A DOLBY TrueHD A A A A A S 0dB A S OFF S OFF S OFF A DTS SURROUND A A A A A S...

Page 81: ...INEMA S A S A A A A A A A A A A A A S DTS NEO 6 MUSIC S A S A A A A A A A A A A A A S DOLBY SURROUND DOLBY TrueHD A A A A A A A A A F A A A A A A DOLBY DIGITAL A A A A A A A A A A F A A A A A DOLBY DI...

Page 82: ...A A A A A A A A M DIRECT Dolby EX z1 z3 A S A A A A A A A A A A A A A A M DIRECT 7 1 z3 A S 7 1 A A A A A A A A A A A A A A PURE DIRECT PURE DIRECT S A S S S S S S S S S S S S S S MULTI CH PURE DIRECT...

Page 83: ...S VIDEO S VIDEO S S Other than 480i 576i S S HDMIz2 COMPONENTz2 S VIDEO S VIDEO S S 480i 576i S S HDMIz2 COMPONENTz2 S VIDEO S VIDEO S Signal input A No signal 480p 720p 480p 576p 1080i 720p A Not ou...

Page 84: ...DMI A S VIDEO A Used S A S S HDMI A S VIDEO VIDEOz2 Not used S A S S HDMI A VIDEO S S A A HDMI COMPONENT A A S S A S HDMI COMPONENTz1 A VIDEO S S S A HDMI COMPONENTz2 S VIDEO A Used S S S S HDMI COMPO...

Page 85: ...ething other than OFF Set a surround mode other than the PURE DIRECT mode 37 46 GGeneralH 82 Getting Started Connections Setup Playback Remote Control Multi zone Information ENGLISH Symptom Cause Coun...

Page 86: ...ce TV AM radio broadcast etc in the STANDARD Dolby DTS Surround mode The mode is set to something other than STANDARD Dolby DTS Surround 45 No sound is produced from surround speakers The surround mod...

Page 87: ...o signals are input to the AVR 1909 the characters of the on screen display are not displayed over the picture Set Manual Setup Option Setup On Screen Display Text to ON Set Manual Setup Option Setup...

Page 88: ...ca for the current list of channels For cases of a new radio or a radio that has not received XM s signal for an extended period allow the radio to receive the XM satellite signal for at least 5 minu...

Page 89: ...ponent video connector Input output level and impedance Y brightness signal 1 Vp p 75 ohms PB CB signal 0 7 Vp p 75 ohms PR CR signal 0 7 Vp p 75 ohms Frequency response 5 Hz 60 MHz 0 3 dB when video...

Page 90: ...7 088 091 094 097 098 115 Radix 088 Randex 088 RCA 007 013 019 023 058 063 064 065 073 080 082 087 Realistic 009 021 031 033 049 053 081 087 088 091 094 097 098 Ricoh 055 S Salora 033 041 Samsung 007...

Page 91: ...Jasco 011 Jerrold 009 016 017 026 032 M Magnavox 018 Movie Time 019 N NSC 019 O Oak 000 006 020 P Panasonic 001 005 Philips 011 012 013 018 021 Pioneer 002 003 022 R RCA 029 Regency 015 S Samsung 014...

Page 92: ...Denon Brand Company D M Holdings Inc Printed in China 5411 10048 202DA www denon com...

Reviews: