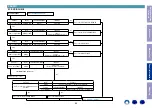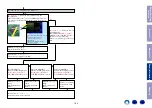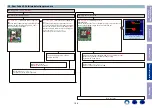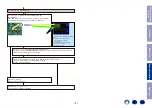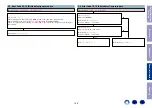
3. Starting detecting the point of failure
Check item(3.1.).
Check the power supply status and communication status with the CPU of each device.
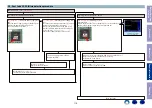
Start in HDMI Diagnostics mode and follow the procedures below.
Start in HDMI Diagnostics mode
While the power is on, hold down buttons "
CURSOR
d
" and "
BACK
" for at least 3 seconds.
L1
HDMI DIAGNOSTICS
L2
"
HDMI DIAGNOSTICS
" is displayed.
When the mode has switched, start Hardware Check.
L1
HDMI DIAGNOSTICS
L2
HardwareCheck...
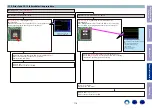
Display when an Error is detected.
L1
Err: H1-01
L2
Contact support
Check the Error Code table items.
Error Code table
Error Code
Check item No.
Description
H1-01
Check item (3-1.1.)
Communication Error with HDMI Tx
[U3401 : MN864787]
H1-02
Check item (3-2.1.)
Communication Error with HDMI SW1
[U2401 : MN864788]
H1-03
Check item (3-3.1.)
Communication Error with HDMI SW2
[U2601 : MN864788]
H1-05
Check item (3-7.1.)
Communication Error with VIDEO DECODER
[U2001 : ADV7180]
H1-06
Check item (3-4.1.)
Communication Error with GUI IC
[U2800 : ADV8003]
H1-08
Check item (3-8.1.)
Communication Error with DSP1
[U101 : ADSP21487]
H1-09
Check item (3-9.1.)
Communication Error with DSP2
[U201 : ADSP21487]
H1-10
Check item (3-10.1.)
Communication Error with DSP3
[U301 : ADSP21487]
H1-11
Check item (3-11.1.)
Communication Error with DSP4
[U401 : ADSP21487]
H1-12
Check item (3-12.1.)
Communication Error with DIR
[U7004 : PCM9211]
H1-14
Check item (3-5.1.)
DDR check Error
[U3000, U3001 : A3R12E40DBF-8E]
H1-15
Check item (3-6.1.)
Communication Error with GUI ROM
[U2801 : MX25L12835FMI-10G]
H1-16
Check item (3-13.1.)
Communication Error with ARC IC
[U3802 : SiI9437]
Display when an Error is not detected.
L1
HDMI DIAGNOSTICS
L2
1 Auto Test
Cancel the mode, and proceed to
check item (3.2.)
.
Canceling the selected mode
Press the power button to exit off the power.
Before Servicing
This Unit
Electrical
Mechanical
Repair Information
Updating
100


