background image

The Latest and Most Comprehensive  

PN-Series Information is Always Online!

User Manuals, Getting Started Info, Tutorials

The DeLorme Wiki is your link to comprehensive information about your Earthmate

®

 PN-Series GPS. The most recent  

User Manual is always available for download.  

wiki.delorme.com

Community Forum

An open, interactive community of DeLorme product users. DeLorme experts monitor the boards regularly and participate 

to answer questions and share their experiences.  

forum.delorme.com

DeLorme Products and Available Accessories

Our website has product and accessory information, as well as press coverage, contact, and company information.  

delorme.com

Technical Support

A large searchable knowledge base of detailed technical information about current and past DeLorme products.  

support.delorme.com

News and Real-Life Examples

Catch up with news about what we are working on, real-life examples using PN-Series devices, and more at the DeLorme 

Weblog.  

blog.delorme.com

SPOT Satellite Communicator Account & Subscription Information

Visit the SPOT website to sign up and manage your account and learn more about the SPOT Satellite Communicator. 

findmespot.com

Summary of Contents for Earthmate GPS PN-60

Page 1: ...Earthmate PN 60 GPS DELORME User Manual ...

Page 2: ... delorme com DeLorme Products and Available Accessories Our website has product and accessory information as well as press coverage contact and company information delorme com Technical Support A large searchable knowledge base of detailed technical information about current and past DeLorme products support delorme com News and Real Life Examples Catch up with news about what we are working on re...

Page 3: ... Communicator 13 The Home Page 16 The Activities Page 17 The Satellites Page 18 The Map Page 21 The Compass Page 32 The Trip Info Page 35 The SPOT Communicator Page 37 The Find Page 44 The Waypoints Page 48 The Geocaches Page 53 The Routes Page 61 The Tracks Page 66 ...

Page 4: ...The Profile Page 71 The Sun Moon Page 74 The Tides Page 76 The Hunt Fish Page 78 The Settings Page 79 Additional Information 85 Info Fields Table 95 Index 101 ...

Page 5: ......

Page 6: ...he world Be completely independent of mobile phone or other land based radio coverage Getting Started See the Quick Start Guide for detailed information on setting up your PN 60 and if included your SPOT Communicator How to Use the Manual When the manual instructs you to do something use these actions on the PN 60 To select an item on the screen such as a field check box button drop down list menu...

Page 7: ...series of steps an arrow indicates the sequence Note that the sequences do not include ENTER and QUIT button presses described above Visit the DeLorme Wiki at wiki delorme com for more information The latest version of the User Manual is always available for download ...

Page 8: ... press down the slot to close the latch Note Do not lift the SD card latch as this could cause damage 3 Insert the batteries according to the polarity symbols inside the battery compartment 4 Replace the back cover and screw in the D rings To check the battery type After you install the batteries go to Settings System Battery Type and make sure the correct battery type is selected this ensures tha...

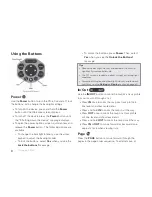
Page 9: ...Power until you see the Welcome screen To turn off the PN 60 press Power and hold for 1 5 seconds until the Shutting down the device message displays Then release the button To view or hide Demo Mode The first time you turn on the PN 60 it opens in Demo Mode To view the demo follow the on screen instructions To exit the demo press QUIT To turn off Demo Mode from the first screen press ENTER to cle...

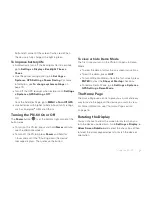
Page 10: ...ons message Tips Reduce the backlight intensity and decrease the timer to significantly improve battery life The TFT screen is readable in direct sunlight or slanting light conditions For more information about backlight intensity and the back light timer see the Settings Display section on page 80 In Out Use the IN OUT button to zoom the map or a track profile in or out or scroll through a list P...

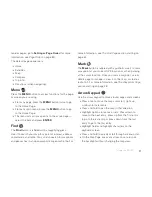
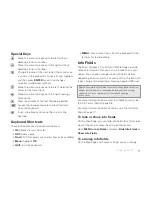
Page 11: ... The Find Page section starting on page 44 Mark The Mark button is labeled with a pushpin Use it to mark a waypoint at your current GPS location or when panning at the cursor location Once you mark a waypoint use its details page to manage it view it on the map or create a route to it For more information see The Waypoints Page section starting on page 48 Arrow Keypad Use the arrow keypad to move ...

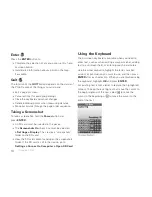
Page 12: ...ings Display This creates a screenshots folder on the SD card View the SD card contents and open the screenshots folder If the SD card is still in the device go to Settings Connect to Computer Open SD Card Using the Keyboard The on screen keyboard is available when you need to enter text such as when editing a waypoint label adding text to a comment field or entering search parameters Use the arro...

Page 13: ...ighlight OK QUIT Exit the keyboard MENU Move cursor focus from the keyboard to the text box for faster editing Info Fields The Map Compass Trip Info and Profile Pages include fields of information that you can customize to suit your needs You can even change which info fields display depending on your activity For each activity the info field types change for navigating or tracking regular GPS use...

Page 14: ...f available info fields opens 3 Select the new info field and press ENTER 4 When you finish editing fields press QUIT The changes are saved until you change them again or restore them to the default settings To restore info fields On the Map Compass Profile and Trip Info Pages you can restore the default information fields for your current activity From the page go to MENU Info Fields Restore Defa...

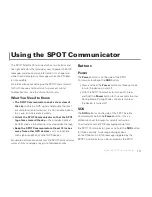
Page 15: ... Communicator at least 12 inches away from other GPS devices as it can interfere with signal reception of other GPS devices For detailed information about how the SPOT Communicator works and its coverage area go to findmespot com Buttons Power The Power button is on the side of the SPOT Communicator above the SOS button Press and hold the Power button for three seconds to turn the device on and of...

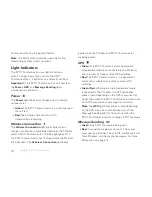
Page 16: ...ator has not heard from the PN 60w in 30 seconds The Wireless Connection light blinks rapidly when the PN 60w and SPOT Communicator are being paired GPS Green The SPOT Communicator is operating in independent mode not connected to the PN 60w and is in view of three or more GPS satellites Red The SPOT Communicator is in independent mode and is unable to see three or more GPS satellites Green Red Wh...

Page 17: ...to transfer firmware upgrades to the SPOT Communicator Device Pairing To control the SPOT Communicator with the PN 60w you must first pair the devices From the Home Page open the SPOT Communicator Page and follow the on screen instructions For more information about device pairing and initial setup see the The SPOT Communicator Page section starting on page 37 and the Quick Start Guide Visit the D...

Page 18: ... any page on the PN 60 press MENU twice To switch pages press the right or left arrow until the page view changes You can customize the button layout for each activity See The Activities Page on page 17 Home Page Icons Tracks Waypoints Geocaches Compass Map Trip Info Settings Satellites SPOT PN 60w only Tides Hunt Fish Sun Moon Routes Profile Activities Visit the DeLorme Wiki at wiki delorme com f...

Page 19: ...ent activity is highlighted green To create a custom activity Highlight one of the Custom activities and then go to MENU Rename Button Use the on screen keyboard to edit the button name To change the Home Page button order You can change the order of the Home Page buttons for each activity Go to MENU Customize Home Page and press ENTER Select an icon and press ENTER The icon frame turns into arrow...

Page 20: ...ear in the PN 60 s almanac data Red The receiver is tracking the satellite but it is not using it to navigate Yellow The receiver is tracking the satellite predicted ephemeris data is available when a 3 D fix has not been obtained and the satellite is being used for navigation Green The receiver is tracking the satellite ephemeris data is available and the satellite is being used for navigation Bl...

Page 21: ...ew of the sky Be sure that trees buildings and other obstacles are not blocking the device If the device still cannot obtain a 2 D or 3 D fix go to MENU Set Current Location When the Map Page displays pan the map to your current location and press ENTER To turn off GPS You can use many features on the PN 60 without a GPS fix When the GPS receiver is turned off GPS OFF displays on the screen and al...

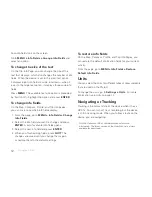
Page 22: ...racy Elevation The elevation is based on the current barometric altimeter reading When the Auto Calibrate Altimeter option is selected you may see the word Calibrating in the bottom right corner of the screen while the barometer adjusts typically 2 3 minutes If you are using the Elevation Barometer info field on any page you may see a red exclamation point in the field while the altimeter adjusts ...

Page 23: ...llites Blue The device is in Track Playback mode or Simulate Navigation mode Yellow The device has a 2 D fix If a 3 D fix has not been obtained predicted ephemeris is available Green The device has a 3 D fix Tracking When tracking satellites a track line also known as a breadcrumb trail follows the GPS arrow as you move If you have turned off track recording the track does not appear For more info...

Page 24: ...the cursor over an object the field in the bottom left corner displays the object name Getting Location Information For information about objects at your current GPS location press ENTER OR Pan the map to a new location When you stop the cursor over an object the object s name is displayed in the bottom left corner of the map Press ENTER For single objects the object details page displays From thi...

Page 25: ...t location and pressing ENTER to snap the point and close the polygon While you are measuring distance the pan location infor mation that displays in the top right corner of the screen changes to display the heading from the last measure ment node to your current GPS location the leg distance and the total distance from the last measurement node to the first measurement node Once you close a polyg...

Page 26: ...r device show in the Data Layering list The default order for layering data is GIS layers by name XMap only Draw Layers Public Lands User Raster Data XMap only Custom Raster Data XMap only ImageReg XMap only DigitalGlobe 30cm DG 30cm High resolution City Imagery Hi Res Cities DigitalGlobe 60cm DG 60cm DigitalGlobe 1m DG 1m Color Aerial Imagery Color DOQQ Aerial Imagery DOQQ USGS Quads 3DTQ Canadia...

Page 27: ...nt The PN 60 stores routes and the base map in its internal memory You can save user maps including the detailed DeLorme Topo North America maps waypoints geocaches and tracks in the device s internal memory or on a removable SD card To view and manage memory information go to Settings System Memory Use After you add a map also called a map package or a map file from a compatible DeLorme mapping p...

Page 28: ...ailed maps and map packages to the PN 60 using PN Series detailed map DVDs Included with your device are DVDs with detailed pre formatted DeLorme Topo North America data This data includes detailed routable road and topographic data for the U S and Canada and major road data for Mexico Insert the DVD for your area of interest in your computer s DVD drive and follow the on screen instructions to co...

Page 29: ...e the map orientation From the Map Page go to MENU Map Setup Orientation and select the map orientation from the drop down list North Up North is always at the top of the map screen Heading Up The direction in which you are traveling is always at the top of the map screen The North Arrow displays in the top right corner of the map screen Course Up The direction of the finish of your route is alway...

Page 30: ...Point Management Select each option and then select how you want that type of map point to appear on the map Select the Hide Logged Caches check box if you do not want logged geocaches to appear on the map Scale Use the scale option to set the type of scale you want to use on your maps To set the scale From the Map Page go to MENU Map Setup Scale from the drop down list select an option Bar Repres...

Page 31: ...Route When you are viewing a route on the map but not navigating you can hide it Go to MENU Hide Route Navionics You can use Navionics HotMaps Premium Lake Maps and GOLD Marine Charts with your PN 60 The charts are available on SD cards that you insert into your devices For more information about the charts that are available visit www navionics com General Information Navionics information appear...

Page 32: ...ries on the map view charts alone boundaries alone or both together To show charts select the Show Charts check box To show boundaries select the Show Boundaries check box To hide charts by map scale You can customize at which map scale you can view charts on the device From the Hide Charts check box select the scale above which you want to hide the charts To set chart details To change the detail...

Page 33: ... select the Show Depth in Fathoms check box To restore the default settings To restore the default Navionics Setup settings select Restore Default Settings Visit the DeLorme Wiki at wiki delorme com for more information The latest version of the User Manual is always available for download The Map Page ...

Page 34: ... next waypoint in your route or point back on course if you leave the route To set the hiking route arrow method from the Routes Page go to MENU Edit Route Settings Compass Navigation Arrow To change the hiking route arrow from the Compass Page press MENU Compass Navigation Arrow Direct to Next Waypoint or Back on Course Electronic Compass The PN 60 s electronic compass shows your direction when y...

Page 35: ... information that you can customize to suit your needs You can even change which info fields display depending on your activity For each activity the info field types change for navigating or tracking regular GPS use To access the Info Fields options go to MENU Info Fields For more information see Info Fields on page 11 and The Activities Page section on page 17 Other Menu Options When navigating ...

Page 36: ...ttings on page 61 Go to MENU Route Options and select Stop Navigating Back on Track or Switch to Hiking Driving the option you can switch to displays Visit the DeLorme Wiki at wiki delorme com for more information The latest version of the User Manual is always available for download The Compass Page ...

Page 37: ...e Activities Page on page 17 To reset the trip information Use the Reset Trip Info option to reset the trip values speed information elevation and the device odometer Track recording is not reset If you want to keep track of all your travels on your device clear the Device Odometer check box before you reset your information From the Trip Info Page go to MENU Reset Info To reset an option select t...

Page 38: ...ld notes and pick your next cache For more information about all of these features see The Geocaches Page section starting on page 53 Route Options When navigating use Route Options to stop navigating get back on track or switch the route type For more information about route options see Route Settings on page 61 Visit the DeLorme Wiki at wiki delorme com for more information The latest version of...

Page 39: ...ate the pairing process go to MENU Connect SPOT Communicator To disconnect a paired device go to MENU Disconnect SPOT Communicator At the top of the SPOT Communicator Page a message displays the current status of the SPOT Communicator Tip If you need to turn the wireless antenna off go to Settings Wireless and clear the Wireless Antenna On check box Sending Messages Your SPOT account at findmespot...

Page 40: ...s are sent to your SPOT account for logging or to online maps A casual message has the least priority Message Types You can send a pre defined message or you can create a new text message using the optional Type Send service and send it to the contact groups you have set up with your SPOT account You can even share with social network websites Facebook Twitter or Fire Eagle that you ve set up a co...

Page 41: ... notified that you need help SPOT Assist service subscription required Send a pre defined message or create a new Type Send message Help Assist messages are sent using the urgent priority level If a GPS fix is obtained a Help or SPOT Assist message with the GPS position will be sent every five minutes for one hour If the PN 60w loses communication the SPOT Communicator will continue to send messag...

Page 42: ...ss message will be sent every 10 minutes for 24 hours unless canceled You cannot send this type of message when an SOS or Help Assist message is in progress Sending Messages To send a Check in OK Help Assist or SOS message 1 From the SPOT Communicator Page select the mes sage type 2 On the Message Composition page select a contact or group from the Send To drop down list 3 Check in OK and Help Ass...

Page 43: ...remium Geocaching com account to your account at findmespot com before you go into the field This will allow you to log a geocache in near real time from virtually anywhere with the SPOT Communicator For more information see To log a geocache on page 58 Send Progress Page Once you have sent a message the Send Progress page displays information about the message currently in progress When the SPOT ...

Page 44: ... Composition page Casual messages Canceling Check in OK Reference Point Geocache and Track Progress messages cancels the message and begins a three minute timer before the next message can be sent Urgent and Critical messages Canceling Help Assist and SOS messages cancels the message and sends a Cancel Help Cancel SOS or Cancel Help and SOS message For Help Assist and SOS messages the Send Progres...

Page 45: ... your account at findmespot com From the Message History page go to MENU Export Message History You can save the message history on the internal drive or to an SD card in the device To clear message history From the Message History page go to MENU Clear Message History All the messages in the history are cleared and the message waypoint icons are removed from the map Visit the DeLorme Wiki at wiki...

Page 46: ...on to search for a specific location by its name Results are listed alphabetically Narrow a Name search with the Name Contains or Name Begins with options press MENU to access them Then in the Name field type one or more characters that the name begins with or contains the more letters you enter the more relevant your search results are For some search types you can also narrow your search with ad...

Page 47: ...how field is the primary search category You can select the following Show options below each option is a list of information you can change to improve your search results All State Country City Name Find by Name only Recent Finds Shows the ten most recent search results Draw Layers appears only if you have draw layers on the device Name Find by Name only GIS Layers appears only if you have GIS la...

Page 48: ... When you highlight an item in the list the Bearing and Distance info fields display measurements as follows From the GPS position when the device has a GPS fix From the cursor location if you are manually panning or viewing another location From the map center if GPS is turned off To view the results list To view the results use the arrow keypad to scroll through the list or press the IN OUT butt...

Page 49: ...to return to the details page To create a route to a search result You can navigate directly to the search result from your current location For more information about creating and modifying routes see The Routes Page starting on page 61 1 On the details page for the search result select Route 2 On the route details page select Navigate Note When you are creating a route from a geocache details pa...

Page 50: ...aging Waypoint Files Waypoints are managed using GPX files each file can contain up to 1 500 waypoints For more information about GPX files see File Management starting on page 85 Tip Use Find to quickly locate a waypoint in the open waypoint file For more information see The Find Page section starting on page 44 Waypoint List The Waypoints Page displays a list of waypoints from the GPX file open ...

Page 51: ...aypoints you create on the device For more information about files see File Management on page 85 To open the File menu from the Waypoints Page go to MENU File The following options are available New Create a new GPX file and name it When you turn off the device the file will be automatically saved Open View a list of GPX files in internal memory and on the SD card The file location displays at th...

Page 52: ...rmation is available the red map pin is the default symbol To mark a waypoint on the map From the Map Page press Mark to save the waypoint and open a new waypoint details page On the waypoint details page you can do the following Edit the waypoint details Delete the waypoint View the waypoint on the map To return to the waypoint details page press QUIT Create a route to the waypoint For more infor...

Page 53: ...aypoint to the current GPS location From the waypoint details page go to MENU Move to GPS Location When you see the confirmation message select Yes To create a route to a waypoint You can navigate to a waypoint from your current location All driving routes and hiking routes with multiple points are automatically saved For more information about creating and modifying routes see The Routes Page sta...

Page 54: ...ge a waypoint From the waypoint details page go to MENU Average Waypoint When the device has recorded the number of readings you want press ENTER Tip Average your location during multiple visits at different times of the day to get the best results Always place the device in the same location to average the waypoint Projecting a Waypoint You can project a waypoint at a new location by providing th...

Page 55: ...s each file can contain up to 1 500 geocaches and child waypoints For more information about GPX files see File Management on page 85 Tip Use Find to quickly locate a geocache in the open waypoint file For more information see The Find Page section starting on page 44 Geocache List The Geocaches Page displays a list of active waypoints from the GPX file open on your device The file name and the nu...

Page 56: ...ect how the geocache is displayed on the device For example if you choose a waypoint symbol the geocache will move to the Waypoints Page and if you change a symbol from a not logged to a logged symbol type it will move from the Show Not Logged to the Show Logged list File Menu Use the File menu to manage geocache waypoint GPX files stored in the PN 60 s internal memory or on an SD card in the devi...

Page 57: ...PN 60 You must be a premium member of Geocaching com to create pocket queries To purchase Cache Register visit our website delorme com See the program s Help for more information on how to use Cache Register e Cache Register is compatible with Apple computers To use the Send to GPS plugin With the DeLorme Send to GPS plugin you can send one geocache at a time to a PN 60 You must be logged in to Ge...

Page 58: ...the cache ID the size the difficulty and terrain as well as the full description the hint and the full log Note loc files do not include comments From the geocache details page go to MENU View Comment Details Note When navigating to a waypoint or geocache the View Comment Details option is also available from the Map Compass Trip Info and Directions pages The comment for the most recently viewed p...

Page 59: ...che the GPS status coordinates elevation number of readings at the location and estimated accuracy display Multiple readings improve the positional accuracy of the geocache The estimated accuracy number decreases as the accuracy improves To average a geocache From the geocache details page go to MENU Average Geocache When the device has recorded the number of readings you want press ENTER Tip Aver...

Page 60: ...he field pick a geocache to start with and then use the PN 60 to navigate to log and write field notes for one geocache or a series of geocaches To navigate to a geocache Navigate from your current location to the first geocache on your list Once you log your find the PN 60 finds the next geocache for you Routes to geocaches are not saved on the device 1 On the geocache details page for the first ...

Page 61: ...t Enter signature text and press ENTER to open the keyboard Ensure the Include Signature check box is selected to automatically add your signature to all field notes that you create 3 Select Done To view field notes From the Geocaches Page go to MENU View Field Notes to see a list of the caches for which you added a field note To upload field notes You can upload field notes from your device to Ge...

Page 62: ... drive after use if you do not the drive is forcefully ejected and could harm both the device and disrupt other USB drives connected to the computer Visit the DeLorme Wiki at wiki delorme com for more information The latest version of the User Manual is always available for download The Geocaches Page ...

Page 63: ... and hiking route options From the Routes Page press MENU and select Edit Route Settings To edit route settings Select the route option you want to change and then select the new setting Calculation Method Determines the option Hike or Drive to use when you create a route and is the default method when viewing a route that has not been calculated From the drop down list select Hiking or Driving Ba...

Page 64: ...point in your route best when trying to get to the next waypoint by the shortest distance or point back to the route best if you want to follow a specific path Select Direct to Next Waypoint or Back on Course from the drop down list Hiking Route Calc Speed The walking speed that the device uses to calculate a walking route Press ENTER and use the arrow keypad to make changes When you are finished ...

Page 65: ...navigation mode OR If you selected View to hide the route go to MENU Hide Route press QUIT to return to the route details page and then select Hide To begin navigating press QUIT to return to the route details page and select Navigate Tip When you create a direct route from your current GPS location to a single point and navigate to it the route is automatically deleted once you stop navigating To...

Page 66: ... the route details page select Navigate or View To simulate navigation When you simulate navigation track recording is turned off From the route details page go to MENU Simulate Navigation When you see the Simulate Navigation message select OK The Map Page opens and simulates the route You can access the following settings from any default page except the Satellites Page To change the simulation s...

Page 67: ...Details to quickly view the comment for the waypoint or geocache you are navigating to The comment for the most recently viewed point is displayed Log Your Geocache Find When navigating to a geocache use this option to quickly log geocaches write field notes and pick your next cache For more information about these features see The Geocaches Page section starting on page 53 Route Options When navi...

Page 68: ...ime The Opened Track File area on the Tracks Page displays information about a saved track file that you have opened to view Viewing a Track on the Map On the Map Page you can view the active track and one open track file at the same time An open track file is the color set in the track s details see To view details for the open track on page 69 The appearance of the active track is based on your ...

Page 69: ...eached Start Recording a New Track The device saves the track and starts recording a new track Overwrite Points The oldest points on the track are replaced with new points Stop Recording The device stops recording Prompt to Reset Trip Info When this check box is selected the Reset Trip Info page appears when you manually save or clear an active track This synchronizes the Trip Info page with the a...

Page 70: ...ile 3 On the track details page edit the Track name Color and Comments fields To edit a field highlight it and press ENTER Then use the available option drop down list arrow keypad or keyboard to make changes When you are finished editing press ENTER 4 If the Reset Trip Info prompt is turned on edit the check boxes and select Reset Now or press QUIT to exit the page Managing Track Files Saved trac...

Page 71: ...he map on the track details page select View The track displays on the map using the color in the Color field To hide a track on the map if it is showing on the track details page select Hide To follow the open track To follow a saved track open the track file and on the tracks details page select Follow The device creates a route and the Map Page opens in navigation mode To play back the open tra...

Page 72: ...elds Table starting on page 95 To reverse the open track To reverse a track from the track details page go to MENU Reverse Track Name and save the file Reversed is added to the file name Calculating the Area of a Track You can use a track to calculate an area by returning to your starting position If you do not return to your starting position a straight line is used to close the gap For the activ...

Page 73: ...ile Page from the Home Page or from the menu on the Tracks Page The Profile Page shows two views of the track you are profiling Press up or down on the arrow keypad to switch which view is active the crosshair appears on the active view Detailed The upper section of the page shows the section of the track you are viewing The initial view shows the track from its start to the current location for a...

Page 74: ...ck recording must be turned on to view an active profile To view a profile for a saved track from the Profile Page go to MENU File Open Then select the track file you want to profile and press ENTER To close the file go to MENU File Close To switch the track view To quickly change the track view from the active track to the open track file go to MENU File Switch to Profile Active Track Switch to P...

Page 75: ...il When you zoom in or pan to an area on the overview profile the detailed profile matches the highlighted section in the overview Info Fields The info fields that display at the bottom of the Profile Page depend on your activity and whether you are navigating or tracking normal GPS use To access the Info Fields options go to MENU Info Fields For more information see Info Fields on page 11 and The...

Page 76: ...overhead When the sun is directly overhead in summer months the shadow is very short As winter approaches and the sun travels lower through the sky the shadow indicator becomes longer The graphic on the right shows where the sun moon is currently as it moves overhead from east to west Rise Set The Rise Set fields display the time that both the sun left and moon right will rise and set If the sun o...

Page 77: ...ant to edit Time or Date 2 Press ENTER and use the arrow keypad to make changes When you are finished editing press ENTER To reset the time and date If you change the time and date on the Sun Moon Page you can reset it to the device s time and date From the Sun Moon Page go to MENU Reset Time Date Visit the DeLorme Wiki at wiki delorme com for more information The latest version of the User Manual...

Page 78: ...other than your current GPS location change the map center for example by panning the map or viewing a waypoint Then open the Tides Page from the Home Page The information for the closest tide station displays and the ten tide stations closest to the map location are available in the Tide Current Station drop down list To change the tide station Select the tide station from the Tide Current Statio...

Page 79: ... on the Tides Page you can reset it to the device s time and date From the Tides Page go to MENU Reset Time Date Visit the DeLorme Wiki at wiki delorme com for more information The latest version of the User Manual is always available for download The Tides Page ...

Page 80: ...r for example by panning the map or viewing a waypoint Then open the Hunt Fish Page from the Home Page To change the date You can change the date to see a prediction of the hunting and fishing conditions for a specific day When you view the Hunt Fish Page the Date field is highlighted press ENTER and use the arrow keypad to make changes When you are finished editing press ENTER To reset the date T...

Page 81: ...f Turns off GPS satellite tracking See To turn off GPS on page 19 Demo Mode Turns Demo Mode on or off See To view or hide Demo Mode on page 7 Sleep when Stationary Select the check box to put the device in doze mode when it is stationary for more than 60 seconds Stealth Mode Select this check box to set Sounds to Mute All Backlight Intensity to its lowest level and the Backlight Timer to 5 seconds...

Page 82: ...n the device The device s total capacity for storing waypoints geocaches tracks and routes Display Use the Display options to update the device s color scheme and backlight settings To change display settings From the Settings Page select Display and then select the option you want to change Color Scheme From the drop down list select the color scheme Light Dark or Midnight or Low Light Use Midnig...

Page 83: ...he Connect to Computer options to determine what mode the device is in when you connect it to your computer with the USB cable To change the connection settings From the Settings Page select Connect to Computer and then select the option you want to change When Connected From the drop down list select the connection method the device will use when you connect it to your computer Use GPS Use this o...

Page 84: ... device uses the GPS elevation Auto Calibrate Altimeter Allows the altimeter to automatically calibrate To calibrate the compass or altimeter From the Settings Page go to Compass Altimeter Calibrate select Calibrate Compass or Calibrate Altimeter and then follow the on screen instructions Wireless PN 60w only The wireless options allow you to turn the wireless antenna on and off and to pair your S...

Page 85: ...for Daylight Saving Time Units Use the Units option to set the units of measure for the device To modify the units settings From the Settings Page select Units and then select the option you want to change From the drop down list for each of the options select the unit of measure you want to use Coordinates Primary Degrees Degrees Minutes Deg Min Sec UTM UPS or USNG MGRS Datum Primary Various The ...

Page 86: ...rmation and edit the text area To display the information when you turn on your device select the Display Info at Startup check box The Owner Info screen displays after the Welcome screen About this Device To view the serial number for downloading maps and the build version number for the device s firmware go to Settings About this Device To view license information highlight License and press ENT...

Page 87: ...end GPX files from your desktop to the PN 60 s internal memory or an SD card that is in the device or in an SD card reader When you return from your trip you can send files back to the desktop to keep all your data in sync For more information about Earthmate GPS Sync see the Help in DeLorme Topo North America 9 0 DeLorme Cache Register Use Cache Register to sync Geocaching com Pocket Query GPX fi...

Page 88: ... the track file The Calibrate option is available from the Satellite Page and the Compass Page and is under the Compass Altimeter option on the Settings Page In addition from the Settings Compass Altimeter menu you can enable or disable the electronic compass barometric altimeter and the auto calibrate barometer options or restore the default settings Compass Calibration Calibrate the electronic c...

Page 89: ...ric pressure unrelated to changes in elevation As the elevation adjusts typically in 2 3 minutes Calibrating displays in the bottom right corner of the Satellites Page If you are using the Elevation Barometer info field on any page it displays a red exclamation point Note that the unit settings used in the Known Elevation and Known Pressure fields are from the units set on your device To change th...

Page 90: ...t representative Please note that DeLorme Technical Support does not provide product training DeLorme Customer Service For general questions about returns your order status or problems with shipments phone 800 511 2459 Monday through Friday or send an email to sales delorme com To place additional orders phone 800 561 5105 SPOT Communicator For questions about the device call DeLorme Customer Serv...

Page 91: ...art 1 minute warm start 45 seconds hot start 5 6 seconds Maximum Velocity 1000 knots Advanced high sensitivity tracking algorithms Weak signal tracking down to 159dBm Proprietary Kalman filter for enhanced position accuracy Superior noise rejection for high electromagnetic interference environments Operating temperature range 4ºF to 167ºF 20ºC to 75ºC Storage temperature range 49ºF to 212ºF 45ºC t...

Page 92: ...ence in a residential installation This equipment generates uses and can radiate radio frequency energy and if not installed and used in accordance with the instructions may cause harmful interference to radio communications However there is no guarantee that interference will not occur in a particular installation If this equipment does cause harmful interference to radio or television reception ...

Page 93: ...ion either repair or replace the unit DeLorme reserves the right to either repair or replace the unit with a new or refurbished unit at its sole discretion Such repairs or replacements will be made at no charge for labor or materials however the customer will be responsible for any shipping charges incurred to send the device to DeLorme The repaired or replaced product will be warranted for 90 day...

Page 94: ...rtain jurisdictions Felbridge is a trademark of Monotype Imaging Inc and may be registered in certain jurisdictions Some fonts used are derived from the DejaVu fonts which are derived from Bitstream Vera Copyright 2003 by Bitstream Inc All Rights Reserved Geocaching icons Copyright Groundspeak Inc used with permission Specifications SPOT Communicator Physical Specifications Case IPX 7 waterproof i...

Page 95: ...llows you to evaluate your entire messaging system from the operational condition of the SPOT Communicator to the readiness of those on your contact list See the FAQ section on findmespot com for more information Limited Warranty Spot LLC warrants that your SPOT Satellite Communicator will be free from defects in materials and workmanship for a warranty period of 1 year from the date of purchase I...

Page 96: ...een tested and found to comply with the limits for a Class B digital device pursuant to Part 15 of the FCC Rules Operation is subject to the following two conditions 1 This device may not cause harmful interference and 2 this device must accept any interference received including interference that may cause undesired operation This device complies with the requirements for radio astronomy site avo...

Page 97: ...can change the unit of measure for many info fields the location on the Settings Page for changing the settings is indicated For more information see The Settings Page section on page 79 Info Field Description Back on Course The direction of travel needed to return to the route while continuing in the direction of the destination expressed in degrees Units Bearing Battery Life The percentage of ba...

Page 98: ...rips Units Measure Distance Climbing Profile Page only The cumulative linear distance spent in increasing elevation Units Measure Distance Descending Profile Page only The cumulative linear distance spent in decreasing elevation Units Measure Distance Linear Profile Page only The cumulative linear distance from the start to the point of reference not taking into account distance caused by elevatio...

Page 99: ...tude height above or below sea level based on the GPS reading expressed in distance Units Measure Elevation Maximum The maximum elevation achieved expressed in distance Units Measure Elevation Minimum The minimum elevation achieved expressed in distance Units Measure Elevation Net Gain Profile Page only The net change in elevation from the start to the point of reference expressed in distance Unit...

Page 100: ...lamation point displays Units Bearing Moonrise Moonset The time of day at which the moon will rise and set based on GPS location or current map center Units Time Next Stop The label for the next stop as it appears in the route directions Next Turn The label for the next turn as it appears in the route directions Also displays an arrow showing the direction of the turn route direction information N...

Page 101: ...s Time Time to Finish The calculated time to the route finish based on road classifications and default speed settings Units Time Time to Moonrise set The time remaining until the moon rises and sets based on GPS location or current map center Units Time Time to Next Stop The calculated time to the next stop in the route based on road classifications and default speed settings Units Time Time to N...

Page 102: ... reset Units Time Trip Time Total The total time the GPS has been tracking both moving and stopped Units Time Velocity Made Good May be abbreviated as VMG The component of the current speed that is in the direction of the route destination expressed in distance per unit of time Units Measure and Time Vertical Speed The current rate of vertical travel for the device expressed in distance per unit o...

Page 103: ...tteries Charge 6 Indicator 16 Install 64 Type 6 79 Bearing arrow 32 62 Buttons 8 10 C Compass Bearing arrow 32 62 Calibrate 32 33 82 86 87 Settings 82 Compass Page 32 34 Connect to Computer settings 81 Contact information 88 89 D Data Layering 24 25 Data Management 25 26 Demo Mode 7 79 Directions page 64 Disable turn off GPS 19 79 Display settings 80 81 E Elevation 18 69 71 84 86 Index Index ...

Page 104: ... Geocaches Page 53 60 GPS PN 60 Accuracy 20 Disable Turn off 19 79 Signal 18 20 Settings 79 Status 16 17 GPS SPOT signal 13 GPX files 85 H Home Page 16 Hunt Fish Page 78 Hybrid map 28 I Imagery 23 28 Info Fields Manage 11 12 Table 95 100 K Keyboard 10 11 M Map cursor 21 22 Map Data 24 275 Map Library 26 27 Map Page 21 31 Map Setup 22 24 Map transfer 26 27 84 85 Mark a waypoint 9 47 49 50 85 Measur...

Page 105: ... default device settings 84 Rotate screen 7 80 Routes Create 47 51 57 62 63 Delete 64 Directions 64 Options 65 Reverse 64 Settings 61 62 Simulate 64 View 63 64 Routes Page 61 65 S Satellites Page 18 20 Scale settings 28 SD card 6 81 Search Methods 44 46 Results 46 47 Screenshot 10 81 Sensors 86 88 Serial number 84 Service Plan 89 Set current location 19 Settings Page 79 84 Simulate route navigatio...

Page 106: ...des Page 76 77 Time settings 83 Tracking 12 Tracks Clear 68 Files 68 69 Follow 68 Profile active track 68 Profile open track file 70 Record 67 Reverse 70 Save 68 Settings 67 View on map 66 Tracks Page 66 70 Transfer maps 85 86 Trip Info Page 35 36 U Units settings 83 84 USB Power setting 79 V View comment details 51 56 W WAAS 18 19 79 Warranty PN 60 PN 60w 91 92 SPOT Communicator 94 Waypoints Aver...

Page 107: ...105 Navigate to 50 Project 52 Sort list 49 Symbols 49 View on map 51 Waypoints Page 48 52 Wireless settings 82 Z Zoom in out Map 8 Profile 73 Index ...

Page 108: ...rme supplied Li Ion rechargeable battery You ll find Earthmate PN Series accessories at www delorme com Rechargeable Lithium Ion Battery Pack Caution Use only an Earthmate PN Series Battery Type Risk of explosion if battery is replaced by an incorrect type Dispose of used batteries according to the instructions ...

Page 109: ...neer DeLorme not only embraced new technologies it developed them In the GPS field alone DeLorme has been first to market with GPS for laptops phones and PDAs voice guided navigation aerial imagery on a handheld receiver and now the integration of a handheld GPS with satellite navigation As new advances in GPS continue to emerge count on DeLorme to remain at the forefront of innovation For more in...

Reviews: