background image

25

HOT-WATER CLEANING
(WITH SHAMPOO)

Hot-water cleaning is recommended for heavily
soiled unwaxed hard floors like ceramic tiles,
linoleum or vinyl floors, and tiles in general.
Recommended also for mirrors and windows -
use with the special squeegee attachment. 

CAUTION: never let the steam-generator on
when the tank has run out of water.

Fit your PENTAVAP with the attachment best
suited to the task required. Rotate selector to
the shampoo setting. Your cleaner is now ready
to deliver a powerful jet of hot water-and-
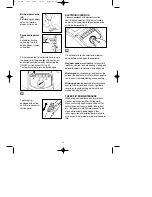
shampoo solution (fig.E).

Plug in your PENTAVAP (green light (18) on)
and depress the suction (19) and hot-water
cleaning (22) buttons on (red light on); the
machine will emit a particular intermittent sound.
This is perfectly normal and indicates that the
machine is working (fig. G). Wait a few seconds,
then proceed to clean. To switch the machine
off, depress the cleaning-lock (20) and suction
(19) buttons.

USEFUL TIPS: 

In case of particularly tough dirt,

proceed as follows:
- begin by dry-vacuuming in accordance with the
instructions contained in the “Dry vacuum”
section;
- set up the machine for extraction cleaning and
proceed to treat the dirty surface as follows;
- rotate selector (5) to the water + shampoo
position;
- depress hot-water button (22) and use the
spray trigger on the handgrip to spray cleaning
solution on the surface to be treated;
- wait one or two minutes for pre-treatment to
soak in;

- depress suction button (19) and go over the
pre-treated area using dry vacuum only (do not
use spray trigger);
- rinse carefully following the instructions in the
next section.

CAUTION: 

when resuming cleaning with hot

water after a few minutes’ pause, aim the nozzle
away for the surface you are cleaning as the
machine may release steam for a few seconds.

RINSING OPERATIONS

After cleaning with the detergent solution, you
may wish to proceed to rinse. Rinsing with water
only will ensure that all traces of detergent are
removed from the treated surface, and is
especially recommended for materials where
detergent residues are hard to get to, like, for
example, fabric and textiles in general.
For rinsing, use the same tools as for extraction
cleaning. Rotate selector (5) to the water-only
position. Plug in your PENTAVAP and depress
the suction (19) and cold-water (21) buttons.
Proceed to clean the surface using the same
technique as for hot- or cold-water cleaning
(fig. D).

When not using the appliance for a fairly long
time, it is advisable to flush out the system with
plain water, no detergent added, before storing
the machine, to avoid blockages due shampoo
residues in the pump. Fill the tank with water
only, and operate the pump depressing the
spray trigger for a few minutes.

G

16/28 GB  3-01-2003  10:36  Pagina 25

Summary of Contents for PENTAVAP

Page 1: ...t 19 Suction ON OFF button 20 Cleaning lock button 21 Cold water cleaning button 22 Hot water cleaning button 23 Steam cleaning button 24 Cleaning on indicator light Tools and accessories 25 Flexible suction hose with handgrip 26 Large triangular clear plastic attachment 27 Small triangular clear plastic attachment 28 Carpet rug brush 29 Window cleaning attachment where provided 30 Hard floor brus...

Page 2: ...it carefully before you use your appliance We are certain that if you follow our suggestions this appliance will give you maximum satisfaction and many years of service PENTAVAP is a multi function appliance ideal for all house cleaning jobs It is the first deep cleaner capable of washing and drying any surface using the best technique for each CONTENTS 1 DRY VACUUM p 19 2 WET VACUUM p 21 3 EXTRAC...

Page 3: ...k steam function Use water only 14 Do not run the appliance over the power cord as this may damage the insulating sheath 15 Do not tug on the power cord to disconnect the appliance from mains outlet 16 Do not shut the power cord in doors or rub against sharp corners Keep away from hot surfaces 17 Do not use the appliance to pick up matches hot ash or burning cigarette ends 18 Do not use to pick up...

Page 4: ...the flexible hose to the inlet port of your cleaner by rotating the hose coupling 17 clockwise until securely attached fig E Connect the solution dispenser by pressing in until it clicks into place DRY VACUUM TOOLS AND ACCESSORIES Attach one end of the extension tubes 39 to the handgrip 10 and the appropriate tool to the other end Carpet floor power brush 28 Effectively picks up dust from hard flo...

Page 5: ...nimum power before switching on the appliance Maximum power recommended for heavy dirt pebbles soil etc on hard flooring matting and deep pile carpets in corners along edges etc Medium power saves energy and reduces the noise of the appliance It is more than enough to remove dust from hard flooring and upholstery Minimum power indispensable for vacuuming over light delicate objects such as light f...

Page 6: ... tubes 39 to the handgrip 10 and the appropriate tool to the other end To make handling the extension tubes easier fit the extra handgrip 31 fig F WET VACUUM TOOLS AND ACCESSORIES Crevice tool 34 Recommended for wet pick up from hard to reach places or to unclog drains Large triangular clear plastic attachment 26 Useful for picking up liquids from floors carpets and rugs When using on hard floors ...

Page 7: ... suction button fig G p 7 CAUTION PENTAVAP can hold up to 8 litres of water in the dirty water tank When the dirty water tank is full a special safety device will shut suction off automatically and the number of motor revolutions will increase At this point switch off the motor disconnect the machine and empty the dirty water tank EMPTYING THE DIRTY WATER TANK To empty the tank disconnect in this ...

Page 8: ...e external unit 6 has two tanks one containing the detergent solution water and shampoo for cleaning with water the other filled with clean water for rinsing or steam cleaning Disconnect the solution injection system 5 and remove the solution tank lifting it out by its handle fig A Fill the tank from the port marked with the tap symbol with plain water until the Max level on the water gauge is rea...

Page 9: ...ampoo position to obtain spray action for the water and shampoo solution fig E Plug in your PENTAVAP green light 18 on and depress the suction 19 and cold water cleaning 21 buttons on red light 24 on fig F At this point your PENTAVAP is ready for extraction cleaning To switch the machine off depress the cleaning lock 20 and suction 19 buttons NOTICE noise level After setting up your machine you ma...

Page 10: ... the spray trigger on the handgrip to spray cleaning solution on the surface to be treated wait one or two minutes for pre treatment to soak in depress suction button 19 and go over the pre treated area using dry vacuum only do not use spray trigger rinse carefully following the instructions in the next section CAUTION when resuming cleaning with hot water after a few minutes pause aim the nozzle ...

Page 11: ...other hard to reach places fig H USEFUL TIP In case of particularly large surfaces the external tank marked with the water shampoo symbol can be filled with water only thus prolonging the autonomy of the machine Conversely if more shampoo is needed a larger percentage can be added to the water IMPORTANT After using your PENTAVAP always drain the solution dispenser by working the dispenser trigger ...

Page 12: ...ver the area with the sponge side of the squeegee then wipe the glass dry by turning the squeegee over and using the rubber scraper side 4 CARE AND MAINTENACE OF THE APPLIANCE CAUTION Always disconnect the appliance from mains outlet before performing any care or maintenance operation After the appliance has been used for extraction cleaning or wet vacuuming the tools and accessories should be rin...

Page 13: ...nerator should be descaled after 8 10 times it has been used for steam cleaning to prevent scale build up which may result in a lowered performance Fill a vessel with a litre of water and 125ml of descaling solution citric acid Remove the liquid injection tubes from the external tank fig D connect solution injection system 5 to its coupling on the motor unit 4 solution injection 2 to its coupling ...

Reviews: