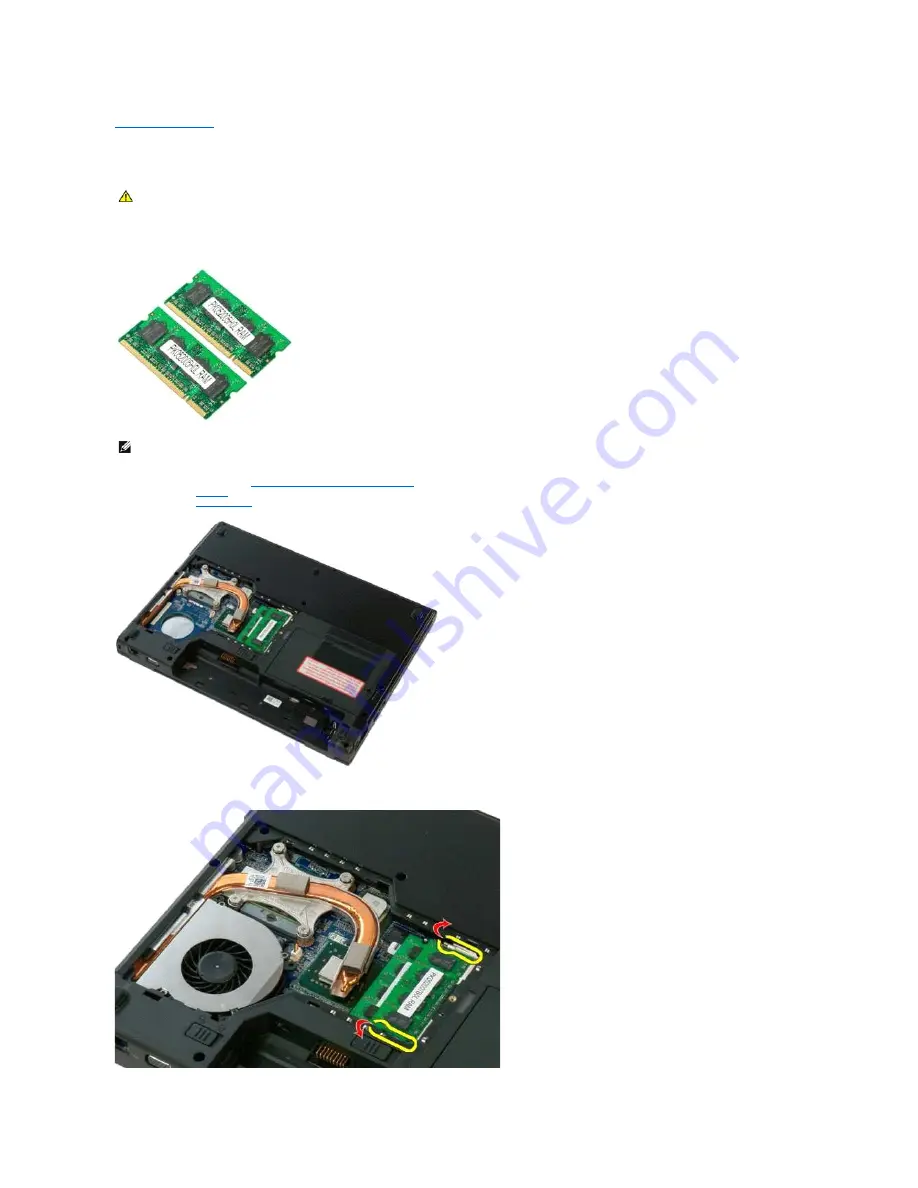
Memory
Dell™ Vostro™ 1320 Service Manual
Removing Memory Modules
1.
Before Working Inside Your Computer
.
2.
3.
4.
For each memory module present in your computer, use your fingertips carefully to spread apart the securing clips on each end of the memory module
connector until the memory module pops up.
WARNING:
Before working inside your computer, read the safety information that shipped with your computer. For additional safety best
practices information, see the Regulatory Compliance Homepage at www.dell.com/regulatory_compliance.
NOTE:
DIMM A is the module closest to the system board. You cannot remove DIMM A until DIMM B is removed. If only 1 DIMM is installed, it should
always be installed in the DIMM A slot. If only 1 DIMM is installed, moving memory from DIMM A to DIMM B will disable AMT (if currently enabled).
Summary of Contents for Vostro 1320
Page 12: ...4 Slide the battery toward the back of the computer and remove ...
Page 14: ......
Page 16: ...5 Remove the bezel from the display assembly ...
Page 19: ......
Page 21: ......
Page 24: ......
Page 27: ......
Page 30: ...12 Lift and remove the display assembly from the computer ...
Page 32: ...6 Lift the fan and remove it from the computer ...
Page 35: ......
Page 40: ......
Page 43: ......
Page 45: ...5 Remove the memory module from the socket ...
Page 47: ...6 Remove the optical drive from the computer ...
Page 51: ...16 Remove the palm rest from the computer ...
Page 53: ...5 Remove the access panel ...
Page 56: ......
Page 58: ...15 Remove the speaker assembly from the computer ...
Page 62: ......
Page 64: ...6 Remove the WLAN card from the computer ...
Page 67: ...14 Remove the data cable from the computer 15 Remove the Bluetooth module from the computer ...
Page 68: ......


