


Operating the Monitor
Dell™
2009W Flat Panel Monitor User's Guide
Using the Front Panel Controls
Using the On-Screen Display (OSD) Menu
Setting the Optimal Resolution
Using the Dell Soundbar (Optional)
Using the Tilt, Swivel, and Vertical Extension
Rotating the monitor
Adjusting the Rotation Display Settings of Your System
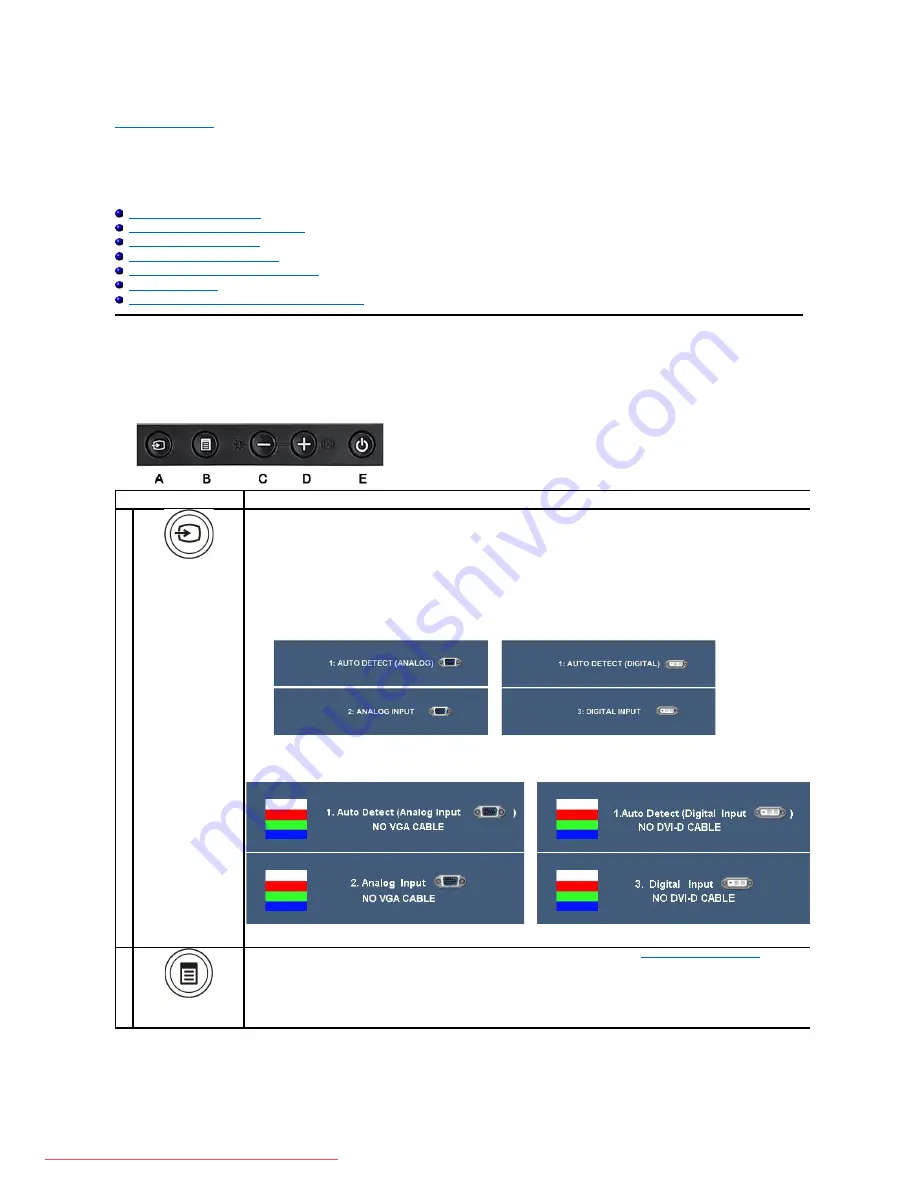
Using the Front Panel
Use the control buttons on the front of the monitor to adjust the characteristics of the image being displayed. As you use these buttons to adjust the controls,
an OSD shows the numeric values of the characteristics as they change.
Front panel Button
Description
A
Input Source Select
Use Input Source Select button to select between two different video signals that may be connected to your monitor.
l
VGA input
l
DVI-D input
If both VGA and DVI cables are connected to one PC, this monitor displays an image automatically as long as a video signal is
present in either VGA or DVI outputs. On a display connected to two PCs, set equal time for both screen savers. The video input
from the movement of the first mouse will activate the display.
As you cycle through the inputs appear the following messages to indicate currently selected input source. It may take 1 or 2
seconds for the image to appear.
If either VGA or DVI-D input is selected and both VGA and DVI-D cables are not connected, a floating dialog box as shown below
appears.
or
or
or
or
B
OSD Menu/Select
Use the MENU button to launch the on-screen display (OSD) and select the OSD Menu. See
Summary of Contents for UltraSharp 2009W
Page 9: ...Downloaded from ManualMonitor com Manuals ...
Page 16: ...Downloaded from ManualMonitor com Manuals ...
Page 17: ...Downloaded from ManualMonitor com Manuals ...
Page 18: ...Downloaded from ManualMonitor com Manuals ...
Page 19: ...Downloaded from ManualMonitor com Manuals ...


