Hard-Disk Drive Removal
1.
Remove the computer cover
.
2.
Remove the front panel as instructed in "
Front Panel
."
3.
Disconnect the DC power cable and EIDE or small computer system interface (SCSI) cable from the drive.
4.
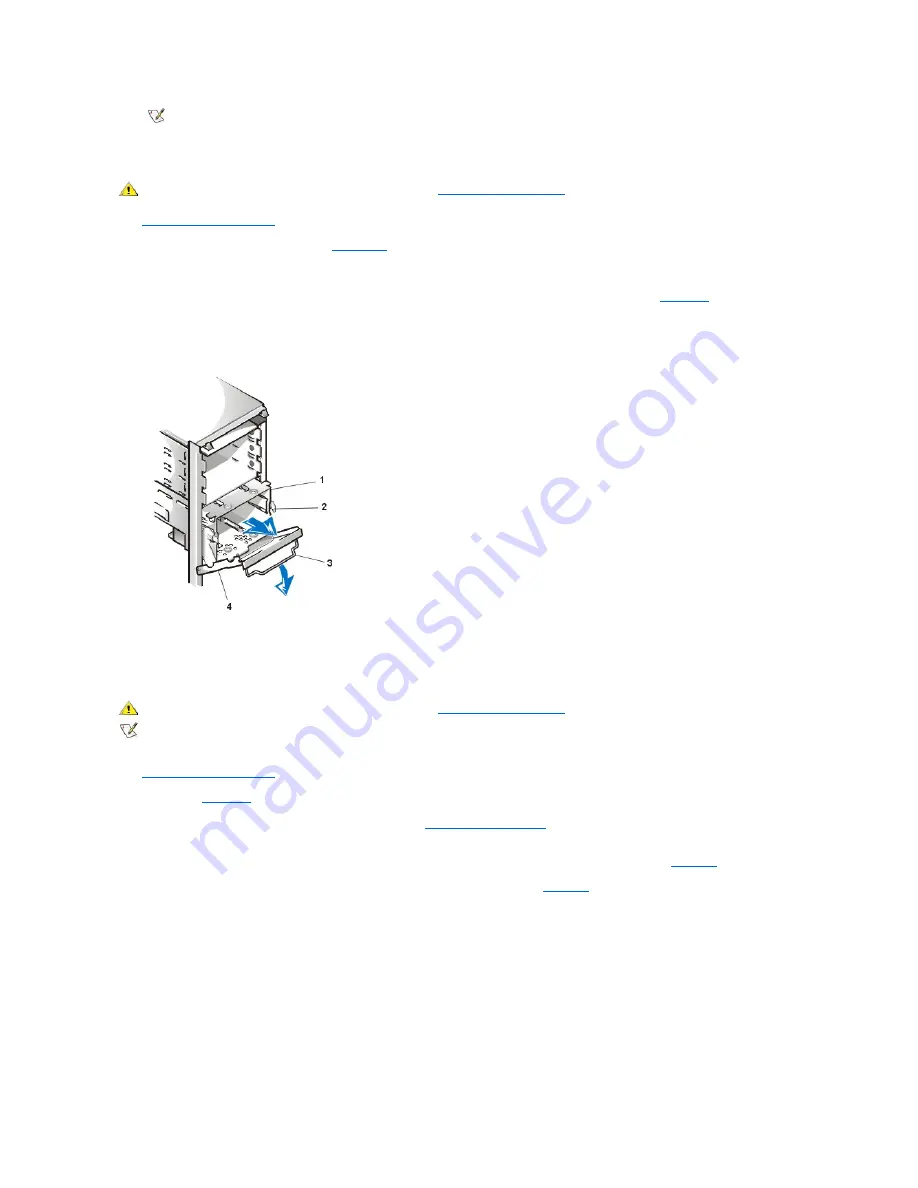
Pull the drive door forward and down until the hard-disk drive bracket is ejected halfway out of the chassis (see
Figure 15
).
5.
Grasp the bracket and pull it completely out of the chassis.
Figure 15. Hard-Disk Drive Bracket Removal
Hard-Disk Drive Installation
To install a hard-disk drive, perform the following steps.
1.
Remove the computer cover
if it is not already off.
2.
Remove the
front panel
if it is not already off.
3.
Remove the drive bracket from the chassis as instructed in "
Hard-Disk Drive Removal
" if it is not already off.
4.
Slide the replacement drive into the slot previously occupied by the drive you removed, oriented so that the connectors on the back of the
drive will face the back of the chassis, with the power connector located above the data/interface connector (see
Figure 16
).
5.
Align the four screw holes of the drive and bracket. Insert and tighten the screws (see
Figure 16
).
Figure 16. Inserting a Hard-Disk Drive in the Bracket
NOTE: Tape drives sold by Dell come with their own operating software and documentation. After you install a tape drive,
refer to the documentation that came with the drive for instructions on installing and using the tape drive software.
CAUTION: Before you remove the computer cover, see "
Precautionary Measures
."
1
Hard-disk drive bracket
2
Hinge tabs
3
Drive door handle
4
Drive door
CAUTION: Before you remove the computer cover, see "
Precautionary Measures
."
NOTE:
If you are installing a replacement hard-disk drive for one containing data you want to keep, make a backup of your important files
before starting this procedure.


