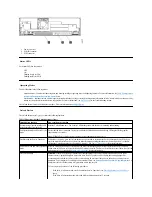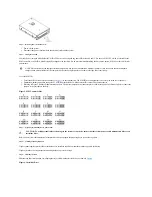
1. Power connector
2. SCSI ID connector
3. SCSI connector
Status LEDs
Each status LED has four modes:
l
OFF
l
ON
l
Flashing slowly (at 2 Hz)
l
Flashing rapidly (at 8 Hz)
Operating Modes
The drive functions in the following modes:
l
Operation mode - functions include using data and cleaning cartridges, reporting errors and updating firmware. For more information, see
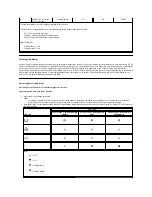
Table 2. Interpretation
of status LEDs in Operation mode (No Errors)
below.
l
Service mode - functions include a drive diagnostic test and methods of saving or erasing drive diagnostic information called a "dump" which can then be used by
trained service personell to troubleshoot a tape problem. For more information, see
Service Mode
in the Troubleshooting section.
The Unload button is used to switch between modes. For more information, see
Unload Button
.
Unload Button
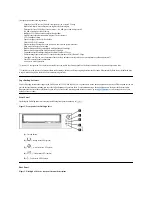
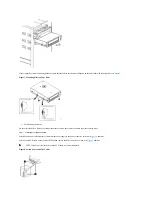
The Unload button
(1)
in
Figure 2
performs the following functions:
Table 1. Functions that the Unload button performs
Unload button function
How to initiate the function
Rewind the tape into the cartridge and
eject the cartridge from the drive
Press the Unload button once. The Activity LED flashes green while the drive is rewinding and unloading.
Exit Operation mode and Enter Service
mode
Ensure that the drive is unloaded. Then, press and hold the Unload button until the Ready LED begins flashing rapidly
(approximately 6 seconds).
Note:
While in Service mode, the drive does not accept commands from the server.
Scroll through the Service Functions
While in Service mode, press the Unload button once per second to increment the Service Functions by one. When you
reach the desired Service Functions, select it by either inserting a cartridge into the drive (Service Function 1) or double-
clicking the Unload button (Service Functions 2, 4, and 5). See
Table 1. Service Mode
for more information.
Exit Service mode and Enter Operation
mode
Press the Unload button once per second until you have scrolled through all Service mode selections. Service mode is
exited when all LEDs are off except for Ready LED which is on solid. The drive will exit Service mode if there is no Unload
button activity for 15 seconds. See
Table 1. Service Mode
for more information.
Force a drive dump
Attention:
If the drive detects a permanent error, it automatically forces a drive dump (also known as a save of the
firmware trace). Captured dump data is placed in drive RAM. If you force a drive dump, the existing dump will be
overwritten and it will be lost. After you force a drive dump, do not turn off the power to the drive or you may lose the
dump data. To permanently save a dump to non volatile memory, see
Executing Service Function 4: Copy dump to flash
. A
dump that is saved to flash memory will persist thru a drive power cycle.
To force a dump, choose one of the following procedures:
l
If the drive is in Service mode, scroll to and select Service Function 2 (see
Executing Service Function 2: Force
dump
).
l
If the drive is in Operation mode, press and hold the Unload button for 12 seconds.
Summary of Contents for PowerVault LTO-3-060
Page 32: ......


