


Dell PowerConnect W-6000M3 Controller Module
| Installation Guide
9
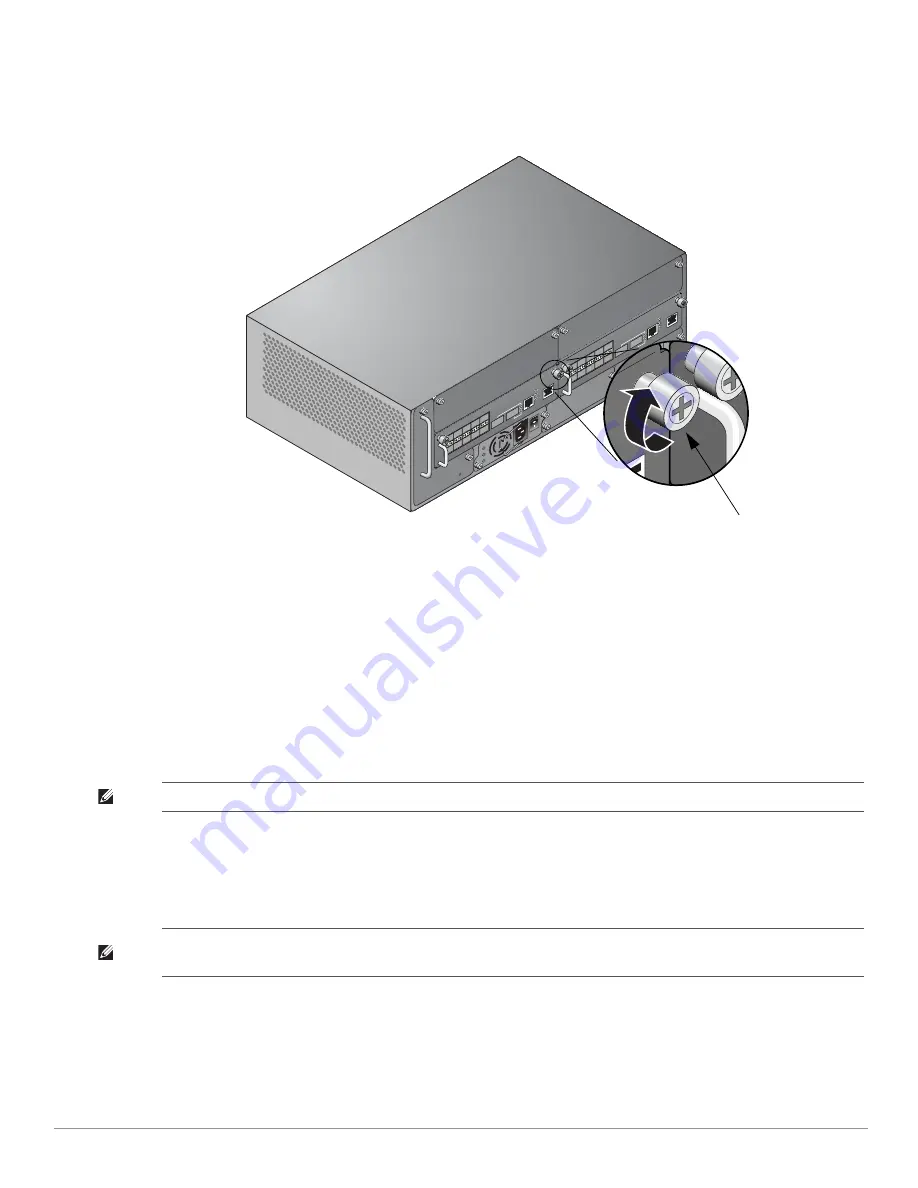
5. Secure the W-6000M3 to the W-6000 by tightening down the two captive screws using a #2 Phillips
screwdriver (see
). Turn the captive screws clockwise until the screws are hand tight. Do not over-
tighten the screws.
Figure 8
Securing an W-6000M3
Initial Setup and Network Connectivity
Once the physical installation is complete, run the initial setup on the W-6000M3 to configure the IP address of
the module (referred to as the controller in ArubaOS documentation) and other basic system information. For
complete details and instructions, refer to the
Dell PowerConnect ArubaOS Quick Start Guide
for the software
version installed on your controller.
Removal
1. Use standard ESD precautions when removing an W-6000M3.
2. Turn the captive screws counter-clockwise to loosen the screws and release the W-6000M3.
3. Slide and remove the W-6000M3 from the W-6000.
4. Install a blank front panel over any unused slots.
arun_0109
Captive Screw
NOTE:
Since the Dell W-6000M3 Controller Module is hot-swappable, the power to the chassis can be ON or OFF.
NOTE:
Dell requires the use of a blank front panel over any unused slots in a Dell W-6000 chassis. The blank front panel is required
for proper cooling and air flow within the W-6000.


