


●
Always purchase genuine batteries from
or authorized Dell partners and resellers.
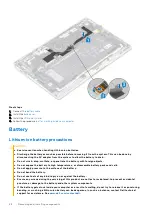
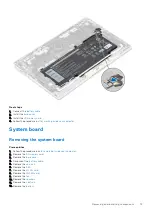
Removing the battery
Prerequisites
before working inside your computer
.
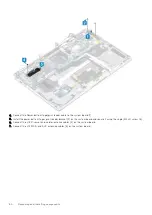
2. Remove the
.
3. Remove the
.
4. Disconnect the
.
5. Remove the
.
Steps
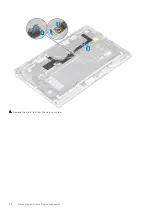
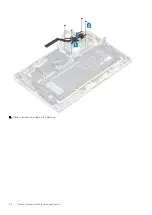
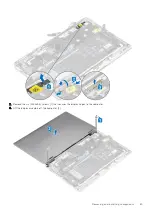
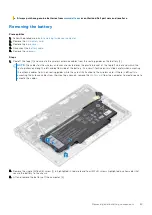
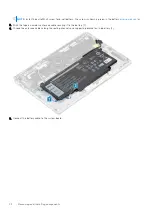
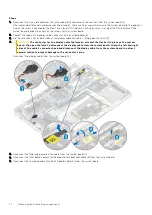
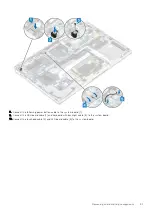
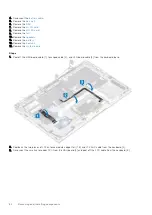
1. Peel off the tape [1] and unroute the wireless antennae cables from the routing guides on the battery [2].
NOTE:
The cables for the wireless antennas are routed over the plastic bracket at the top left corner and within the
routing channels along the left and bottom side of the battery. As a result, technicians must be careful when unrouting
the antenna cables from their routing guides while they are still attached to the wireless card. If there is difficulty in
unrouting the antenna cables from their routing channels, remove the
from the computer to create space to
unroute the cables.
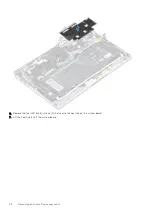
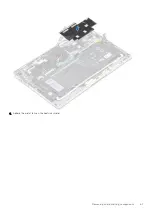
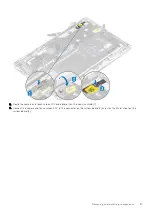
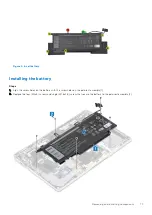
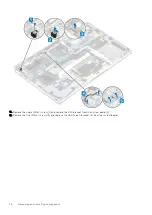
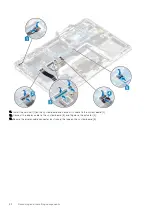
2. Remove the single (M1.6x4.5) screw [1] in highlighted in red circle and four (M2x3) screws highlighted in yellow color that
secure the battery to the chassis.
3. Lift and remove the battery off the computer [2].
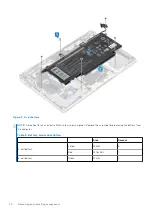
Removing and installing components
69
Summary of Contents for Latitude 7400 2-in-1
Page 24: ...4 Pry along the left right and bottom edges of the base 24 Removing and installing components ...
Page 43: ...5 Place the metal shield on the WWAN card Removing and installing components 43 ...
Page 51: ...8 Adhere the Mylar sheet on the system board Removing and installing components 51 ...
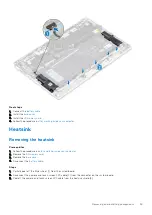
Page 56: ...4 Remove the metal foil from the heatsink shield 56 Removing and installing components ...
Page 57: ...5 Remove the heatsink shield from the system board Removing and installing components 57 ...
Page 60: ...3 Place the heatsink shield on the heatsink 60 Removing and installing components ...
Page 61: ...4 Adhere the metal foils on the heatsink shield Removing and installing components 61 ...
Page 87: ...8 Lift the keyboard off the palmrest assembly Removing and installing components 87 ...


