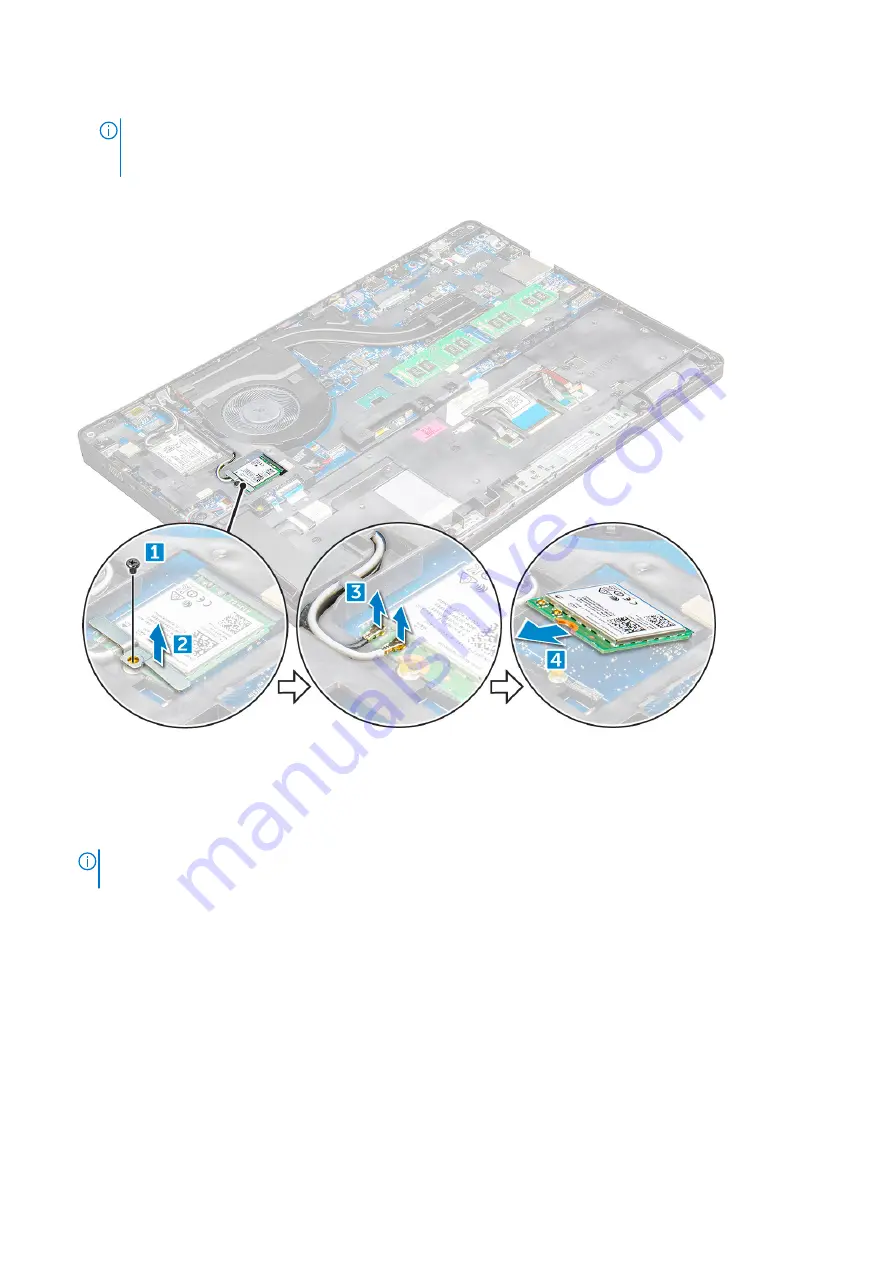
c. Disconnect the WLAN cables from the connectors on the WLAN card [3].
NOTE:
The WLAN card is held in place with an adhesive foam spacer. When removing the wireless card from the
system, make sure the adhesive pad stays on the system board/chassis frame during the prying process. If the
adhesive pad is removed from the system along with the wireless card, adhere it back to the system.
d. the WLAN card to release it from the [4].
Installing the WLAN card
1. Insert the WLAN card into the slot on the .
2. Route the WLAN cables through the routing channel.
NOTE:
When installing the display assembly or chassis frame onto the system, the wireless and WLAN antennas must
be routed correctly into the routing channels on the chassis frame.
3. Connect the WLAN cables to the connectors on the WLAN Card.
4. Place the metal bracket and tighten the M2x3 screw to secures the WLAN card to the .
5. Install the:
a.
b.
After working inside your system
.
18
Disassembly and reassembly


