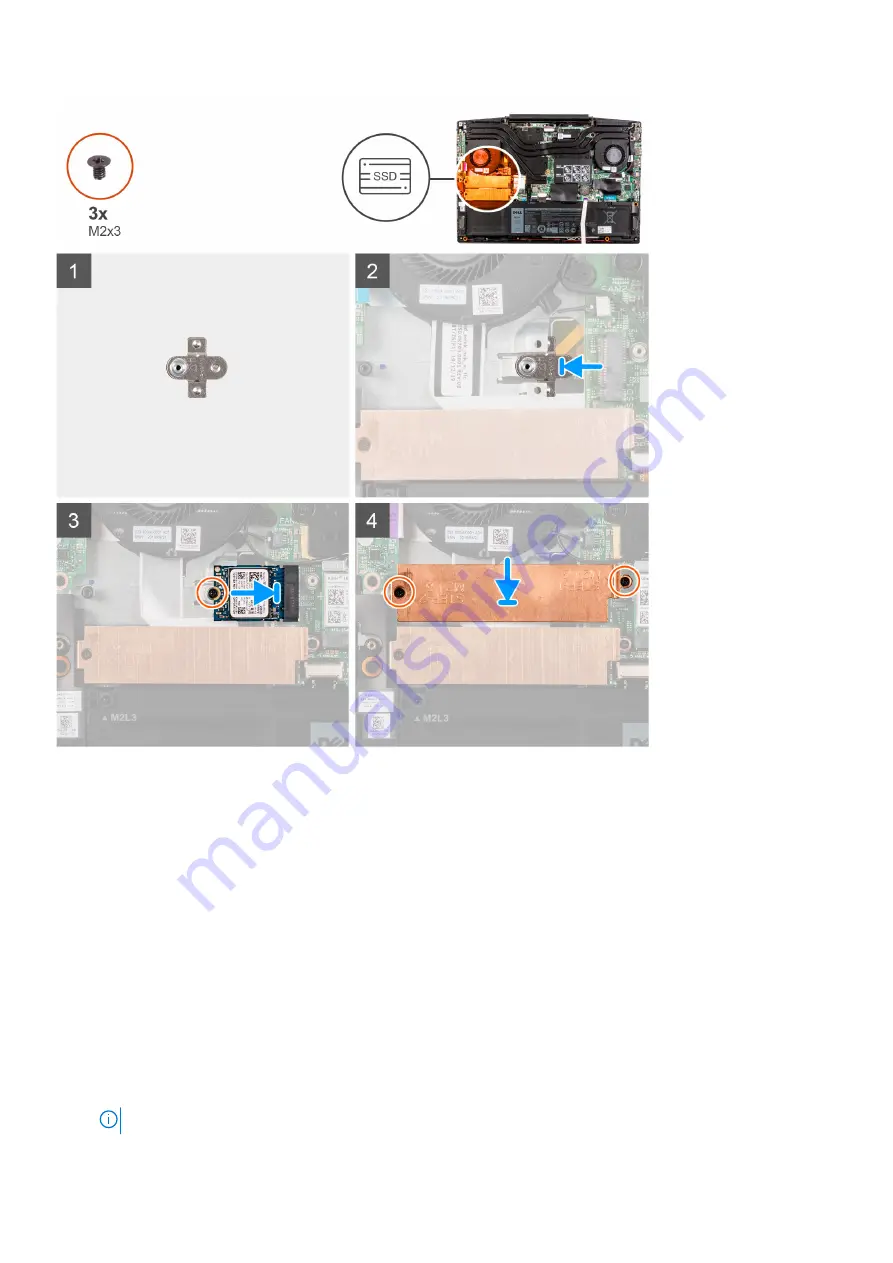
Steps
1. Slide the solid-state drive mounting bracket into the slot on the palm-rest assembly, if it is not installed.
2. Align the notches on the solid-state drive with the SSD1 slot on the system board.
3. Slide the solid-state drive into the SSD1 slot on the system board.
4. Replace the screw (M2x3) that secures the solid-state drive to the palm-rest and keyboard assembly.
5. Place the solid-state drive bracket on the solid-state drive.
6. Align the screw holes on the solid-state drive bracket with the screw holes on the system board and the palm-rest and
keyboard assembly.
7. Replace the two screws (M2x3) that secure the solid-state drive bracket to the system board and the palm-rest and
keyboard assembly.
Next steps
1. Install the
.
After working inside your computer
.
3. Verify if the storage device is installed correctly:
a. Turn on or restart your computer.
b. Press F2 when the Dell logo is displayed on the screen to enter the BIOS setup program.
NOTE:
Alist of storage devices are displayed under the
System Information
in the
General
group.
Removing and installing components
19


