19" LCD Color Monitor
Dell E1909Wc
7
3. Operation instructions
3.1
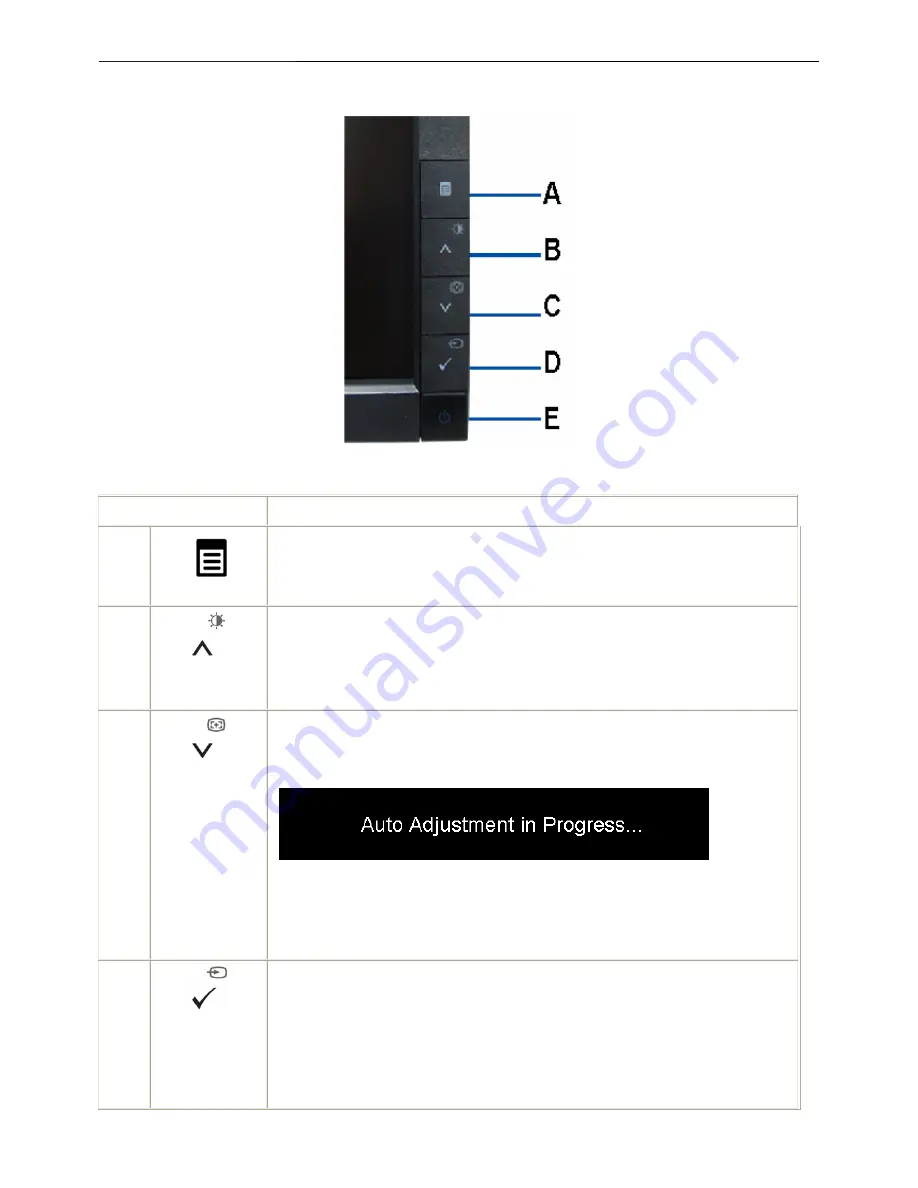
Control Buttons
Use the buttons on the front of the monitor to adjust the image settings.
Front panel Button
Description
A
Menu
Use the MENU button to launch the on-screen display (OSD) and select the OSD
Menu.
B
Brightness&Con
trast /Adjust UP
Use this button to directly access the "Brightness/Contrast" menu or to increase the
values of the selected menu option.
C
Automatic
Adjust /Adjust
Down
Use Auto Adjust to activate automatic setup/adjustment or to decrease the values of
the selected menu option. The following dialog appears on a black screen as the
monitor self-adjusts to the current input:
Auto Adjustment allows the monitor to self-adjust to the incoming video signal. After
using Auto Adjustment, you can further tune your monitor by using the Pixel Clock
(Coarse) and Phase (Fine) controls under Image Settings.
D
Input Source
Select/Select
Use this button to select the input source or select an OSD menu option. Use the
Input source button to select one of the two different video signals that may be
connected to your monitor:
•
VGA
input
Summary of Contents for E1909Wc
Page 22: ...19 LCD Color Monitor Dell E1909Wc 22 ...
Page 23: ...19 LCD Color Monitor Dell E1909Wc 23 4 5 2 Appearance inspection specification ...
Page 24: ...19 LCD Color Monitor Dell E1909Wc 24 4 5 3 Outside dimension specification ...
Page 33: ...19 LCD Color Monitor Dell E1909Wc 33 The panel ...
Page 41: ...19 LCD Color Monitor Dell E1909Wc 41 8 PCB Layout 8 1 Main Board ...
Page 42: ...19 LCD Color Monitor Dell E1909Wc 42 ...
Page 43: ...19 LCD Color Monitor Dell E1909Wc 43 8 2 Power Board ...
Page 44: ...19 LCD Color Monitor Dell E1909Wc 44 8 3 Key Board ...
Page 57: ...19 LCD Color Monitor Dell E1909Wc 57 12 Exploded View E ...


