6
3. Operation instructions
3.1 General Instructions
Press the power button to turn the monitor on or off. The other control buttons are located at front panel of the
monitor. By changing these settings, the picture can be adjusted to your personal preferences.
-
The power cord should be connected.
-
Connect the video cable from the monitor to the video card.
-
Press the power button to turn on the monitor, the power indicator will light up.
3.2 Control Buttons
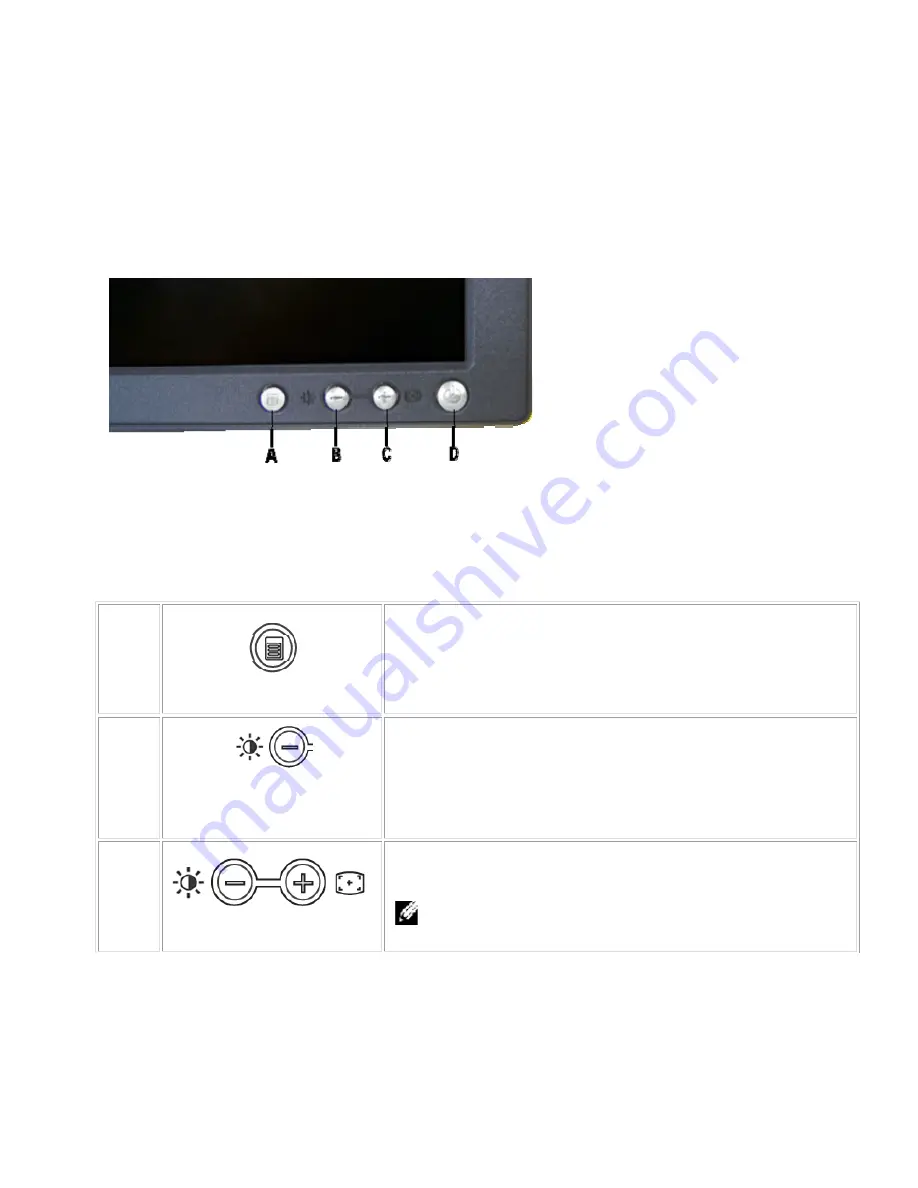
A
MENU
The 'MENU' button is used to open the on-screen display (OSD), select
function icons, exit from menus and sub-menus, and to exit the OSD.
B
Brightness/Contrast Hot Key
Use this button for direct access to the 'Brightness' and 'Contrast' control
menu.
B C
-
And + buttons
Use these buttons to adjust (decrease/increase ranges) items in the OSD.
Note:
you can activate automatic scroll feature by pressing
and holding or - button.
A
Menu button
B
Brightness / Contrast Hotkey and - button
C
Auto Adjust and + button
D
Power On/Off button with LED Indicator
Summary of Contents for E156FPc
Page 17: ...Dell E156FPc 17 5 Block Diagram 5 1 Monitor Exploded View ...
Page 21: ...Dell E156FPc 21 5 3 2 Inverter Power Board ...
Page 34: ...Dell E156FPc 34 8 PCB Layout 8 1 Main Board ...
Page 35: ...Dell E156FPc 35 ...
Page 36: ...Dell E156FPc 36 8 2 Inverter Power Board ...
Page 37: ...Dell E156FPc 37 ...
Page 38: ...Dell E156FPc 38 ...
Page 50: ...Dell E156FPc 50 b Click the Select Chip button and choose the type you will program ...
Page 52: ...Dell E156FPc 52 d Select the communication Setting Port Name e Click the ConNect button ...
Page 68: ...Dell E156FPc 68 15 Definition of Pixel Defects 15 1CLAA150XP01 ...


