background image

Clearing jams from the standard exit bin

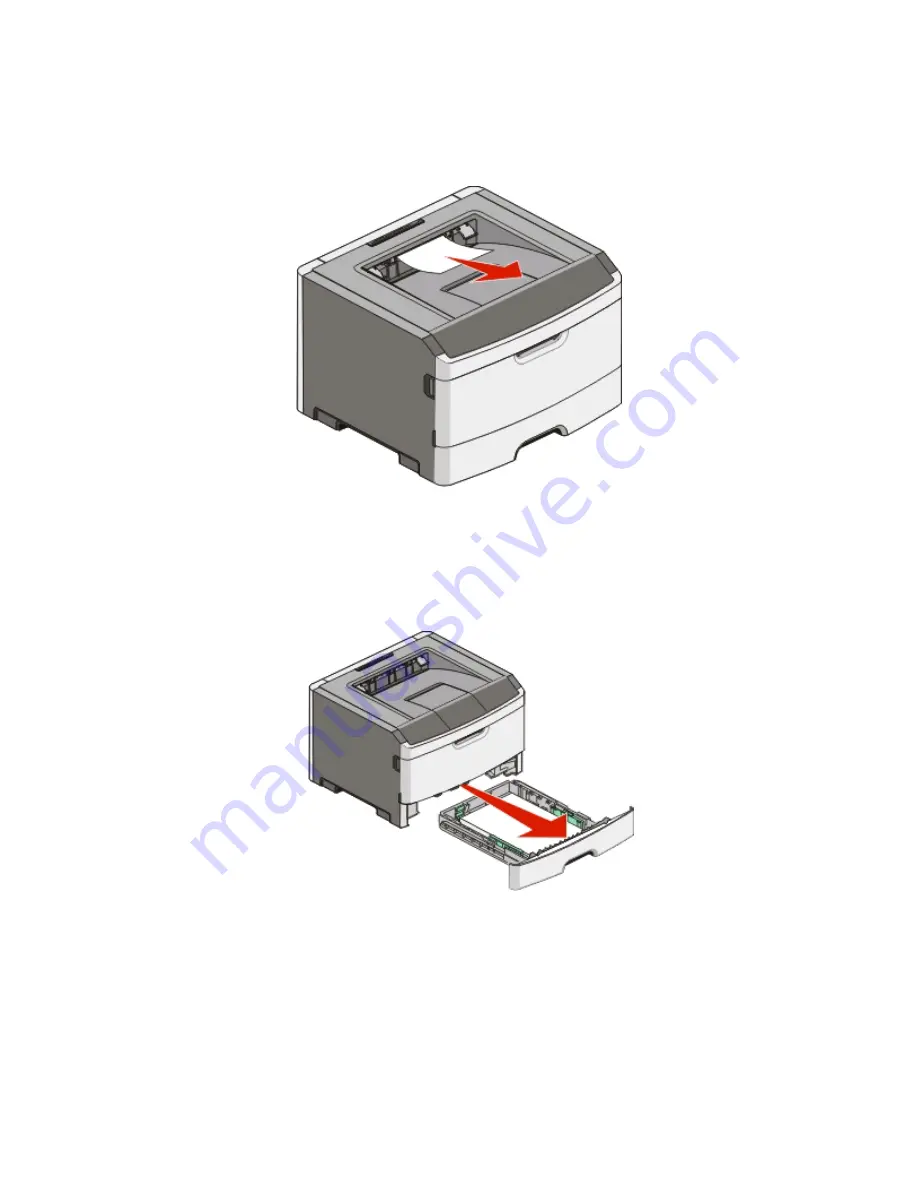
A paper size that is not supported for duplex printing can jam the standard exit bin.

To remove the jam, gently pull the sheet straight out of the standard exit bin.

Clearing jams from Tray 1

To see whether paper is jammed in or behind Tray 1, the standard tray:

1

Remove Tray 1.

Clearing jams

104

Summary of Contents for 2230

Page 1: ...Dell 2230d Laser Printer User s Guide November 2008 www dell com support dell com ...

Page 2: ...marks used in this text Dell the DELLlogo andDellTonerManagementSystem aretrademarksofDellInc MicrosoftandWindowsareregisteredtrademarksofMicrosoftCorporation Other trademarks and trade names may be used in this document to refer to the entities claiming the marks and names of their products Dell Inc disclaims any proprietary interest in trademarks and trade names other than its own ...

Page 3: ...tings menu 24 General Settings menu 24 Setup menu 26 Finishing menu 27 Quality menu 29 PostScript menu 30 PCL Emul menu 30 Using the Finishing menu 32 Additional printer setup 33 Installing internal options 33 Accessing the system board to install internal options 33 Installing a memory card 34 Installing hardware options 36 Installing a 250 or 550 sheet drawer 36 Printing the printer settings con...

Page 4: ...Paper capacities 64 Paper characteristics 64 Unacceptable paper 65 Selecting paper 66 Selecting preprinted forms and letterhead 66 Using recycled paper and other office papers 66 Storing paper 67 Supported paper sizes types and weights 67 Paper types and weights supported by the printer 67 Paper sizes supported by the printer 68 Setting up for local printing 70 Windows 70 Installing the Printer Dr...

Page 5: ...ard stock 83 Printing a booklet 84 Printing information pages 84 Printing the menu settings page 84 Printing the print quality test pages 84 Canceling a print job 85 Maintaining the printer 87 Ordering supplies 87 Printer attached locally to a computer 87 Cleaning the exterior of the printer 87 Storing supplies 87 Conserving supplies 88 Extending the life of your toner cartridge 88 Replacing suppl...

Page 6: ... not print 110 Multiple language PDFs do not print 111 Job takes longer than expected to print 111 Job prints from the wrong tray or on the wrong paper 111 Incorrect characters print 111 Tray linking does not work 112 Large jobs do not collate 112 Solving option problems 112 Option does not operate correctly or quits after it is installed 112 Drawers 113 Memory card 113 Solving paper feed problems...

Page 7: ...rs on the page 119 Toner rubs off 120 Toner specks 120 Transparency print quality is poor 120 Streaked horizontal lines 121 Streaked vertical lines 121 Solid black or white streaks appear on transparencies or paper 122 Appendix 124 Dell Technical Support Policy 124 Contacting Dell 124 Warranty and Return Policy 125 Index 126 Contents 7 ...

Page 8: ...8 ...

Page 9: ...hen you set it down CAUTION POTENTIAL INJURY Do not twist bind crush or place heavy objects on the power cord Do not subject the power cord to abrasion or stress Do not pinch the power cord between objects such as furniture and walls If the power cord is misused a risk of fire or electrical shock results Inspect the power cord regularly for signs of misuse Remove the power cord from the electrical...

Page 10: ...ith its basic features or parts 1 Front door release button 2 Paper stop 3 Standard exit bin 4 Printer control panel 5 System board door 6 Standard 250 sheet tray Tray 1 7 Manual feeder door 8 Front door The following illustration shows the printer back with its basic features or parts Learning about the printer 10 ...

Page 11: ... Parallel port 4 Printer power cord socket 5 Power button On Off switch 6 Locking device Configured models The following illustration shows the printer configured with an optional 250 sheet drawer Learning about the printer 11 ...

Page 12: ... Printer control panel 5 System board door 6 Standard 250 sheet tray Tray 1 7 Optional 250 sheet drawer Tray 2 8 Manual feeder door 9 Front door The following illustration shows the printer configured with an optional 550 sheet drawer Learning about the printer 12 ...

Page 13: ...er control panel 5 System board door 6 Standard 250 sheet tray Tray 1 7 Optional 550 sheet drawer Tray 2 8 Manual feeder door 9 Front door Understanding the printer control panel The printer control panel features six lights and two buttons Learning about the printer 13 ...

Page 14: ...ight 4 Toner light 5 Ready light 6 Continue button 7 Stop button Attaching cables 1 Connect the printer to a computer using USB or parallel cable 2 Connect the power cord to the printer first and then to a wall outlet Learning about the printer 14 ...

Page 15: ...1 USB port 2 Parallel port 3 Printer power cord socket Learning about the printer 15 ...

Page 16: ...s and the Paper Size and Paper Type settings match the trays are automatically linked When one tray is empty the job prints using paper from the linked tray Size Type menu Menu item Description Select Source menu Tray 1 Tray 2 Manual Paper Manual Envelope Notes These menus let you specify the installed paper size and type in the selected tray or manual feeder Only installed trays and feeders are l...

Page 17: ...Set Type menu for Tray 1 Plain Paper Card Stock Transparency Recycled Bond Letterhead Preprinted Colored Paper Light Paper Heavy Paper Rough Cotton Custom Type x Lets you specify the type of paper loaded in Tray 1 Notes Plain Paper is the factory default setting for Tray 1 Ifavailable auser definednamewillappearinsteadofCustomType x Use this menu item to configure automatic tray linking Set Type m...

Page 18: ...he type of envelope being manually loaded Note Envelope is the factory default setting Paper Texture menu In the Paper Texture menu the Select Type and Select Texture features work together to enable you to select the texture for a specific type of paper Menu item Description Select Type Plain Texture Card Stock Texture Transparency Texture Recycled Texture Bond Texture Envelope Texture Letterhead...

Page 19: ...specific type of paper Menu item Description Select Type Plain Weight Card Stock Weight Transparency Weight Recycled Weight Bond Weight Envelope Weight Letterhead Weight Preprinted Weight Colored Weight Light Weight Heavy Weight Rough Weight Custom x Texture Specifies the paper type Select Weight Light Normal Heavy After you select a setting for Select Type the Select Weight feature lets you set t...

Page 20: ...e Rough Cotton Name a Custom Type x and this user defined name displays instead of Custom Type x Notes The Custom Name must be limited to 16 characters Paper is the factory default setting for the Custom Type The custom media type must be supported bythe selected tray or feeder in order for you to print from that source Recycled Paper Card Stock Transparency Envelope Rough Cotton Assign a paper ty...

Page 21: ...n the printer uses the maximum width allowed 8 5 inches is the US factory default setting Inches can be increased in 0 01 inch increments 216 mm is the international factory default setting Millimeters can be increased in 1 mm increments Portrait Height 3 14 17 inches 76 360 mm Sets the portrait height Notes If the height exceeds the maximum then the printer uses the maximum height allowed 14 inch...

Page 22: ...rtSwitch setting is Off NPA Mode On Off Auto Sets the printer to perform the special processing required for bidirectional communication following the conventions defined by the NPA protocol Notes Auto is the factory default setting Changing this setting automatically resets the printer USB Buffer Disabled Auto 3K to maximum size allowed Sets the size of the USB input buffer Notes Auto is the fact...

Page 23: ...the Setup menu if PCL SmartSwitch is set to Off NPA Mode Off Auto Sets the printer to perform the special processing required for bidirectional communication following the conventions defined by the NPA protocol Notes Auto is the factory default setting Changing this setting automatically resets the printer Parallel Buffer Disabled Auto 3K to max size allowed Sets the size of the parallel input bu...

Page 24: ...s turned on and off Parallel Mode 2 On Off Determines whether the parallel port data is sampled on the leading on or trailing off edge of the strobe Note On is the factory default setting Mac Binary PS On Off Auto Sets the printer to process Macintosh binary PostScript print jobs Notes Auto is the factory default setting The Off setting filters print jobs using the standard protocol The On setting...

Page 25: ...int jobs are waiting Print Timeout is available only when using PCL This setting has no effect on PostScript emulation print jobs Timeouts Wait Timeout Disabled 15 65535 Sets the amount of time in seconds the printer waits for additional data before canceling a print job Notes 40 seconds is the factory default setting Wait Timeout is available only when the printer is using PostScript emulation Th...

Page 26: ...ocessingprint jobs PCLemulationusesaPCLinterpreterforprocessingprint jobs The factory default printer language is PCL Emulation Setting a printer language as the default does not prevent a software program from sending print jobs that use another printer language Print Area Normal Whole Page Sets the logical and physical printable area Notes Normal is the factory default setting When attempting to...

Page 27: ...s 1 sided is the factory default setting To set 2 sided printing from the software program for Windows users click File Print and then click Properties Preferences Options or Setup For Macintosh users choose File Print and then adjust the settings from the print dialog and pop up menus Duplex Binding Long Edge Short Edge Defines the way duplexed pages are bound and how the printing on the back of ...

Page 28: ... Tray x Multi Purpose Feeder Specifies the paper source for separator sheets Notes Tray 1 standard tray is the factory default setting Multi Purpose Feeder appears as a value only if it is a supported option on the printer and if Configure MP is set to Cassette N up pages side Off 2 Up 3 Up 4 Up 6 Up 9 Up 12 Up 16 Up Specifies that multiple page images be printed on one side of a sheet of paper No...

Page 29: ...ance Fine Lines with a document open click File Print and then click Properties Preferences Options or Setup for Windows users For Macintosh users choose File Print and then adjust the settings from the print dialog and pop up menus Gray Correction Auto Off Choose whether to apply Gray Correction on printed gray images The Auto setting automatically applies Gray Correction and Off does not Note Of...

Page 30: ...t setting It shows the factory default set of fonts downloaded into RAM Download appears only if downloaded fonts exist It shows all the fonts downloaded into RAM Flash appears only if a flash option containing fonts is installed A flash option must be properly formatted and cannot be Read Write Write or password protected All shows all fonts available to any option Font Name x Lets you view or ch...

Page 31: ... lines that print on each page Notes 60 is the US factory default setting 64 is the international default setting Theprintersets theamount ofspacebetween eachline based onthe Lines perPage PaperSize andOrientationsettings SelectthedesiredPaperSize and Orientation before setting Lines per Page PCL Emulation Settings A4 Width 198 mm 203 mm Sets the printer to print on A4 size paper Notes 198 mm is t...

Page 32: ...Tray Renumber View Factory Def None Displays the factory default setting assigned to each tray drawer or feeder Tray Renumber Restore Defaults Yes No Returns all tray drawer and feeder assignments to the factory default settings Using the Finishing menu UsetheFinishingmenutoadjustsettingsforsuchfeaturesasCollate SeparatorSheets andN up Multipage printing You can use the settings to collate pages t...

Page 33: ...f as well and unplug any cables going to the printer 1 As you face the printer the system board door is on the right side Open the system board door 2 Use the following illustration to locate the appropriate connector Warning Potential Damage System board electronic components are easily damaged by static electricity Touch a metal surface on the printer before touching any system board electronic ...

Page 34: ...ce on the printer before touching any system board electronic components or connectors An optional memory card can be purchased separately and attached to the system board To install the memory card 1 Turn the printer off 2 Access the system board 3 Unpack the memory card Note Avoid touching the connection points along the edge of the card 4 Align the memory card with its connector on the system b...

Page 35: ...y require some force to fully seat the card 7 Ensure that each latch fits over the notch on each end of the card 8 Close the system board door 9 Turn the printer back on 10 In Windows Vista a Click Control Panel b Click Hardware and Sound c Click Printers Additional printer setup 35 ...

Page 36: ...ptions Installing a 250 or 550 sheet drawer An optional drawer attaches under the printer A drawer consists of two parts a tray and a support unit The printer supports one optional drawer you can install a 250 or 550 sheet drawer CAUTION SHOCK HAZARD If you are installing a drawer after setting up the printer turn off the printer and unplug the power cable before continuing 1 Turn the printer off ...

Page 37: ...r back on 9 In Windows Vista a Click Control Panel b Click Hardware and Sound c Click Printers In Windows XP and 2000 a Click Start Control Panel b Double click Printers and Other Hardware c Double click Printers and Faxes 10 Right click the Dell 2230d Laser Printer icon 11 Click Properties 12 Click Install Options 13 Click Ask Printer 14 Click OK 15 Click OK and then close the Printers folder Add...

Page 38: ...To print the printer settings configuration sheet 1 Turn the printer off 2 Open the front door 3 Press and hold as you turn the printer on All the lights cycle 4 Release 5 Close the front door The light sequence representing the home menu appears Home Menu On On On On 6 Press until all the lights cycle The printer settings configuration sheet prints Note The sheet prints only when the home menu li...

Page 39: ...paper 4 Toner 5 Ready 6 Continue 7 Stop The printer control panel features six lights and two buttons The lights can be on off blinking or blinking slowly Light sequence What you can do Service Error Blinking Blinking Blinking Blinking Blinking Blinking Turn the printer off and then on again If the lights are still blinking contact Dell at support dell com Interpreting the printer control panel li...

Page 40: ... Blinking Blinking On Replace the photoconductor kit For more information see Replacing the photoconductor kit on page 91 Ready On green Send a job to print Power Saver On yellow Send a job to print Interpreting the printer control panel lights 40 ...

Page 41: ...ex Trace Ready Slowly Blinking Use Hex Trace to troubleshoot printing problems Busy Blinking Wait or press Flushing Buffer Blinking Blinking Waituntiltheprinterreturnstothe Ready state Interpreting the printer control panel lights 41 ...

Page 42: ...etoclear Canceling job On On On On On On Waitforthelightsequencetoclear Invalid Engine Code On On Press and release To avoid this light sequence in the future ensure that you use a valid code when programming the printer Interpreting the printer control panel lights 42 ...

Page 43: ... return to the Ready state Cartridge region mismatch On On Replace the toner cartridge with one suitable for your region For more information see Replacing the toner cartridge on page 89 Front door is open On Close the front door Interpreting the printer control panel lights 43 ...

Page 44: ... Tray 2 No paper in manual feeder On Load paper in the manual feeder Remove paper from the standard exit bin Blinking Remove printed pages from the standard exit bin and then press and release to clear the light sequence and continue printing Interpreting the printer control panel lights 44 ...

Page 45: ...it life warning Blinking On Press and release to clear the light sequence and continue processing the print job Replace the photoconductor kit For more information see Replacing the photoconductor kit on page 91 The following light sequences show that there is a secondary error code or secondary jam code to read Light sequence What you can do Printer error On On Press twice quickly to see the seco...

Page 46: ... the secondarypaperjamlightsequences on page 50 Understanding the secondary error light sequences When the and lights are on simultaneously press twice quickly to see the secondary error code Printer control panel Lights and buttons 1 Error 2 Jam 3 Load paper 4 Toner 5 Ready 6 Continue 7 Stop Interpreting the printer control panel lights 46 ...

Page 47: ...talling a memory card on page 34 Insufficient memory to collate job On On On Press tocollatetheremaining pages of the job Press to cancel the print job Simplify the page by reducing the amount of text graphics fonts or macros Install additional printer memory For more information see Installing a memory card on page 34 Insufficient memory to support Resource Save feature On Blinking On Install add...

Page 48: ...e printer To avoid this error in the future simplify the print job Reduce the complexity of the page by reducing the amount of text or graphics on the page and deleting unnecessary downloaded fonts or macros Install additional printer memory For more information see Installing a memory card on page 34 Paper size is small On On On On Ensure that the paper you loaded is large enough Clear any paper ...

Page 49: ...h On Blinking On Replace the toner cartridge with one that is suitable for your region For more information see Replacing the toner cartridge on page 89 Invalid refill Change cartridge On Blinking On Replace the toner cartridge For more information see Replacing the toner cartridge on page 89 Interpreting the printer control panel lights 49 ...

Page 50: ...e Replacing the toner cartridge on page 89 Understanding the secondary paper jam light sequences Whenthe and lightsareon apaperjamhasoccurred Pressandrelease twicequicklytodisplaythesecondary jam light sequence which can help pinpoint the site of the jam Be sure to check all areas of the printer to ensure all the paper is removed Once the jam is cleared press to continue printing Printer control p...

Page 51: ...r jam On On On Try one or more of the following Remove Tray 1 Remove the photoconductor kit and toner cartridge unit 201 yy Paper jam On On On Remove the photoconductor kit and toner cartridge unit 202 yy Paper jam On On On Open the front door and then open the rear door Interpreting the printer control panel lights 51 ...

Page 52: ...en the rear door 233 yy Paper jam On Blinking Blinking On Try one or more of the following Remove Tray 1 Openthefrontdoor andthenopentherear door 234 yy Paper jam On Blinking On Try one or more of the following Remove Tray 1 Openthefrontdoor andthenopentherear door Interpreting the printer control panel lights 52 ...

Page 53: ...r more information see Paper sizes supported by the printer on page 68 24x yy Paper jam On On On On Try one or more of the following Remove Tray 1 Remove the photoconductor kit and toner cartridge unit Remove Tray 2 24x yy Paper jam On On On On Try one or more of the following Remove Tray 1 Remove the photoconductor kit and toner cartridge unit Remove Tray 2 Interpreting the printer control panel ...

Page 54: ...nce What you can do to access the jam 251 yy Paper jam On On On On Clear the paper jam from the manual feeder Note For more information see Clearing jams on page 97 Interpreting the printer control panel lights 54 ...

Page 55: ... Print and then adjust the settings from the print dialog and pop up menus Configuring Universal paper settings The Universal Paper Size is a user defined setting that lets you print on paper sizes that are not preset in the printer menus Defining a specific height and width measurement for the Universal paper size in the portrait orientation allows the printer to support the size Specify all of t...

Page 56: ...light sequence appears on the printer control panel Doing so may cause a jam Busy Blinking 2 Squeeze the width guide tabs and then slide them to the sides of the tray The width guides move in unison 3 Squeeze the length guide tabs together and then slide the length guide to the correct positionforthe papersize being loaded Loading paper and specialty media 56 ...

Page 57: ...e A6 size position b Raise the A6 length guide Note The standard tray accommodates only 150 sheets of A6 size paper 4 Flex the sheets back and forth to loosen them and then fan them Do not fold or crease the paper Straighten the edges on a level surface 5 Load the paper stack toward the back of the tray as shown with the recommended print side facedown Note Notice the maximum fill line Do not try ...

Page 58: ...he top edge of the sheet toward the front of the tray Load the letterhead with the design placed facedown 6 Squeeze the width guide tabs on the right guide and slide the width guides to lightly touch the side of the stack Loading paper and specialty media 58 ...

Page 59: ...eets of A6 size paper so the width guides slide farther to the center of the tray Loading the optional 250 or 550 sheet tray Only one optional drawer which includes either a 250 or 550 sheet tray may be attached to the printer at a time Regardless of the number of sheets in the optional tray it is referred to as Tray 2 1 Pull the tray completely out 2 See Loading the standard 250 sheet tray on pag...

Page 60: ... inside the manual feeder door of the printer and can feed only one sheet of paper at a time You can use the manual feeder to quickly print on paper types or sizes that are not currently loaded in the tray 1 Open the manual feeder door Loading paper and specialty media 60 ...

Page 61: ...n contact the paper guides 4 Adjust the paper guides to the paper width Warning Potential Damage Do not force the paper into the feeder Forcing the paper causes jams Using the standard exit bin and paper stop The standard exit bin holds up to 150 sheets of 20 lb paper It collects print jobs facedown The standard exit bin includes a paper stop that keeps paper from sliding out the front of the bin ...

Page 62: ...d Type settings are the same for any trays the trays are automatically linked The Size and Type settings for all trays must be set from the Paper menu To initiate tray linking from a locally connected printer On a Windows computer access the Paper menu through the Local Printer Settings Utility On a Macintosh computer access the Paper menu through the Printer Settings Unlinking trays Unlinked tray...

Page 63: ...ing a Custom Type x name Assigning a Custom Type x name to a tray enables you to link or unlink it Use the same Custom Type x name for each tray that you want to link Only trays with the same custom names assigned will link If the printer is connected to a computer by a USB or parallel cable use one of the following utilities to access the Paper menu and assign a Custom Type depending on your oper...

Page 64: ...upported for occasional use Manual feeder 1 sheet of paper 1 sheet of A6 size paper 1 transparency 1 sheet of card stock 1 envelope Feed paper into the manual feeder only to the point where its leading edgecan contactthepaperguides Donot force thepaper into the feeder Paper characteristics The following paper characteristics affect print qualityand reliability Consider these characteristics when e...

Page 65: ...ction Grain refers to the alignment of the paper fibers in a sheet of paper Grain is either grain long running the length of the paper or grain short running the width of the paper For 60 90 g m2 16 24 lb bond paper grain long paper is recommended Fiber content Most high quality xerographic paper is made from 100 chemically treated pulped wood Thiscontent provides the paper with a high degree of s...

Page 66: ...ight not When in doubt contact the paper supplier Preprinted papers such as letterhead must be able to withstand temperatures up to 230 C 446 F without melting or releasing hazardous emissions Using recycled paper and other office papers Low moisture content 4 5 Suitable smoothness 100 200 Sheffield units or 140 350 Bendtsen units European Note Somemuchsmootherpapers suchaspremium24lblaserpapers 5...

Page 67: ...n unlisted paper size select the closest larger listed size Paper types and weights supported by the printer The printer engine and the duplex path support 60 90 g m2 16 24 lb paper weights The manual feeder supports 60 163 g m2 16 43 lb paper weights Paper type 250 sheet standard tray 250 or 550 sheet optional tray Manual feeder Duplex path Paper Plain Light Heavy Rough Cotton Recycled Custom Bon...

Page 68: ... mm 5 5 x 8 5 in X Universal3 76 2 x 127 mm 3 x 5 in up to 216 x 356 mm 8 5 x 14 in X B5 Envelope 176 x 250 mm 6 9 x 9 8 in X X X C5 Envelope 162 x 229 mm 6 4 x 9 in X X X DL Envelope 110 x 220 mm 4 3 x 8 7 in X X X 7 3 4 Envelope Monarch 98 x 191 mm 3 9 x 7 5 in X X X 9 Envelope 98 x 225 mm 3 9 x 8 9 in X X X 1 A6 is supported only for grain long papers 2 This size setting formats the page for 21...

Page 69: ...mm 9 x 14 in X X X 1 A6 is supported only for grain long papers 2 This size setting formats the page for 216 x 356 mm 8 5 x 14 in unless the size is specified by the software application 3If a paper size you want to use is not listed configure a Universal paper size For more information see Configuring Universal paper settings on page 55 Paper and specialty media guide 69 ...

Page 70: ... Utilities CD launches the installation software automatically 2 When the Drivers and Utilities CD screen appears click Personal Installation Install the printer for use on this computer only and then click Next 3 Select your printer from the drop down menu 4 Select Typical Installation recommended and then click Install 5 Click Finish connect the printer to the computer using a USB or parallel ca...

Page 71: ...s XP Windows Server 2003 Windows 2000 D Drivers Print Win_2kXP where D is the letter of your CD ROM Note After selecting the directory containing your printer drivers you may be prompted for additional files in order to continue installation Insert the operating system CD and then click OK 9 Click Open and then click OK 10 Select the type of driver you want to install PCL HBP or PS in the Manufact...

Page 72: ...SB printer does not appear in the Printer List Ensure that the USB cable is properly connected between the printer and the computer and that the printer is turned on Afterthe printer appears in the Printer List the printer has been set up successfully and you can quit the application Mac OS 9 Creating a Desktop Printer With Desktop Printer Utility 1 Install support for the printer on the computer ...

Page 73: ...rted on many Linux platforms such as Red Hat SUSE DebianTM GNU Linux Ubuntu Red Flag Linux and Linspire Printer software packages and installation instructions are available on the Drivers and Utilities CD All the printer software supports local printing using a parallel connection To launch the installation instructions for Linux 1 Insert the Drivers and Utilities CD If the Drivers and Utilities ...

Page 74: ...settings not available from the printer software for example activating Alarm Control if you want the printer to sound an alarm when it needs attention Note The Local Printer Settings Utility only works when the printer is connected to a computer locally through a USB or parallel cable The Dell Local Printer Setup Utility is installed automatically on your computer when you install the printer sof...

Page 75: ...Buffer Control Page Protect Eco Mode Quiet Mode PCL Emulation PostScript Parallel USB A4 Width Orientation Auto CR After LF Auto LF after CR Lines Per Page Print PS Error Font Priority PCL SmartSwitch PS SmartSwitch Advanced Status Honor Init Protocol Parallel Buffer PCL SmartSwitch PS SmartSwitch USB Buffer Note This utility is not supported in Windows x64 environments Driver Profiler Use theDriv...

Page 76: ...e Dell Printer Alert Utility 1 From the System Tray right click the icon 2 Select Exit To re enable the Dell Printer Alert Utility 1 In Windows Vista default Start menu a Click Programs b Click Dell Printers c Click Dell 2230d Laser Printer In Windows XP and 2000 Click Start Programs or All Programs Dell Printers Dell 2230d Laser Printer 2 Click Printer Alert Utility Installing the Optional XPS Dr...

Page 77: ...der with the setupxps batch file D Drivers xps readme Dell Toner Management System Printing Status Window Note For the Printing Status Window to work properly bidirectional communication support must be in place so the printer and computer can communicate An exception is added to the Windows Firewall to allow this communication The Printing Status window displays the status of the printer Printer ...

Page 78: ...er Supplies dialog box opens 3 If Multiple Printers Found launches select the printer you are ordering the supplies for 4 Follow the instructions on the screen If ordering from the Web click the link under the Order Online heading If ordering by phone call the number that appears under the Order by Phone heading Software Overview 78 ...

Page 79: ...t the paper size f Click OK and then click Print For Macintosh users In Mac OS X a Customize the settings as needed in the Page Setup dialog 1 With a document open choose File Page Setup 2 From the Paper Size pop up menu choose a paper size orcreate a custom size to match the loaded paper 3 Click OK b Customize the settings as needed in the Print dialog 1 With a document open click File Print If n...

Page 80: ...ing in the printer software Do one of the following depending on your operating system For Windows users 1 With a document open click File Print 2 Click Properties Preferences Options or Setup 3 Under the Page Layout tab select 2 sided printing duplex 4 Select Long edge or Short edge 5 Click OK For Macintosh users 1 With a document open choose File Print If necessary click the disclosure triangle ...

Page 81: ... placed facedown The top edge of the sheet with the logo is placed at the front of the tray Duplex two sided printing from trays Printed letterhead design is placed faceup The top edge of the sheet with the logo is placed at the rear of the tray Manual feeder simplex printing Preprinted letterhead design is placed faceup The top edge of the sheet with the logo should enter the manual feeder first ...

Page 82: ... these settings in the Paper menu using a local utility To prevent print quality problems avoid getting fingerprints on the transparencies Before loading transparencies fan the stack to prevent sheets from sticking together Tips on using envelopes Print samples on the envelopes being considered for use before buying large quantities When printing on envelopes Use envelopes designed specifically fo...

Page 83: ...tridgewithadhesive and could voidthe printerandcartridge warranties Do not use labels with exposed adhesive Do not print within 1 mm 0 04 in of the edge of the label of the perforations or between die cuts of the label Be sure adhesive backing does not reach to the sheet edge Zone coating of the adhesive at least 1 mm 0 04 in away from edges is recommended Adhesive material contaminates the printe...

Page 84: ... Printing information pages Printing the menu settings page Print the menu settings page to review the current menu settings and to verify that the printer options are installed correctly To print the menu settings 1 Ensure that the light is on 2 Press The menu settings page prints On the menu settings page Under the Paper Menu check what papers are listed under Custom Types Printing the print qua...

Page 85: ...odetermine thequalityofprinting Ifthereareproblems see Solvingprintqualityproblems on page 114 To return to the home menu press and hold until all the lights cycle To exit the menus turn the printer off Canceling a print job To cancel a print job do one of the following From the printer control panel 1 Press to cancel the current print job 2 Wait for the light to appear before re sending the print...

Page 86: ... 3 From the printer window select the job to cancel 4 From the icon bar at the top of the window click the Delete icon In Mac OS X versions 10 2 through 10 4 1 Choose Applications Utilities and then double click Print Center or Printer Setup Utility 2 Double click the printer icon 3 From the printer window select the job to cancel 4 From the icon bar at the top of the window click the Delete icon ...

Page 87: ...the risk of electric shock when cleaning the exterior of the printer unplug the power cord from the wall outlet and disconnect all cables to the printer before proceeding 2 Remove all paper from the printer 3 Dampen a clean lint free cloth with water Warning Potential Damage Do not use household cleaners or detergents as they may damage the finish of the printer 4 Wipe only the outside of the prin...

Page 88: ...ault setting Paper or specialty media From the Finishing menu you can adjust the N up Multipage Print setting Lets you print two or more pageimages on one side of a sheet Values for N up are2 Up 3 Up 4 Up 6 Up 9 Up 12 Up and 16 Up From the Finishing menu you can select Duplex Lets you print on both sides of a sheet of paper Conserving supplies when printing multiple copies If you need to print sev...

Page 89: ...dge Firmly shake itside to side andfront to back severaltimesto redistributethetoner and thenreinsert itand continue printing When shaking the cartridge no longer improves the print quality replace the toner cartridge Note You can estimate how much toner is left in your cartridge by printing a menu settings page For more information see Printing the menu settings page on page 84 To replace the ton...

Page 90: ...t light for an extended period of time Extended light exposure can cause print quality problems 4 Shake the cartridge in all directions to distribute the toner 5 Install the new toner cartridge by aligning the rollers on the toner cartridge with the arrows on the tracks of the photoconductor kit Push the toner cartridge in as far as it will go The cartridge clicks into place when correctly install...

Page 91: ...ight sequence Light sequences Photoconductor life warning Blinking On Replace photoconductor Blinking Blinking On When you first receive either light sequence you should immediately order a new photoconductor kit While the printermaycontinuetofunctionproperlyafterthephotoconductorkithasreacheditsofficialend of life printquality significantly decreases Note The photoconductor kit is one item only M...

Page 92: ...ing on the toner cartridge handle Note The photoconductor kit and toner cartridge form a unit Place the unit on a flat clean surface 3 Press the button on the base of the photoconductor kit Pull the toner cartridge up and out using the handle 4 Unpack the new photoconductor kit Warning Potential Damage Be careful not to touch the photoconductor drum Doing so may affectthe print quality of future p...

Page 93: ...he unit with the arrows in the printer Push the unit as far as it will go 7 After you replace the photoconductor kit reset the photoconductor counter To reset the counter see the instruction sheet that came with the new photoconductor kit Warning Potential Damage Resetting the photoconductor counter without replacing the photoconductor kit may damage your printer and void your warranty 8 Close the...

Page 94: ...er to another location CAUTION POTENTIAL INJURY Before moving the printer follow these guidelines to avoid personal injury or printer damage Turn the printer off using the power switch and then unplug the power cord from the wall outlet Disconnect all cords and cables from the printer before moving it Lift the printer off of the optional drawer and set it aside instead of trying to lift the drawer...

Page 95: ...allow clearance around it as shown 1 300 mm 12 0 in 2 300 mm 12 0 in 3 200 mm 8 0 in 4 12 7 mm 0 5 in 5 300 mm 12 0 in Shipping the printer When shipping the printer use the original packaging or call the place of purchase for a relocation kit Maintaining the printer 95 ...

Page 96: ...r click Actions Apply Settings Restoring the factory default settings If your printerisconnected to a computerbya USB or parallelcable use the LocalPrinterSettingsUtility for Windows or Printer Settings for Macintosh 1 Open the utility 2 Do one of the following From the Local Printer Settings Utility menu bar click Actions Restore Factory Defaults From Printer Settings click Factory Defaults Warni...

Page 97: ...n the same stack Store the paper in an appropriate environment Do not remove trays while the printer is printing Wait for the light to come on before removing a tray The light sequence for loading paper also signals that the tray may be removed Load paper On Do not load the manual feeder while the printer is printing Wait for the light to come on Push all trays in firmly after loading paper Make s...

Page 98: ...he unit housing the toner cartridge and photoconductor kit 2 Standard exit bin 3 Front door 4 Manual feeder door 5 Standard 250 sheet tray Tray 1 6 Optional tray Tray 2 7 Rear door Understanding jam lights and access locations Thefollowingtableliststhe jamlightsandmessages and provides brief instructions forhowto accesseachjam More detailed instructions follow 200 yy Paper jam On On On Clearing ja...

Page 99: ...emove the photoconductor kit and toner cartridge unit 201 yy Paper jam On On On Open the front door and then remove the photoconductor kit and toner cartridge unit 202 yy Paper jam On On On Open the front door and then open the rear door 231 yy Paper jam Clearing jams 99 ...

Page 100: ... 233 yy Paper jam On Blinking Blinking On Try one of the following Remove Tray 1 Open the front door and then open the rear door 234 yy Paper jam On Blinking On Try one of the following Open the front door and then open the rear door Remove Tray 1 Clearing jams 100 ...

Page 101: ...nking On Remove the jam from the standard exit bin 24x yy Paper jam On On On On Try one of the following Remove Tray 1 Open the front door and then remove the photoconductor kit and toner cartridge unit Remove Tray 2 Clearing jams 101 ...

Page 102: ...51 yy Paper jam On On On On Remove the jam from the manual feeder Clearing jams behind the photoconductor kit and toner cartridge 1 Push the release button and then lower the front door Clearing jams 102 ...

Page 103: ...ductor kit Use the cartridge handle whenever you are holding the cartridge CAUTION HOT SURFACE The inside of the printer might be hot To reduce the risk of injury from a hot component allow the surface to cool before touching 3 Remove the jammed paper Note If the paper is not easy to remove then open the rear door to remove the paper 4 Align and reinstall the unit 5 Close the front door 6 Press to...

Page 104: ... supported for duplex printing can jam the standard exit bin To remove the jam gently pull the sheet straight out of the standard exit bin Clearing jams from Tray 1 To see whether paper is jammed in or behind Tray 1 the standard tray 1 Remove Tray 1 Clearing jams 104 ...

Page 105: ...2 Remove the jammed paper 3 If necessary depress the lever to free the paper and remove the jam 4 Insert the tray 5 Press to continue printing Clearing jams 105 ...

Page 106: ...Clearing jams from Tray 2 To see whether paper is jammed in or behind Tray 2 1 Remove Tray 2 2 Remove the jammed paper Clearing jams 106 ...

Page 107: ...the manual feeder can usually be grasped and pulled straight out If the jam cannot be removed this way check for jammed paper behind the photoconductor kit and toner cartridge unit For more information see Clearing jams behind the photoconductor kit and toner cartridge on page 102 Clearing jams 107 ...

Page 108: ...inter 1 Push the release button and then lower the front door 2 Pull open the rear door The paper may be jammed with one end caught in the standard exit bin CAUTION HOT SURFACE The inside of the printer might be hot To reduce the risk of injury from a hot component allow the surface to cool before touching Clearing jams 108 ...

Page 109: ...3 Remove the jammed paper 4 Close both the front and rear doors 5 Press to continue printing Clearing jams 109 ...

Page 110: ...e properly installed The printer driver settings are correct Once you have checked each of these possibilities turn the printer off wait for about 10 seconds and then turn the printer back on This often fixes the problem Solving printing problems Jobs do not print Try one or more of the following VERIFY THAT THE PRINTER IS READY TO PRINT Ensure that the light is on before sending a job to print CH...

Page 111: ...e or more of the following CHECK THE PAPER SIZE AND PAPER TYPE SETTINGS If the printer is connected to a computer by a USB or parallel cable open the Local Printer Settings Utility for Windows or Printer Settings for Macintosh From the Paper menu ensure that the Paper Size and Paper Type settings match the paper loaded in the trays CHECK THE PAPER TAB SETTINGS IN YOUR OPERATING SYSTEM Open Print P...

Page 112: ...do one of the following CHECK THE PAPER TAB SETTINGS IN YOUR OPERATING SYSTEM Open Print Properties in a Windows operating system or the print dialog in a Macintosh operating system Ensure that the Page layout setting for Collate copies is On or that the Collate check box is selected Note Clearing the Collate check box overrides the setting in the Finishing menu REDUCE THE COMPLEXITY OF THE PRINT ...

Page 113: ... 9 users should make sure the printer is set up in the Chooser Drawers These are possible solutions Try one or more of the following MAKE SURE THE PAPER IS LOADED CORRECTLY 1 Pull the tray completely out 2 Check for paper jams or misfeeds 3 Make sure the guides are aligned against the edges of the paper 4 Insert the tray RESET THE PRINTER Turn the printer off wait about 10 seconds and then turn th...

Page 114: ...en doors Page that jammed does not reprint after the jam is cleared Jam Recovery is set to Off Ifthe printerisconnectedto a computerby a USB orparallelcable openthe LocalPrinterSettingsUtility forWindows or Printer Settings for Macintosh From the Setup menu ensure that Jam Recovery is set to Auto or On Solving print quality problems The information in the following topics may help you solve print ...

Page 115: ...imum stroke width and a graphic for evaluating the print quality Two pages for assessing how well the printer is capable of printing various types of graphics 7 Examine thepagestodetermine thequalityofprinting Ifthereareproblems see Solvingprintqualityproblems on page 114 To return to the Home menu press and hold until all the lights cycle To exit the menus turn the printer off Blank pages Try one...

Page 116: ...o the correct positions for the paper size loaded CHECK THE PAPER SIZE SETTING Ensure that the Paper Size setting matches the paper loaded in the tray Gray background Ifthe printerisconnectedto a computerby a USB orparallelcable openthe LocalPrinterSettingsUtility forWindows or Printer Settings for Macintosh From the Quality menu select a reduced Toner Darkness setting before sending the job to pr...

Page 117: ...THE PAPER GUIDES Move the guides in the tray to the correct positions for the paper size loaded CHECK THE PAPER SIZE SETTING Make sure the Paper Size setting matches the paper loaded in the tray CHECK THE PAGE SIZE SETTING Before sending the job to print specify the correct page size in Print Properties or the software program Paper curl Try one or more of the following CHECK THE PAPER TYPE SETTIN...

Page 118: ...u change these settings THE PAPER MAY HAVE ABSORBED MOISTURE DUE TO HIGH HUMIDITY Load paper from a fresh package Store paper in its original wrapper until you use it CHECK THE PAPER Avoid textured paper with rough finishes CHECK THE PAPER TYPE SETTING Ensure that the Paper Type setting matches the paper loaded in the tray THE TONER CARTRIDGE MAY BE DEFECTIVE Replace the toner cartridge For more i...

Page 119: ...e paper loaded in the tray THE TONER MAY BE LOW When the toner is low light sequence appears or when the print becomes faded order a new toner cartridge THE TONER CARTRIDGE MAY BE DEFECTIVE Replace the toner cartridge For more information see Replacing the toner cartridge on page 89 Skewed print CHECK THE PAPER GUIDES Move the guides in the tray to the correct positions for the paper size loaded C...

Page 120: ...llowing THE TONER CARTRIDGE MAY BE DEFECTIVE Replace the toner cartridge For more information see Replacing the toner cartridge on page 89 THERE IS TONER IN THE PAPER PATH Contact Customer Support Transparency print quality is poor CHECK THE TRANSPARENCIES Use only the recommended transparencies For more information see Tips on using transparencies on page 82 CHECK THE PAPER TYPE SETTING Load the ...

Page 121: ...AR Papercould be caught between the photoconductor kitand the fuser Check the paper patharound the fuserarea CAUTION HOT SURFACE The inside of the printer might be hot To reduce the risk of injury from a hot component allow the surface to cool before touching Clear any paper you see THERE MAY BE EXCESS TONER IN THE PAPER PATH Contact Customer Support Streaked vertical lines Try one or more of the ...

Page 122: ...AY BE EXCESS TONER IN THE PAPER PATH Contact Customer Support Solid black or white streaks appear on transparencies or paper Try one or more of the following ENSURE THAT THE FILL PATTERN IS CORRECT If the fill pattern is incorrect choose a different fill pattern from your software program CHECK THE PAPER TYPE Try a different type of paper Use only the recommended transparencies Ensure that the Pap...

Page 123: ...THE TONER CARTRIDGE MAY BE DEFECTIVE OR LOW ON TONER Replace the used toner cartridge with a new one For more information see Replacing the toner cartridge on page 89 Troubleshooting 123 ...

Page 124: ...Peripherals DellWare ReadyWare and Custom Factory Integration CFI DellPlus Contacting Dell You can access Dell Support at support dell com Select your region on the WELCOME TO DELL SUPPORT page and fill in the requested details to access help tools and information You can contact Dell electronically using the following addresses World Wide Web www dell com www dell com ap Asian Pacific countries o...

Page 125: ...factures its hardware products from parts and components that are new or equivalent to new in accordance with industry standard practices For information about the Dell warranty for your printer refer to the Product Information Guide Appendix 125 ...

Page 126: ...tory defaults restoring using Printer Settings 96 using the Local Printer Settings Utility 96 using the printer control panel 96 Finishing menu 27 using 32 G General settings menu 24 guidelines letterhead 81 I installing printer drivers in Windows 70 in Windows for local printing 70 on Linux for local printing 73 on Mac OS 9 for USB printing 72 on Mac OS X for USB printing 72 installing software L...

Page 127: ...er sizes supported by the printer 68 paper stop using 61 Paper Texture menu 18 paper types duplex support 67 supported by printer 67 where to load 67 Paper Weight menu 19 Parallel menu 23 parallel port 14 PCL Emul menu 30 photoconductor kit replacing 91 PostScript menu 30 Power Saver adjusting 96 print job canceling from Macintosh 85 canceling from the printer control panel 85 canceling from Windo...

Page 128: ...tridge replacing 89 transparencies tips 82 tray linking 63 trays linking 62 unlinking 62 troubleshooting checking an unresponsive printer 110 solving basic printer problems 110 troubleshooting paper feed lights remain on after jam is cleared 114 page that jammed does not reprint 114 troubleshooting print incorrect characters print 111 incorrect margins 117 job prints from wrong tray 111 job prints...

Reviews: