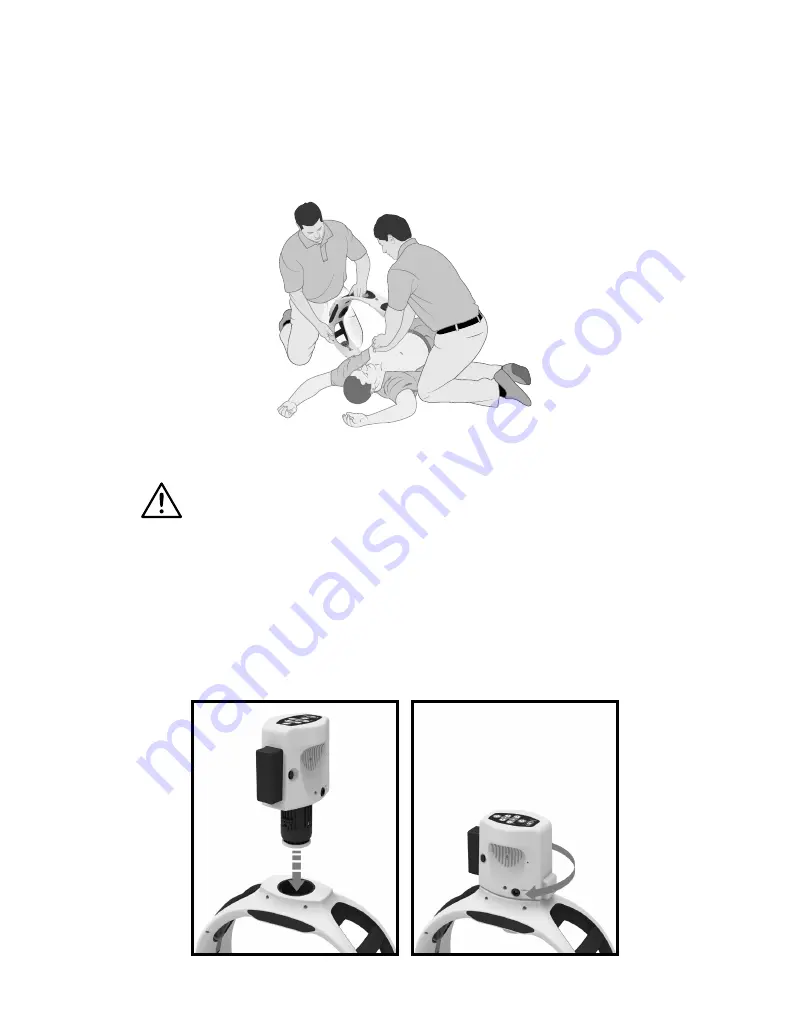
STEP 5)
Place Frame over patient such that the Backboard is aligned with the mounting pins
on the Frame. Push down fi rmly until the Frame latches to the Backboard. Alternatively, attach
the side of the Frame nearest to you to the Backboard and then rotate the Frame to latch to the
opposite side of the Frame. Continue manual CPR compressions while attaching the Frame to
the Backboard.
STEP 6)
Pull up on the Frame to make sure that Frame is securely latched to the Backboard.
WARNING
If patient is too large for the Frame, remove Frame and continue manual CPR
compressions. Do not use the ACC if the Frame cannot be latched to the
backboard.
STEP 7)
Remove Compression Module from case. Check to make sure a Patient Interface Pad
is installed. If not, install a Patient Interface Pad per the instructions in Section 3.7,
“Installing and
Removing the Patient Interface Pad."
Also make sure that a Battery Pack is installed. If not, install
a Battery Pack per the instructions in Section 3.8,
“Installing and Removing the Battery Pack."
STEP 8)
Mount the Compression Module in the Frame by inserting it at approximately 90 degrees
to the Frame and twisting the Module in either direction until it is aligned with the Frame and
locks in place as shown:
Arrival and Setup (continued)
RAC-E1510EN-DN
32
Summary of Contents for RMU-1000
Page 2: ......
Page 6: ...RAC E1510EN DN 6...
Page 8: ...1 2 The Defibtech RMU 1000 ACC 7 6 3 4 5 1 2 13 12 14 15 8 9 10 11 RAC E1510EN DN 8...
Page 12: ...RAC E1510EN DN 12...
Page 28: ...RAC E1510EN DN 28...
Page 50: ...RAC E1510EN DN 50...
Page 54: ...RAC E1510EN DN 54...
Page 64: ...RAC E1510EN DN 64...


