1
2
3
4
5
6
SETUP
COMPLETE
7
8
9
?
STEP 1
A
B
C
D
E
F
G
G
G
H
1
2
3
4
5
6
SETUP
COMPLETE
7
8
9
?
STEP 1
A
B
C
D
E
F
G
G
G
H
QUICK START GUIDE
www.defender-usa.com
13
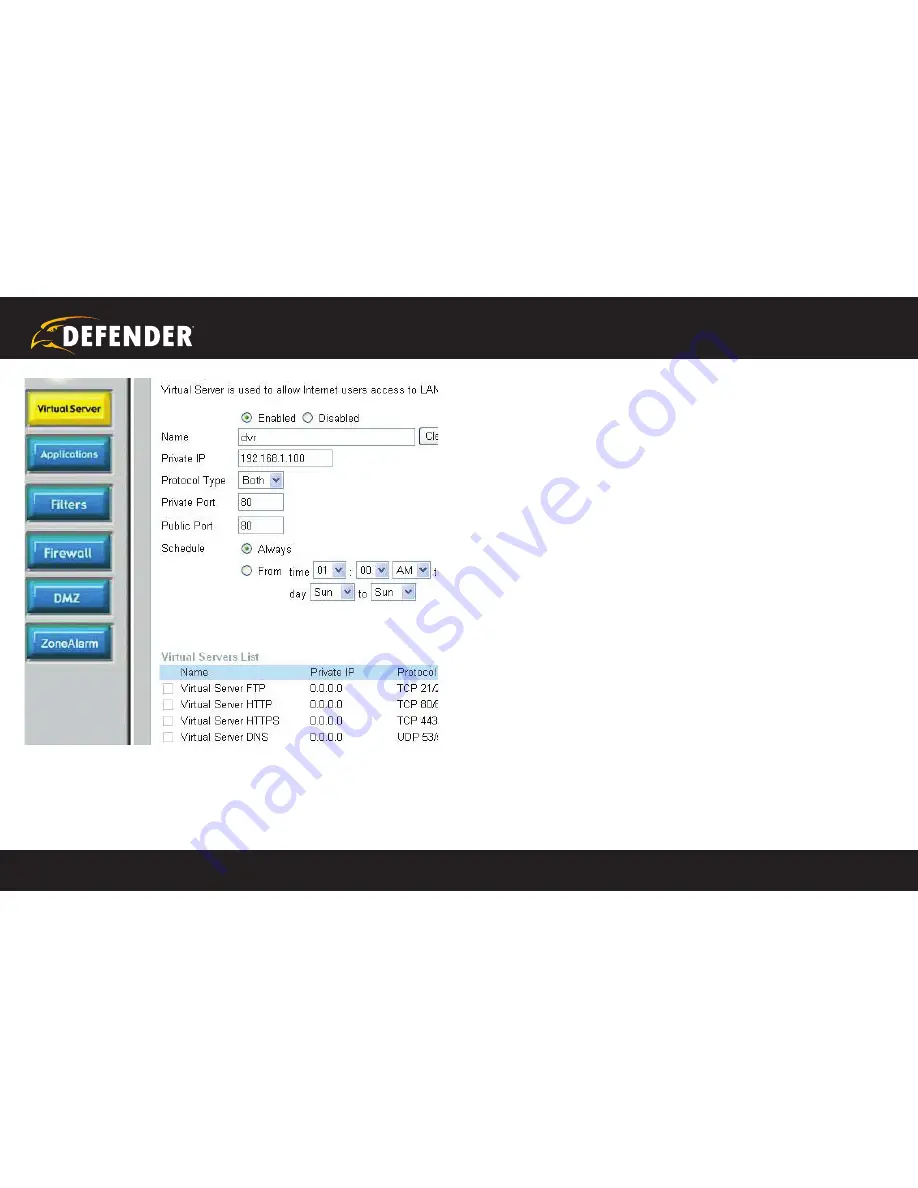
4. Select the Virtual Server tab.
• Enable the Virtual server
• In the Name field type
in “DVR”
• In the Private IP field enter the DVR’s IP address.
• In the Protocol field, select Both (This will enable both TCP
and UDP).
• In the Private port enter the port number you need to forward.
By default this DVR is set to port 2000. Use port 2000 unless
you have a reason to change the DVR to another port (not
recommended).
• In the Public port re-enter the port number you entered in the
private port field (e.g. 2000).
• Select the Schedule to Always.
• Ensure that the Virtual Server (or forwarding that is being
set-up) is set to
ENABLED.
When complete, select the Apply button located at the bottom
of the page to save your changes.
Port forwarding is now complete!
STEP 4: DVR NETWoRKING GUIDE
continued


