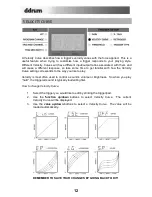
background image


17 


USING HI-HAT PEDALS


When using a hi-hat pedal connected to the Hi-hat pedal input on the DDTi, the Hi-hat 
input (Input 3) can send two different MIDI Notes, depending on the position of the Hi-
hat pedal.  In effect, this allows you to assign two different notes for the hi-hat input 
(Input 3) and with the pedal toggle between which note the hi-hat trigger sending.  In 
addition, you can also assign another MIDI Note Number to the pedal down position 
of the pedal. 


To assign open hi-hat sound to Hi-hat input (Input 3), engage the hi-hat trigger with the hi-
hat pedal in the UP position.  Then use the 

function up/down

 buttons to select MIDI Note 

# and use the 

value up/down

 buttons to dial in the desired note number. 


To assign a closed hi-hat sound to Hi-hat input (Input 3), engage the hi-hat trigger with the 
hi-hat pedal in the DOWN position.  Then use the 

function up/down

 buttons to select MIDI 

Note # and use the 

value up/down

 buttons to dial in the desired note number.   


To  assign  a  pedal-hat  sound  to  the  Hi-hat  pedal  input  (HI-hat),  press  down  on  the  hi-hat 
pedal.  Then use the 

function up/down

 buttons to select MIDI Note # and use the 

value 

up/down

 buttons to dial in the desired note number. 


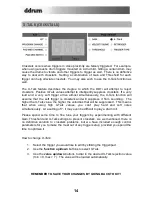
EDITING HI-HAT PEDAL PARAMETERS


When editing hi-hat pedal parameters, some of the edit functions are used in a 
slightly different manner.  Please see below for detailed description of hi-hat pedal 
parameters.  
 

Gain


– This setting is used in much the same way as it is used for other triggers.  Please refer 

to “Gain” section of this manual for information. 
 

Velocity Curve


– This setting is used in much the same way as it is used for other triggers.  

Please refer to “Velocity Curve” section of this manual for information. 
 

Threshold 

–  When  editing  a  hi-hat  pedal,  the  Threshold  function  has  a  slightly  different 

meaning.    For  a  hi-hat  pedal,  the  Threshold  value  describes  the  minimum  distance  between 
pedal positions, when changing directions, necessary for the DDTi to output a CC value.  If you 
like to use the hi-hat pedal for subtle nuances, you may wish to set the hi-hat pedal Threshold to 
a low value.    

X-Talk 

– For a hi-hat pedal, the X-Talk function is used as a Calibration function.  This allows 

you  to  calibrate  the  pedal  for  optimum  performance.    If  a  hi-hat  pedal  is  selected,  you  will  see 
“CAL” displayed on the screen.  You can adjust the calibration manually or you can let the DDTi 
adjust it automatically by leaving the pedal in the up position and pressing 

up value

 and

 down 

value

 buttons simultaneously.  This will automatically calibrate the pedal. 

Retrigger 

– This setting is used in much the same way as it is used for other triggers.  Please 

refer to “Retrigger” section of this manual for information.  Please note that the Retrigger 
parameter only refers to hi-hat control messages and not the pedal-hat Note message. 

 
Trigger Type 

– Hi-hat pedals are automatically detected by the DDTi, so there will be no need 

to set the Trigger Type. 


Summary of Contents for DDTi

Page 1: ...REFERENCE MANUAL...

Page 2: ......

Page 3: ...9 SETTING GLOBAL PARAMETERS 10 GAIN 11 VELOCITY CURVE 12 THRESHOLD 13 X TALK CROSSTALK 14 RETRIGGER 15 TRIGGER TYPE 16 USING HI HAT PEDALS 17 EDITING HI HAT PEDAL PARAMETERS 17 SENDING MESSAGES 18 ALL...

Page 4: ......

Page 5: ...dules or software devices Here at Ddrum we take pride in building electronic instruments and controllers for the modern musician The DDTi allows you to explore new avenues of sonic possibilities with...

Page 6: ...s in the OUT position USB However if your computer s USB port does not provide sufficient power to the DDTi please use the included AC adapter to power the unit 3 Power Adapter Input If you do not wis...

Page 7: ...nect a power source to the DDTi You have two options for powering the DDTi a Connect the DDTi to a computer s USB port the computer s USB bus will provide power b Connect an optional 9V AC power adapt...

Page 8: ...the DDTi The display will turn on to let you know that the DDTi is on Tip It is a good idea to connect and turn on the DDTi before starting any software applications with which you intend to use the D...

Page 9: ...usually adjusted in your software s Preferences menu In general if latency is higher than about 15 20ms you will start to notice a significant delay between the time that you hit the pads and the tim...

Page 10: ...ction function by using the function up down buttons When in Kit selection function you can use the value up down buttons to select different kits The DDTi will automatically load the kits as you step...

Page 11: ...n have an associated Program Change message 0 127 This means that effectively you can have each kit on the DDTi address a different set of sounds in your DAW or external MIDI device By default each ki...

Page 12: ...CHANNEL This is the MIDI Channel on which the trigger is sending information Each trigger can be set to transmit on a separate channel For example this could be very useful if you are trying to contro...

Page 13: ...depending on the position of the pedal When you press the pedal down and engage the hi hat input the DDTi will output a closed hi hat note With the pedal released engaging the hi hat input will outpu...

Page 14: ...bal parameters include Gain Velocity Curve Threshold Crosstalk Retrigger and Trigger Type Please take some time to optimize the DDTi for use with your preferred trigger devices Once you begin tweaking...

Page 15: ...a trigger are transferred to another trigger and cause it to trigger as well If one trigger is naturally more sensitive than others it may trigger in response to slight vibrations from other trigger R...

Page 16: ...he Velocity Curve setting corresponds to the way you like to play Velocity is most often used to control a sound s volume or brightness So when you play hard the triggered sound is typically louder br...

Page 17: ...d should be set based on your playing style so please try different Threshold settings until you find one that works best for you How to change trigger Threshold 1 Select the trigger you would like to...

Page 18: ...will suppress it from sounding The higher the X Talk value the higher the velocities that will be suppressed This means that when using high X Talk values you can t play hard and soft notes simultane...

Page 19: ...igger setting is set to 25ms the DDTi will output both sounds since the second sound occurs beyond the Retrigger boundary The Retrigger setting should be set depending on your playing style If you lik...

Page 20: ...that your trigger s Trigger Type is configured correctly before editing or using it If the Trigger Type is configured incorrectly your trigger may not function properly or at all You will need to sele...

Page 21: ...description of hi hat pedal parameters Gain This setting is used in much the same way as it is used for other triggers Please refer to Gain section of this manual for information Velocity Curve This s...

Page 22: ...gone a little too far changing the configuration of the DDTi In this case you might want to use the Factory Reset message to restore everything including presets back to the way it originally was To...

Page 23: ...Ti the Hi hat input will alternate between sending MIDI Note 44 and MIDI Note 42 depending on the position of the Hi hat footswitch With the hi hat pedal pressed down the Hi hat input will send MIDI N...

Page 24: ...seen throughout this manual the DDTi uses MIDI Note information to trigger events such as drum hits However MIDI Notes also represent actual musical notes and pitches much like keys on a piano This a...

Page 25: ...6 7 8 9 10 ZONE TIP CHANNEL 10 10 10 10 10 10 10 10 10 10 MIDI NOTE 35 38 46 51 50 48 45 49 55 52 RING CHANNEL 10 10 10 10 10 10 10 10 10 10 MIDI NOTE 35 37 35 53 35 35 35 35 35 35 HI HAT FOOT SWITCH...

Page 26: ...CHROMATIC 2 INPUT 1 2 3 4 5 6 7 8 9 10 ZONE TIP CHANNEL 1 1 1 1 1 1 1 1 1 1 MIDI NOTE 48 50 52 54 56 58 60 62 64 66 RING CHANNEL 1 1 1 1 1 1 1 1 1 1 MIDI NOTE 49 51 53 55 57 59 61 63 65 67 HI HAT FOOT...

Page 27: ...ource in your application Software application not receiving MIDI data Many software applications have MIDI IN and OUT indicators Play the triggers and look for the MIDI IN light to indicate activity...

Page 28: ...t the MIDI OX output buffer is set to at least 256 bytes or higher My trigger isn t sending any Note On messages even though I m hitting it The Trigger Type is set incorrectly Try selecting a differen...

Page 29: ...re described in the X Talk discussion on page 17 of this manual Begin with the DDTi s automatic calibration feature as described on that page This procedure typically results in an excellent match bet...

Page 30: ...f 1 127 0 X X After Touch X X Pitch Bend X X Control Change Ctrl 4 Ctrl 64 0 127 0 127 X X Foot Pedal CC message Sustain Pedal CC message Program Change 0 127 0 20 System Exclusive O O System Common S...

Page 31: ......

Page 32: ...MANUAL REVISION C...

Page 33: ...www ddrum com...

Page 34: ......

Reviews: