background image

5

Safety Practices & Precautions

• Do not use the grill for cooking excessively fatty meats or products which promote flare-ups.
• Never grill without the drip pan in place and pushed all the way to the back of the grill.Without it 

hot grease could leak downward and produce a fire or explosion hazard.

• Do not operate the grill under unprotected combustible construction. Use only in well ventilated 

areas.

• Do not use in buildings, garages, sheds, breezeway or other such enclosed areas.This unit is for 

outdoor use only.

• Keep the area surrounding the grill free from combustible materials, trash, or combustible fluids and 

vapors such as gasoline or charcoal lighter fluid. Do not obstruct the flow of combustion and 
ventilation air.

• If a cart unit is stored indoors ensure that it is cool, fold the side shelf down, then push, never pull,

the grill. If LP, the cylinder must be unhooked and the LP cylinder stored outside in a well ventilated 
area, out of reach of children.

• Do not use charcoal in the grill.
• Never use the grill in a windy area.
• Keep the electrical supply cord, or the rotisserie motor cord away from the heated areas of the grill.

When plugging the rotisserie motor into the convenience outlet (carted units) be sure the cord does
not come in contact with the upper areas of the grill.

• Never use the grill in windy conditions. If located in a consistently windy area (oceanfront,

mountaintop, etc.) a wind break will be required. Always adhere to the specified clearances listed.

• Never use a dented or rusty LP tank. Keep the ventilation openings of the cylinder enclosure free 

and clear from debris.

• Never pinch or cut the supplied power cable. Prevent the cable from lying on the ground, sitting in 

water or coming into contact with the hot surfaces of the grill. Avoid placing the cable where it 
could be strained, chaffed or cut by sharp edges.

Summary of Contents for DCS36E-BQARL

Page 1: ...THE PROFESSIONAL E SERIES GRILL Use and Care Guide Models DCS36E BQARL DCS36E BQARN DCS48E BQARL DCS48E BQARN DCS48E BQRL DCS48E BQRN ...

Page 2: ...epresentative by phone 1 888 281 5698 Fax 714 372 7004 email support dcsappliances com or by mail DCS Attention Customer Service 5800 Skylab Road Huntington Beach CA 92647 WARNING Improper installation adjustment alteration service or maintenance can cause property damage injury or death Read the installation operating and maintenance instructions thoroughly before use installing or servicing this...

Page 3: ...RILL CLEARANCES 11 BUILT IN CONSTRUCTION DETAILS 12 LEAKTESTING 13 14 INSTALLER FINAL CHECKLIST 14 BURNER ADJUSTMENTS 15 16 USINGTHE GRILL 17 18 LIGHTING INSTRUCTIONS 19 SIDE BURNER INSTRUCTIONS 20 USINGTHE SMOKER SYSTEM 21 USINGTHE ROTIS BURNER 22 25 BURNER REMOVAL 26 27 CARE AND CLEANING 27 TROUBLESHOOTING 28 PARTS LISTS 29 34 HOWTO OBTAIN SERVICE 35 WARRANTY 36 ...

Page 4: ...g is attached to the grill to remind you your family and all others who may use your BBQ grill of these safety precautions DO NOT REMOVE THIS STICKER CAUTION Do not try lighting this appliance without reading the LIGHTING INSTRUCTIONS section of this manual Do not store or use gasoline or other flammable vapors and liquids in the vicinity of this or any other appliance Children should not be left ...

Page 5: ...ult of this can be melted knobs or ignition buttons Use a covered hand when opening the grill lid and only do so slowly to allow heat and steam to escape Never lean over an open grill When lighting a burner always pay close attention to what you are doing Be certain you are pushing the ignition button labeled for the burner you intend on using When using the grill do not touch the grill rack burne...

Page 6: ...ever pull the grill If LP the cylinder must be unhooked and the LP cylinder stored outside in a well ventilated area out of reach of children Do not use charcoal in the grill Never use the grill in a windy area Keep the electrical supply cord or the rotisserie motor cord away from the heated areas of the grill When plugging the rotisserie motor into the convenience outlet carted units be sure the ...

Page 7: ...R ROTIS IGNITER SMOKER IGNITER SMOKER FRONT REAR IGNITER ROTIS GRILL GRILL GRILL IGNITER GRILL IGNITER GRILL GRILL IGNITER ROTIS IGNITER SMOKER IGNITER SMOKER 48 MODELS DCS48E BQAR REAR IGNITER ROTIS GRILL GRILL GRILL IGNITER GRILL IGNITER ROTIS IGNITER SMOKER IGNITER SMOKER 36 MODELS DCS36E BQAR DCS48E BQR ...

Page 8: ...accessible location All pipe sealants must be an approved type and resistant to the actions of LP gases Never use pipe sealant on flare fittings All gas connections should be made by a competent technician and in accordance with local codes and ordinances In the absence of local codes the installation must comply with the national fuel gas code ANSI Z223 1 1988 Gas conversion kits are available fr...

Page 9: ...rill will not function properly Any joint sealant used must be an approved type and be resis tive to the actions of LP gases TO HOOK UPTHE FITTINGS SUPPLIED WITHTHE GRILL Assemble as shown fig 01 Use threading compound on male threads only Do not use threading com pound on the male end of the 1 2 NPT to 3 8 flare adapter Use a second pipe wrench to hold the grill inlet pipe to avoid shifting any i...

Page 10: ... during transport of the tank or unit Insert the regulator inlet into the tank valve and turn to the black coupler clockwise until the coupler tightens up Do not overtighten the coupler Turn the main tank valve on and turn the burner control valves on the unit to the LITE position for about 20 seconds to allow the air in the system to purge before attempting to light the burners Do not attempt lig...

Page 11: ...red indoors the cylinder must be disconnected and removed from the appliance Cylinders must be stored outdoors in a well ventilated area out of the reach of children LOCATION When determining a suitable location take into account concerns such as exposure to wind proximity to traffic paths and keeping any gas or electrical supply lines as short as possible Locate the grill only in a well ventilate...

Page 12: ...STO NON COMBUSTIBLE CONSTRUCTION A minimum of 3 clearance from the back of the grill to non combustible construction is required for lid to fully open A minimum of 8 clearance from both sides is required for the rotisserie motor and skewer handle The grill can be placed directly adjacent to non combustible construction below the cooking surface INSULATED JACKET Do not build the grill under overhea...

Page 13: ...osure Unplug the cable from the transformer box before installation ALL GRILL MODELS Review the detail drawings shown and take into account the provisions shown for gas line hook up clearance in the left rear corner It is recommended that ventilation holes are provided in the enclosure in the event of a gas leak The supporting ledges or deck must be level and flat The counter should also be level ...

Page 14: ...me Make a soap solution of one part liquid detergent and one part water You will need a spray bottle brush or rag to apply the solution to the fittings For LP units check with a full cylinder The valve panel must be removed to check the valves and fittings Remove the 4 torx head screws fig 05 which fasten the valve panel to the unit Pull the valve panel outward be careful not to pull on the ignite...

Page 15: ...l Substitution can void the warranty Do not use the grill until all connections have been checked and do not leak NOTE Check all gas supply fittings for leaks before each use It is handy to keep a spray bottle of soapy water near the shut off valve of the gas supply valve Spray all the fittings Bubbles indicate leaks INSTALLER FINAL CHECKLIST Specified clearances maintained to combustibles Nylon s...

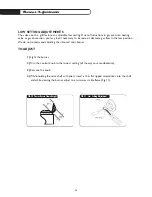
Page 16: ...djust the burners The flames of the burners except the rotisserie burner should be visually checked and compared to that of the drawing in Fig 08 Flames should be blue and stable with no yellow tips excessive noise or lifting If any of these conditions exist check if the air shutter or burner ports are blocked by dirt debris spider webs etc Proceed with air shutter adjustment The amount of air whi...

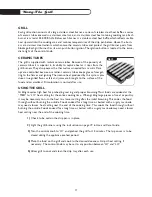
Page 17: ...low in the low position We do not recommend adjusting the infra red rotis burner TO ADJUST 1 Light the burner 2 Turn the control knob to the lowest setting all the way counter clockwise 3 Remove the knob 4 While holding the valve shaft with pliers insert a thin flat tipped screwdriver into the shaft and while viewing the burner adjust to a minimum stable flame Fig 11 FIG 10 Power Burner Flame Heig...

Page 18: ...o duces true grilled flavor as fats and juices are brought to the surface of the food and caramelized Discoloration is normal after use USINGTHE GRILL Grilling requires high heat for preheating searing and proper browning Most foods are cooked at the MED to LO heat setting for the entire cooking time When grilling large pieces of meat or poultry it may be necessary to turn the heat to a lower sett...

Page 19: ...s of the cut Expert chefs say it is impossible to have a rare doneness with a thin cut of meat The cooking time is affected by the kind of meat the size and shape of the cut the temperature of the meat when cooking begins and the degree of doneness desired When defrosting meats it is recommended that it be done overnight in the refrigerator as opposed to a microwave This in general yields a juicie...

Page 20: ... Keep your face as far away from the grill as possible and hold a lit match over the hole located on the top left for burner on the left or the right hole for the right burner Push and turn the control knob which is centered on the burner where the lit match is located to LITE If the burner does not light in 4 seconds turn the knob off wait 5 minutes and try again Once the left or right burner is ...

Page 21: ...y restaurant ranges Each is rated at 15 000 Btu hr and shares a push button ignition system The burner grates see Fig 15 are porcelain enamel over cast iron for durability To cover the power burners when not in use each grill comes with a stainless steel cover which doubles as a work surface When using the grill burners with the work surface in place be careful as heat can conduct from the grill s...

Page 22: ... will not light after several attempts wait 5 minutes then match light using a paper book match or lighter through the cut out in the valve panel Once lit fill the smoker tray and replace WOOD CHIPS There are many wood chips available for purchase and selection is based on personal taste The most common wood chips used are mesquite or hickory Mesquite has a sweeter taste and is commonly used with ...

Page 23: ...d nutrients found in quality cuts of meat Once lit the rotis burner will reach cooking temperatures in about 1 minute The orange red glow will even out in about 5 minutes The rotis motor is equipped with metal gears and is capable of turning up to a 25 lb cut of meat or poultry The motor is mounted to a metal channel which attaches to the left side of the grill and gets tightened into place with a...

Page 24: ...ast that is equally balanced from top to bottom in size The meat will cook more evenly while on the Rotisserie For Poultry tie wings and legs to the body using Dental floss or butcher string to prevent flopping around while turning Fig 19 1 Determine the center placement for the food put 1st prong on Rod turn L shape screw to tighten 2 Center tied meat poultry on Rod place second prong turn L shap...

Page 25: ...low while using your instant read thermometer For poultry it should read 170º in breast Thermometer should touch bone then lift up 3 4 inch from breastbone to get a more accurate temperature Turn on Motor return heat to high if more cooking is needed Repeat above instructions Fig 24 5 Remove Rod using hot pads place meat or poultry on broiler pan bottom then remove prongs Fig 25 6 Cover with foil ...

Page 26: ...otis is not in use Never light a grill burner under the rotis while rotisserie burner is lit MANUAL LIGHTING To manually light the rotisserie place a butane lighter near the tip of the thermocouple as shown in Fig 26 Turn the control knob to LITE Hold the safety valve button in for about 4 to 5 seconds or until the burner remains lit Once lit turn control knob to desired setting If the burner does...

Page 27: ... grill racks then lift out the grill radiant tray Grasp the burner pull it up and slightly to the rear of the unit so the burner head comes off the brass orifice at the front angle the burner sideways and remove POWER BURNERS STANDARD ON 48 BQR MODELS ONLY Remove the top grate Lift out aeration pan from around burners Lift and remove the front and rear power burners SIDE BURNERS The power burners ...

Page 28: ...rill grates are allowed to cool before cleaning cleaning will be more difficult Another effective grill grate cleaning method Running grates through dishwasher cycle after majority of grease and large debris removed DRIP PAN The full width drip pan will collect grease from the grill section and boil overs and spills from the power burners Allow the pan and its contents to cool before attempting to...

Page 29: ...tter for proper adjustment 2 Grill may be in a dusty area Move to less dusty area if possible LOW HEAT WITH KNOB IN HI POSITION 1 If only one of the burners appears low clean the orifice and burner clearing ports of any obstruction 2 Grill may be in a dusty area Move to less dusty area if possible 3 Check for proper gas supply and pressure 4 Pre heat grill for a full 15 minutes 5 If using L P gas ...

Page 30: ...18174 5 Handle Endcap 18164 PL 6 Warming Rack 48E 32248 01 Warming Rack 36E 32248 03 7 Trim Weld Assy 48 32235 03 Trim Weld Assy 36 32232 02 8 Logo Spring Clip 15073 9 Valve Panel 36E BQAR 32212 18 PA Valve Panel 48E BQAR 32212 19 PA Valve Panel 48E BQR 32212 17 PA 10 DCS Logo 17129 01 11 Torx Screw 15002 41 12 Drip Pan Handle 48E 32050 01 Drip Pan Handle 36E 32050 02 13 Drip Pan 48E 30645 2 Drip ...

Page 31: ...48 36 Grill Ca rt Assembly 30 1 2 3 4 5 13 8 9 11 10 14 15 16 25 24 23 22 17 28 27 26 34 36 35 33 32 30 29 31 21 18 19 20 6 7 38 12 37 ...

Page 32: ... Washer 15146 16 Hex Bolt 15001 23 17 Caster w out Brake 18022 17 Caster with Brake 18022 1 18 Top Hinge L H 41092 01 19 Hex Bolt 15001 23 20 Bottom Hinge L H 41093 01 21 Left Door Assembly 41098 01 22 Kickplate Panel 41097 23 Pull Handle 18204 02 24 Door Stop Tab 41094 25 Screw 15139 26 Cart Drawer 41056 27 LP Drawer Dam 41077 28 Hex Bolt 15001 23 29 Torx Screw 15002 41 30 Hub Cap 41075 01 31 8 S...

Page 33: ...A 32231 2 SCREW 15139 3 SMOKER PULL HANDLE 18204 01 4 MINI IGNITER 24VAC 16325 5 SMOKER BURNER W ASSY 32649 6 SCREW 13012 6 7 ORIFICE LP 13005 71 ORIFICE NAT 13005 59 8 CONTROL VALVE 13017 01 9 KNOB BEZEL 14006 PL 10 CONTROL KNOB 14154 11 OTTO SWITCH 16330 12 SMOKER BURNER SUPPORT 32226 13 SCREW 15139 ...

Page 34: ...c Rods 48 32224 3b Ceramic Rods 36 32224 01 4 Center Heat Shield W Assy 32268 5 S S Grill Burner 32217 6 Control Valve 13017 7 Manifold Bolt 15001 06 8 Knob Bezel 14006 PL 9 Control Knob 14154 10 Bezel Screw 15001 29 11 Collector Box 32501 12 Mini Igniter 24VAC 16325 13 Regulator LP GAS 13230 14 Regulator NAT GAS 13035 15 Heat Shield 32219 ...

Page 35: ... 6 ROTISSERIE MOUNT KNOB 14161 7 HEX BOLT 15003 06 8 MINI IGNITER 16325 9 THERMOCOUPLE 13007 2 10 ELECTRODE COVER 32509 11 ROTIS RECEIVING BRACKET 32233 12 ORIFICE ELBOW 18193 13 ROLLER ASSEMBLY BEARING ROTIS 18211 14 10 24 ACORN NUT 15019 06 15 TUBE CUT FORMED 30841 04 16 SAFETY VALVE 18110 17 TUBE FORMED 30841 04 18 SAFETY VALVE BEZEL 14160 19 SAFETY VALVE KNOB 14108 20 OTTO SWITCH 16330 21 CONT...

Page 36: ...efore you call please have the following information ready Model Number Serial Number Date of installation A brief description of the problem Your satisfaction is of the utmost importance to us If a problem cannot be resolved to your satisfac tion please write fax or email us at Write DCS Attention Customer Service 5800 Skylab Road Huntington Beach CA 92647 Fax us at 714 372 7004 email support dcs...

Page 37: ...ce or accident Implied warranty shall not extend beyond the duration of this written warranty This warranty is in lieu of all warranties expressed or implied and all other obligations or liability in connection with the sale of this appliance DCS WILL NOT PAY FOR Installation or start up Shipping damage Service by an unauthorized agency Damage or repairs due to service by an unauthorized agency or...

Page 38: ...duct improvement is an ongoing process at DCS we reserve the right to change specifications or design without notice 5800 Skylab Road Huntington Beach CA 92647 Tel 714 372 7000 Fax 714 372 7001 Customer Service 888 281 5698 www dcsappliances com ...

Reviews: