


11:
Configure the
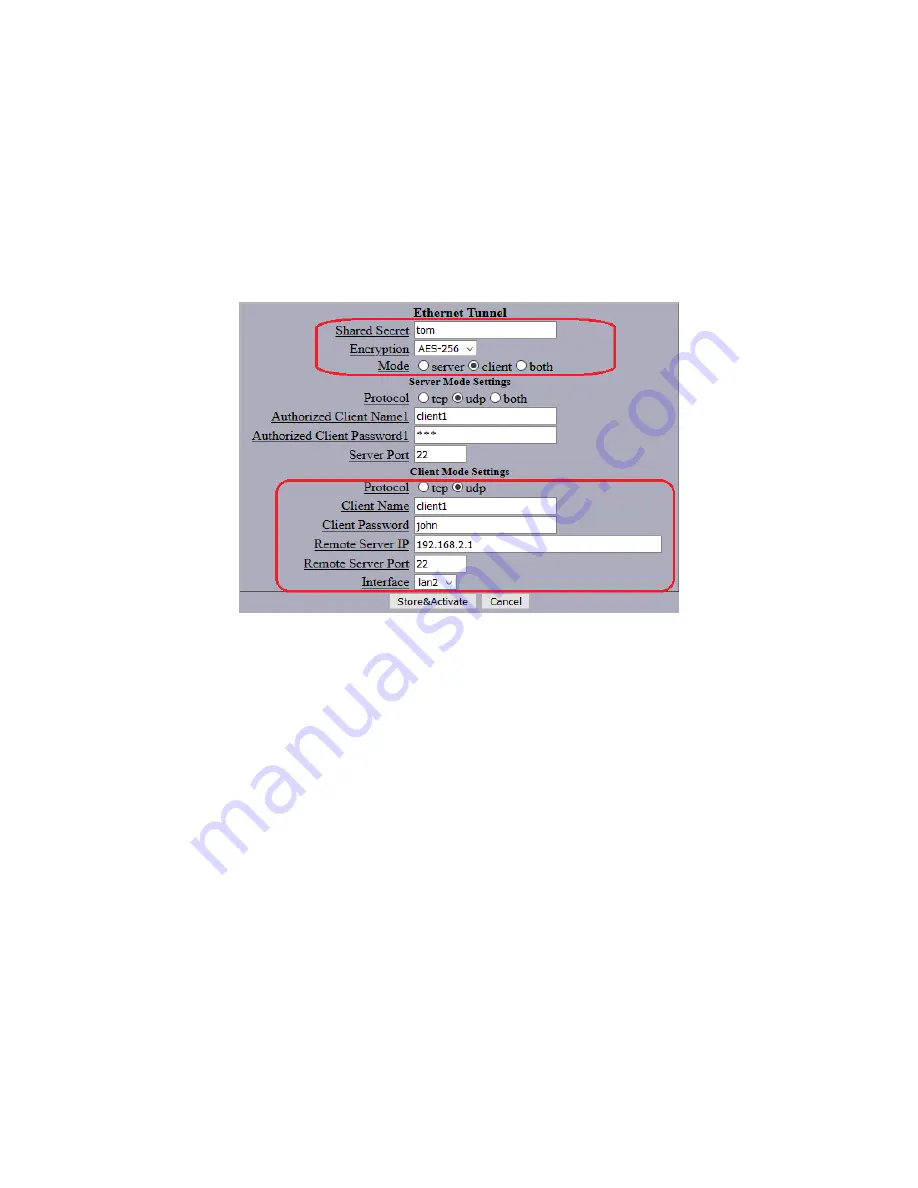
Ethernet Tunnel
section using these settings, shown in Figure 7 below:
Shared Secret
= tom
Client Name
= client1
Encryption
= AES-256
Client Password
= john
Mode
= client
Remote Server IP
= 192.168.2.1
Protocol
= udp
(The Client Password is entered in the
Client Mode Settings
portion of the page when XT-3305
B is configured as a Client: The values in the
Server Mode Settings
fields are ignored in this
case.)
Figure 7 – Ethernet Tunnel Settings for XT-3305 “B”
To make these changes active on XT-3305 B, click the
Store&Activate
button near the bottom
of the screen. Wait a few seconds to make sure the changes have been applied.
12:
Connect an Ethernet cable between the untrusted ports (far left jack) of XT-3305 A and XT-
3305 B.
Testing the Link
If only one PC is available, it should be possible to connect to the LAN1 (trusted) network of
XT-3305 A and open a web browser window displaying the main menu of XT-3305 A and a
second browser window displaying the main menu of XT-3305 B. If the PC connection is moved
to the LAN1 (trusted) network of XT-3305 B, the same two menu pages should be accessible as
before. This verifies that the tunnel is configured properly and working.
In addition, if two PCs are available, allowing one to be on each side of the link, it should be
possible for each PC to ping the other over the link as if they were connected to the same switch.
Note that it is not possible to ping the LAN2 (Untrusted) interface from the LAN1 (Trusted)
interface: This is the way the tunnel is supposed to work.
4


