


A security dialog may ask for approval of an Exception to complete this connection. Complete
the dialog to give the PC permission to contact the XT.
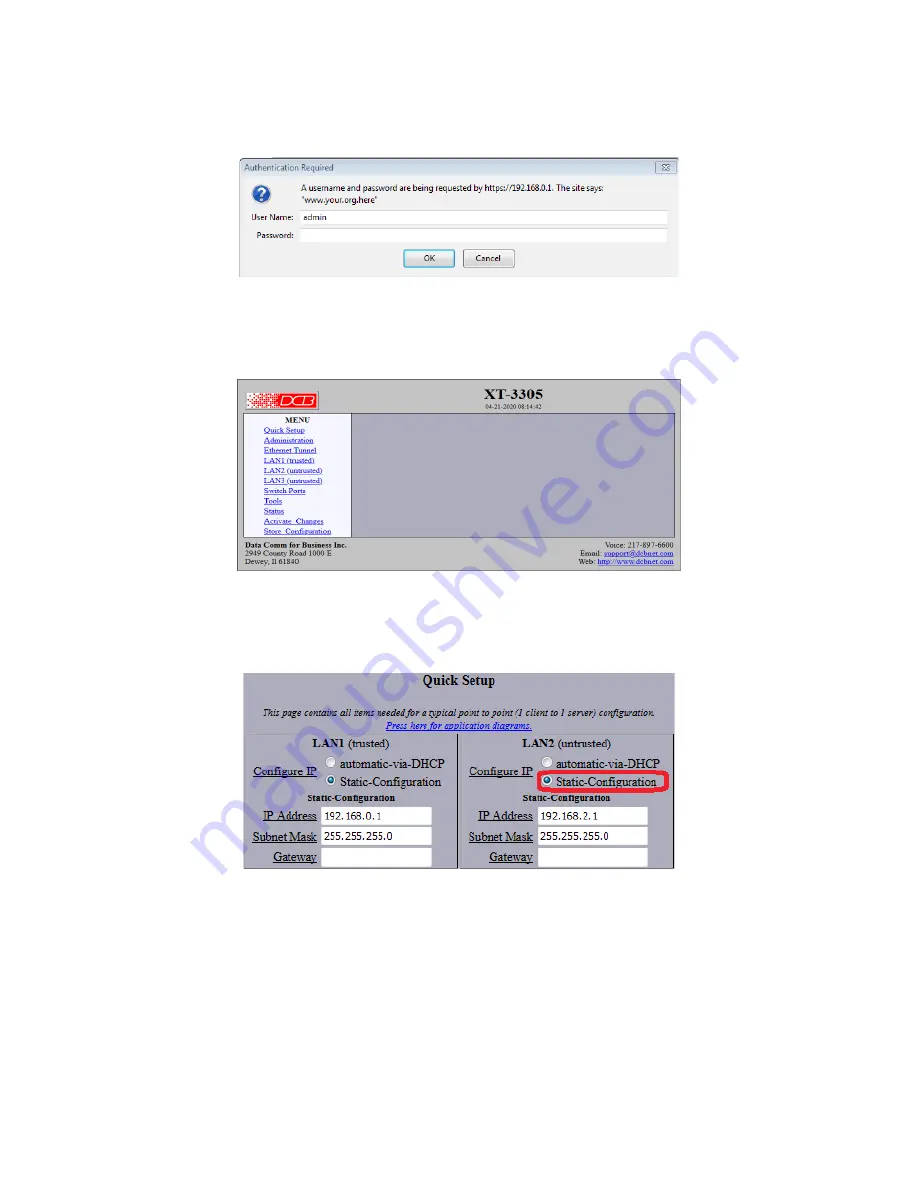
The
Authentication Required
dialog should appear:
Figure 2 – Authentication Dialog
Enter default User Name “admin” and leave Password blank (nothing entered). Click “OK” to
bring up the main menu for configuring the XT-3305.
Figure 3 – Main Menu Screen
6:
Click on
Quick Setup
from the menu and click
Static-Configuration
for LAN2 (untrusted) as
shown in Figure 4.
All other parameters can stay at the default values.
Figure 4 – LAN Settings for XT-3305 “A”
7:
For this demonstration, the fields in the
Ethernet Tunnel
section of the screen are configured
as shown in Figure 5, with this unit being the Server. The following values are used:
Shared Secret
= tom
Authorized Client Name1
= client1
Encryption
= AES-256
Authorized Client Password1
= john
Mode
= server
Protocol
= udp
2


