I
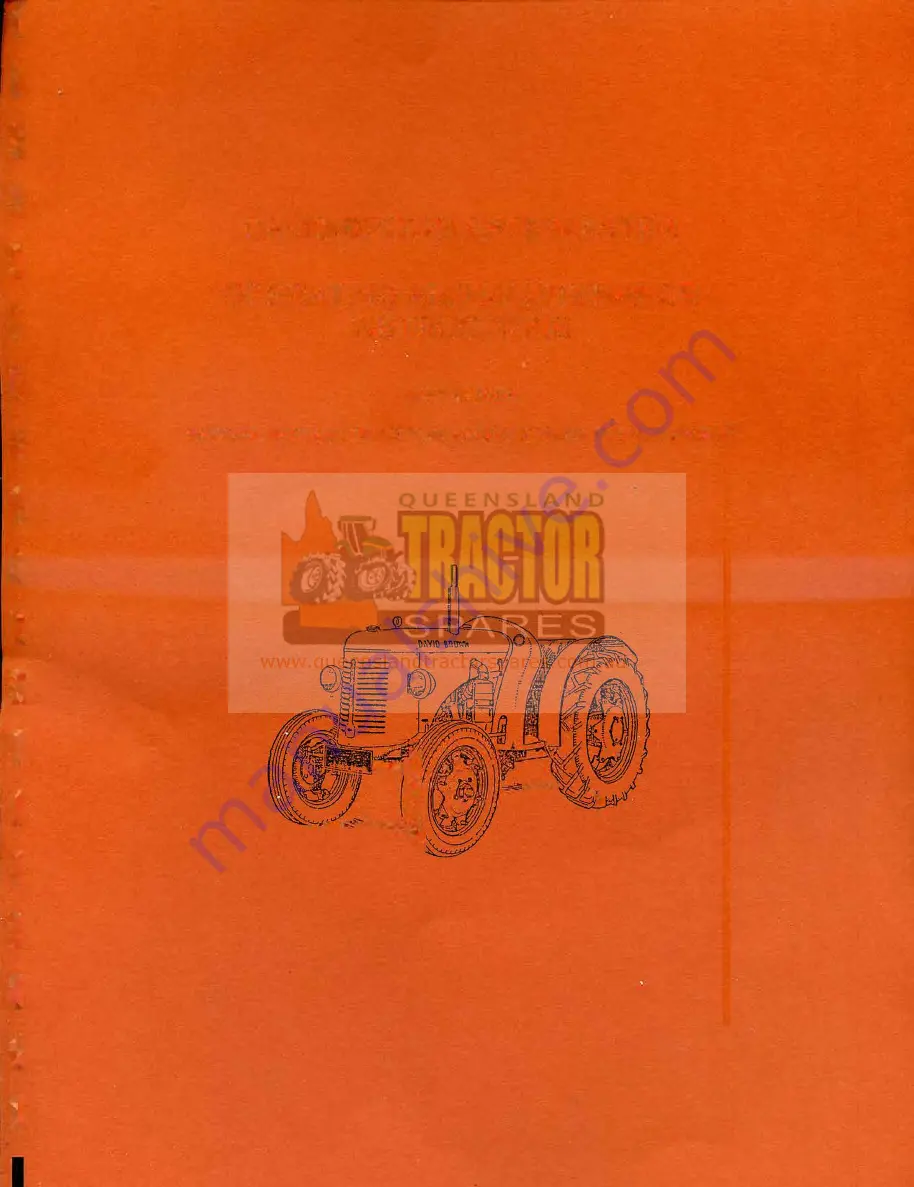
DAVID BROWN CROPMASTER
OPERATING AND MAINTENANCE
INSTRUCTIONS
VAK1 SERIES
SPECIAL INSTRUCTIONS FOR VAG/1C SERIES PETROL ENGINE
.
{/
�
,
__
!la;m,�
_
;:
....
I ,
·
-
t
\ �.
:,j
--
���
Page 1: ...I I I I I I I I I I I I I I I I I I I DAVID BROWN CROPMASTER OPERATING AND MAINTENANCE INSTRUCTIONS VAK1 SERIES SPECIAL INSTRUCTIONS FOR VAG 1C SERIES PETROL ENGINE __ la m _ I t j ...
Page 2: ... I I I I I I I I I I I I I I I I Operatin g an d Mai ntena n c e In s tr u cti ons for V A Ii l 0 Ser i e s a nd Special Instruc tions for VA G 10 Serie s wiih Pe trot Engi ne I DAVID BROWN TRACTons LTD I ...
Page 3: ...work read the items detailed in Bold Type in the Contents Section on Page 3 If the Tractor is a VAG IC fit st read the special in tructions for this model on page 46 The Service Department at Mel tham or any authorised David Brown dealer will he pleased at all times to deal with any operational mechanical or technical queries and you are invited to take full advantage of these facilities In all co...
Page 4: ...the end of every Season Filling Greasing and Draining Points Approved Lubricants Storing the Tractor 1 1INOR SERVICE AND ADJUSTMENTS Engine Fuel System Ignition System Clutch Brakes Front Wheels Front Huhs Electrical System Wiring Diagrams TRACING ENGINE TROUBLE Engine refuses to start Engine stops suddenly Engine runs unsatisfactorily TRACING ELECTRICAL TROUBLE Battery Dynamo Starter Motor Wiring...
Page 5: ...I I I I I I I I I I I I I I I I I I I PACE 4 ...
Page 6: ...ubricate with the grease gun Check the oil levels in the engine transmission air cleaner reductions power take off and pulley if fitted check all drain plugs for tightness Cooling Sustem Close the cylinder block drain tap see Fig 10 and the tap at the bottom of the left hand side of the radiator and fill the cooling system with clean soft water Fuel Susteni Turn the fuel tap which is referred to o...
Page 7: ...PAGE 6 I I I I I I I I I I I I I I I I I I I ...
Page 8: ... cold air drawn into the carburettor For adjustment see Starting and Stopping the Engine lgnitio11 Switch Fig 1 This is of the rotary type When magneto ignition is fitted the flats must be horizontal for ON and vertical for OFF These positions are reversed if the tractor is equipped with coil ignition Electric Starter Control Situated at the right hand side of the steering column Pull smartly to s...
Page 9: ...diment bowl and filter to trap dirt and water Radiator Blind Control Fig 3 The grip is attached to a cable which controls the blind and four positions are provided on the bracket attached to the fuel tank The blind is fully closed when the grip is in the rearmost position and should be adjusted to maintain the needle of the temperature indicator in the green segment Temperature Indicator Fig I Thi...
Page 10: ...s Gear positions are as shown The main gearbox lever has 3 forward and 1 reverse gear positions namely 2 R 3 1 The H High and L Low positions of the left hand lever are indicated Steering Hand Brake Levers Fig I Mounted at each side of the driver for use ih making sharp turns at headlands Whenpulled backwards eachlever operates on the corresponding rear wheel The steering brakes should not he used...
Page 11: ...OPERATING THE TRACTOR FIG 4 PAGE 10 FIG 5 I I I I I I I I I I I I I I I I I I I ...
Page 12: ... this causes a heavy drain on the battery Starting from cold I Put the gear lever in neutral 2 Close the radiator blind 3 Close the choke by pulling the control outwards and close the pre heater regulator 4 Move the engine hand contrgl lever upward about a quarter inch 5 Turn fuel tap to petrol position 6 Drain carburettorfloat chamber if not alreadyfull of petrol from the tap Fig 2 and allow fuel...
Page 13: ...n stopped for only five or ten minutes it will restart on vaporizing oil The radiator blind should he closed to warm up quickly Stopping the Engine If it is known that the engine is to be stopped long enough for it to cool down turn over to petrol six or seven minutes before stopping to make sure that the carburettor and fuel pipes contain petrol only If this precaution is not taken it will be nec...
Page 14: ... for which there may be no cure except a new block When using anti freeze affix a label to the radiator cap to guard against draining and loss of anti freeze solution OA lJTIONS Repeated here are the things which it is important to avoid D on t attempt to start a cold engine with any vaporizing oil in the pipes or carburettor Don t leave the engine running with the choke out for one second longer ...
Page 15: ...e catch If starting up hill release the footbrake and the clutch pedal together so that the engine commences to take up the drive while the brakes are being released 11se of Clutch Pedal When starting from rest do not run the engine faster than is necessary Except when the clutch is actually being used keep the foot off the pedal Do not slip the clutch when the engine is labou ring in the hope tha...
Page 16: ... is always possible to move the tractor gently forward or backward and to pull the steering wheel round progressively as the tractor moves llse of Engine Controls The life of the engine can be safeguarded by considerate handling Therefore Do not keep the choke open one second longer than is necessary Do not vary the throttle when warming up Reduce engine speed by means of the throttle when engagin...
Page 17: ...full range of wheel settings for all purposes is provided with each Tractor Special attention is drawn to the changing over of pneumatic tyres to ensure correct direction of rotation When it is necessary to reverse the wheels to obtain a particular track setting they should be transferred to opposite sides of the tractor Correct rotation should be checked by referring to the arrow moulded into the...
Page 18: ...ed gearboxes P T O OR P T O A ND BELT PULLEY Fitting Instructions Drain oil from transmission case and remove rear axle cover plate Clean the machined surface of the axle and if necessary fit new gasket which can be retained in position by lightly smearing with grease The pipe adjacent the crown wheel maintains a constan t oil level in the unit and is supplied from the power lift or gearbox top s_...
Page 19: ...ff I I t J AIRCL ANl RL l T GRUSE NIPPLE _P At iSIIAl T IRAO ET THE SYMBOL AGAINST EACH POINT DENOTES THE PERICO OF MAINTENANCE AS FOLLOWS EVERY OAY OS 10 t lOURS 0 OPERATION EVERY WEEK OR GO HOURS OF OPERATION EVERY MONiM OR 240 HOURS OF OPERATION EVERY SEASON OR 1000 HOURS OF OPERATION LUBRICATION DIA GRAM GREASE Nll PLES_ LIFT ARM i ...
Page 20: ...l in the radiator and top up if necessary Check the oil level in the engine and top up if necessary with the correct oil See Fig 8 and Page 6 Thfa may not require topping up every evening hut a check on the level gives an early warning of any tendency to increased consumption which can then he remedied Grease Apply a shot of grease to the king pins 2 points steering joints 4 points see Fig 9 and t...
Page 21: ...ve the cleaner element flush with clean paraffin or vaponzmg oil allow to drain and replace See Fig 12 Gearbox and Final Reduction Housings Check the oil level and top up if necessary with the correct oil See Figs 4 or 5 and 6 Page 26 Power Lift Linkage Referring to Fig 6 lubricate with the grease gun all the indicated points Wipe off excess grease to prevent dirt adhering to the moving parts PAGE...
Page 22: ...nflation pressures must be checked more frequently with water filled tyres Cleaning Clean the tractor as thoroughly as possible Nuts anti Bolts Check all nuts and bolts for tightness Controls Clean all control joints then apply a few spots of oil to all joints and levers which operate the throttle governor choke and brakes Wipe off excess oil Front Hubs Apply a shot of grease to each huh FIG 10 PA...
Page 23: ...in oil from transmission and power lift sump see Fig 14 into a clean container remove the power lift sump plate which releases the gauze and magnetic filter from the power lift suction pipe The magnetic filter secured to the gauze centre with three countersunk headed setscrews should he removed to enable the magnetic prongs to he thoroughly cleaned After cleaning the gauze with paraffin or vaporiz...
Page 24: ...n and reset the sparking plug gaps to 0 030 taking care not to bend the centre electrodes It is always advisable to have a spare set of plugs so that those which have been removed may he properly serviced David Brown dealers have special equipment for this work Gearbox Final Reduction Housi gs P T O IJnit or P T O and Pulley llnit Referring to Fig 6 and 14 drain while warm flush out and refill wit...
Page 25: ...ds Electrical System Have the entire system including the battery checked over by an authorised dealer Inspection Carefully examine the tractor for oil leaks Check the brakes throttle blind and choke controls Pay special attention to the tyres Spares Examine the tractor and order spares which you anticipate may be required Uinor Service Adjustments These are referred to on Pages 28 to 35 Each item...
Page 26: ...burettor mid position is OFF and front is for vaporizing oil The carburettor drain tap is showq in Fig 10 Air Cleaner The base may he removed by releasing the clamps Fig 10 Engine The filler and dipstick are shown in Fig 8 the drain plug for the sump in Fig 11 and the water pump greaser in Fig 10 Clutcli TiliR is fitted with a carbon thrust pad and requires no lubrication Gearbox The alternative t...
Page 27: ...bricator NOTE Lubricator fitted on magnetos only Electrical Equipment The dynamo lubrication points are shown in Fig 10 Po P r Lift R111nsl111ft and Linl agp Lubrication points are indicated in Fig 6 The spherical bearings on the top and lower links should not be lubricated REOO U1 IENDED LlJBRIOANTS AND OA PAUITIES ENGINE WINTER Shell tractor oil 30 SUMMER Shell tractor oil 50 Capacities 12 pints...
Page 28: ...water from the radiator and cylinder block flush the system with clean water and allow to drain Fill the fuel tanks to the brim to prevent collection of moisture by condensation Grease all points fitted with grease nipples Lubricate exposed parts such as brake connection etc by use of the oil can Clean the tractor removing any rust and repainting where necessary Jack up the tractor to take the loa...
Page 29: ... The fan belt should never he run taut Undue slackness is taken up by releasing the setscrew securing the front half of the pulley to the fan hub rotate the front half of the pulley clockwise keeping the huh statio_nary until by using only light finger pressure a deflection of one and a half inches is obtained at the centre of one side of the belt The front half of the pulley should he held in the...
Page 30: ...0 r p m is achieved and tighten locknut N See that the governor to throttle rod ball joint A Fig 15 is free from dirt FIG 15 Manifold Remove carbon from the hot spot chamber after withdrawing the four setscrews and removirg the cover plate See that the gasket is intact before replacing the plate Valve Clearances Inlet 0 015in Exhaust 0 022in Sta ing at the front of the engine the inlet valves are ...
Page 31: ... obtain access to the jets the latter only if partial blocking is suspected remove the lower half of the carburettor by disconnecting the choke control releasing the clips on the air intake hose and sliding the hose toward the air cleaner Unscrew the two square headed bolts above the float chamber and two hexagon bolts which are in line with the throttle spindle also release the balance pipe from ...
Page 32: ...sure that the carbon brush in the distributor cap slides freely The same instructions apply to the distributor when this is fitted in conjunction with coil ignition Sparl ing Plugs These are the detachable type and can be cleaned easily All carbon and soot deposit should he removed After re assembly set the spark gap to 0 030 in magneto ignition or 0 022 in coil ignition Take care not to bend the ...
Page 33: ...t brake when it will immediately be noticed whether the tractor has a tendency to slew to one side or fails to stop in a reasonable distance The brake on the side to which it slews will be aeting harder than that on the other side and therefore adjustment is required either by slackening off the more active brake or tightening up the opposite brake AdjuElt as follows Jack up both rear wheels and d...
Page 34: ...shes should be bedded in by a David Brown dealer Battery The battery requires regular attention as follows Check the level of the acid solution topping up with clean distilled water Do not let the level fall b low the top of the plates Have the battery checked by a David Brown dealer every two months Keep the outside and top clean and dry Never leave the battery in a discharged condition Starter T...
Page 35: ...lTlll PULL AMMlTlR SWITCM Headlamp to Lighting Switch Rearlamp to Lighting Switch Coil t Distributor Starter to Ammeter All Earth Returns WIRING DIAGRAM MAGNETO GRICULTURAL LIGHTING AND STARTING Hr LEADS MA Nno TO SPAR KING PLUGS 1 Red la Red 2 Purple PAGE 34 Dynamo to Ammeter through Fuse Ammeter to Lighting Switch Magneto to Ignition Switch 3 Blue 4 Blue 5 Yellow 6 Blat k STA TU PULL VTTON znrmr...
Page 36: ...h Fuse 2 Yellow Starter to Ammeter AMMETER IGNITION SWl1 Clf 3 Purple Ignition Switch to Mag neto 4 Black All earth leads WIRING DIAGRAM COIL IGNITION STARTING ONLY 2 3 l Red Dynamo to Ammeter through Fuse and Am meter to Ignition Switch 2 Yellow Starte r to Ammeter 3 Purple 4 SilveT Black Ignition Coil to Lead STAII T II PULL BU TON 16NITION SWITGH Switch to Coil Distributor Lt All earth leads PA...
Page 37: ...whether from fuel oil or water and check for fuel or mechanical fault as described later When the plugs are cleaned and adjusted place them on their sides on the cylinder head with the leads attached and the electrodes exposed to view Re check for spark by again turning the engine If no spark is obtained or the spark is weak change the plags concerned If a good spark is now obtained refit the plug...
Page 38: ...sfactory check the flow of vaporizing oil in a similar manner Examine the filter in the carburettor banjo and while this is disconnected open the fuel cock No flow indicates blocked fuel ph es or that the fuel tap strainer may be choked Remove and inspect MEUHANIOAL FAULTS Engine Controls These may not be functioning correctly Examine particularly for freedom at joints ENGINE RUNS UNSATISF AOTORIL...
Page 39: ...in previous section also see below Apparent lacl of power at intervals Mechanical This may result from inadequate lubrication of the engine causing partial seizure Inspect sump level and condition of oil filter at pump Top up and clean as required A check on the condition of the oil cleaner element should be made wash or renew Engine knocl mith overheating Due possibly to shortage of water in the ...
Page 40: ...y be due to 1 Electrolite not up to level see Battery Page 33 2 dirty or loose battery con nections 3 excessive use of the starter motor 4 dynamo not charging see Dynamo Page 33 or 5 wiring short circuit see Wiring Pages 34 35 and 40 Dynamo 11ot charging Indicated by the ammeter needle showing discharge when the tractor engine is running at normal working speed Probable causes 1 Brushes worn or di...
Page 41: ... failure of Pinion to engage witli Flgwheel 6ear Probable causes 1 Partly discharged battery 2 battery terminals loose or dirty 3 partially seized starter pinion remove clean and lubricate with thin oil 4 starter brushes worn or dirty see Starter Pages 33 and 39 or 5 loose connections on starter motor Wiring Harness Causes of electrical failure may be divided into two main sections 1 Failure of el...
Page 42: ...T D C closes 35 after B D C Exhaust opens 42 before B D C closes T n C Single valve springs split cotters clearance adjusting screws at rockers Lubrication Full force feed to crankshaft and camshaft bearings by pass feed to valve rocker shaft Crankshaft drilled for lubrication of big ends Gear type pump driven from camshaft by skew gears Relief valve set to 25 lb sq in Pressure indicator on dashbo...
Page 43: ...ocity jets of cool water on to exhaust valve seatings and sparking plug bosses Capacity of system 6 gallons Radiator blind operated by cable from side of dash Thermometer fitted to water outlet pipe from engine Clut h Borg and Beck single dry plate type 10 A6 G Operated by foot pedal or from rear of tractor by hand lever Carbon thrust pad 6earbox and Billerential Assembled as a unit and connected ...
Page 44: ...al and independently by hand Catch pawl operates on foot pedal for parking purposes Frame Designed to comprise engine and transmission casings and to carry radiator and provide front axle fixing Top face is ground to take engine clutch cover gearbox and gearbox c0ver while rear end is machined to take rear axle casing Front Axle and Steerin g Square construction offset pivot fixing at front to fra...
Page 45: ...ditional equipment Power Lift Incorporated in transmission unit Hydraulically operated by gear type pump and provided with overload release valve Magnetic and gauze filters at pump inlet Maximum effort at lift arms 2 700 lb Controlled by lever from driver s seat Power Lift Linkage Incorporates levelling lever manual width control and adjustable top link Lift arms can he locked in high or low posit...
Page 46: ...d as with P T O unit Speeds Low speed High speed Low speed High speed Engine 1 300 r p m P T 0 SHAFT PULLEY R P M 484 718 R P M 993 1 480 Engine 2 000 r p m P T 0 SHAFT PULLEY R P M 744 1 105 R P M 1 527 2 275 BELT SPEED FT PER MIN 2 210 3 280 BELT SPEED FT PER MIN 3 400 5 046 Tractor Bi nensions Overall length Wheelbase Width Height Turning radius Ground clearance 111 in 71 in 60 in minimum 55 in...
Page 47: ...tap positions are as follows Forward l lain Tank Rear Reserve Tank Mid Position OFF Fuel Pump A fuel pump is mounted on the off side of the cylinder block To prime the carburettor cepre3s and release the fuel pump priming lever several times until the slight normal resistance ceases when the lever should not he operated further A strainer is incorporated in the fuel pump and is accessible after re...
Page 48: ...e and pull smartly upwards until the engine fires 8 Open the choke by pushing control inwards 9 Check for oil pressure by noting the position of the pressure indicator button which should he out To ensure that it is functiorung properly press the button in and release it when it should immediately return to the OUT position 10 Regulate throttle to allow engine to run fairly fast in order to warm u...
Page 49: ...ning Points 25 Driving the Tractor 14 Dynamo 22 33 39 PAGE 48 PAGE Electrical System 24 26 33 39 40 Engine 11 12 15 20 25 28 36 Fan Belt 28 Filling Points 25 Filters 8 13 22 23 28 Final Reduction Units 23 25 Front Axle and Steering 24 26 Front Wheels 32 Front Wheel Huhs 21 26 32 Frost 13 Fuel System 5 25 30 36 38 Fuel Tap 8 31 Fusebox 33 Gearbox 10 20 25 Gear Lever Gears 14 20 Governor Adjustment ...
Page 50: ...intenance 19 Switch Ignition 7 Manifolds 29 Switch Lamp 8 I I Oil Capacities 26 Tappet Clearances 29 Oil Cleaner 20 28 Temperature Indicator 8 I Oil Pressure Indicator 7 Terminals 33 Oil Strainers 28 Throttle Control Lever 5 8 Track Adjustment 16 I Tyres 5 21 Pedals 8 I Power Lift 11 20 25 26 Power Lift Filters 22 I Power Take Off 9 17 23 25 Valve Clearances 29 Power Take Off and Pulley I 11 17 23...
Page 51: ......