remove the rubber cover first). To begin the charging your Xbox 360 will need to be
powered on. Whilst charging, the Player Number Indictor Lights will begin to flash
alternating in sequence, when charging is complete all four Player Number Indicator
Lights will remain static.
Fully charging the built-in battery can take up to four hours. While charging, the headset
will not function and it’s perfectly normal for the headset to become slightly warm.
Whilst using the headset either 2 audible beeps will be heard to indicate that
approximately 30 minutes of battery life is remaining or 3 audible beeps will be heard to
indicate that approximately 5 minutes of battery life is remaining.
Hint:
Check the battery life any time using your Xbox Guide. A battery status meter is
shown beside the headset symbol located within the upper part of the Xbox Guide.
Before you can use the Wireless Gaming Headset for the first time you will need to sync it
with your Xbox 360.
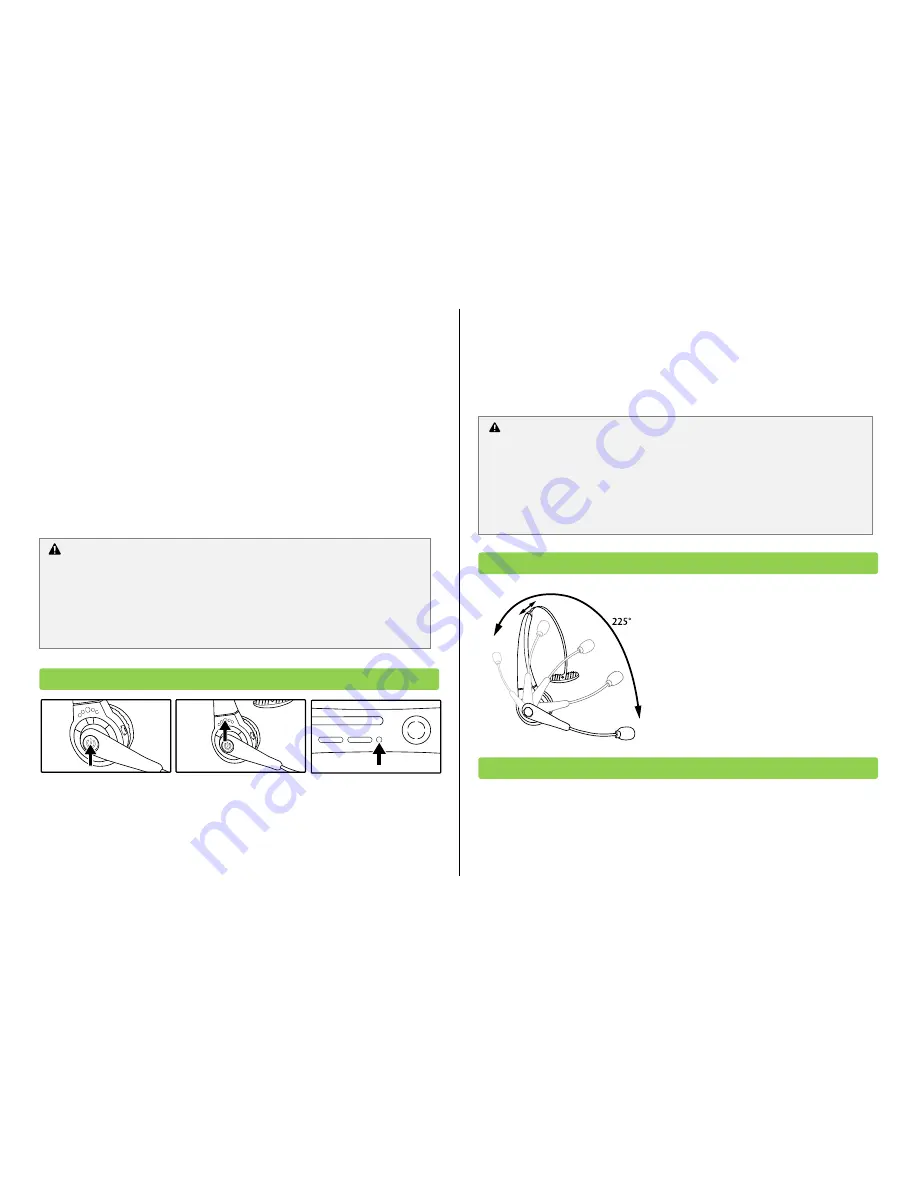
To do this, ensuring that your console is powered on, press and hold the Function button
on the headset until the Player Number Indicator Lights begin to flash continuously. Next
press the Sync button on the headset so that the Player Number Indicator Lights continue
to flash in alternate sequence. To complete the syncing process, press the ‘Sync’ button
on the front of the console.
After a few seconds the headset and console will be synchronised and a player number
will be assigned to the headset and displayed by the Player Number Indicator Lights. The
headset will automatically be assigned the first available player number.
The headset can be worn on either ear. Rotate
the headset arm over the top of the headset to
change ear as shown.
Adjust the head band by sliding it outwards to
achieve a comfortable fit.
Position the mouthpiece so that it is close to
your mouth without being directly in front of it.
This will allow the mic to pick up your voice
clearly without picking up your breathing.
Turning the Headset On/Off
To turn the headset on, press and hold the Function button for at least one second. The
Player Number Indicator Lights will now briefly flash before one of the lights remains
static to indicate the assigned player number. When turning the headset on the headset
Using the Headset
Wearing the Headset
Important syncing advice
A wired headset takes precedence over a wireless headset. You cannot associate a
wireless headset with a controller which a wired headset is connected. If a wired
headset is connected whilst a wireless headset is already associated to your
controller, the wireless headset will automatically disconnect. Please refer to the
section ‘Player Numbers’ for advice on associating the headset with a different
player number.
Syncing the Headset with your Xbox 360
Important charging precautions
For Safety reasons, and to prevent damage to the headset, please ensure that you
follow these recommendations:
Please recharge the headset at normal room temperature, do not recharge
the headset in temperatures in excess of 30oC.
Only use the USB charging cable supplied to charge the headset.


