background image

13 


Prompter Application Set Up 
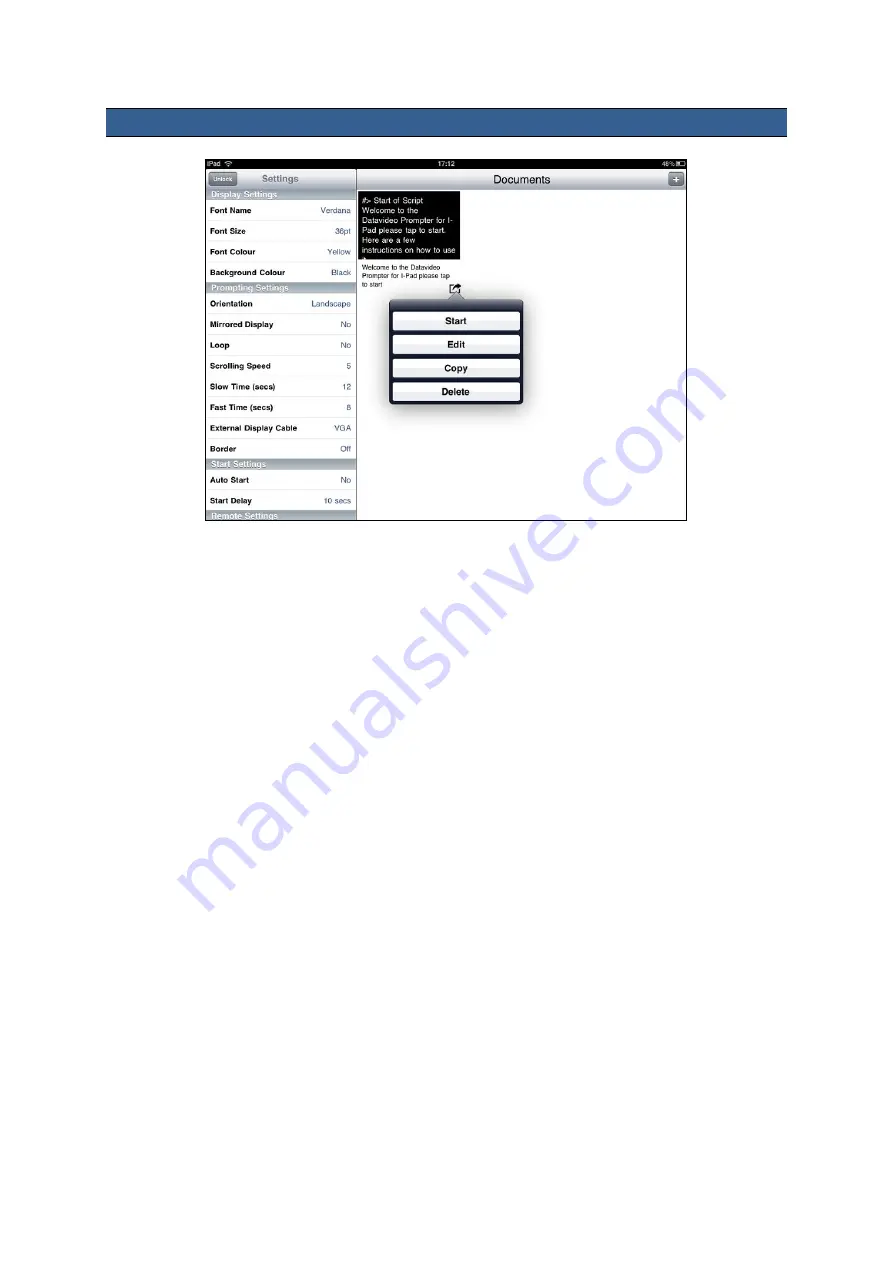


Display Settings 

These  settings  allow  the  look  of  the  text  to  be  changed.  You  can  change  the 

Font  Type

,  the 

Font 

Size

 of the font, the 

Font Colour

 and the 

Background Colour


The software initially defaults to White, Arial, 60pt size text on a Black Background. However, you can 

choose  from  the  following  text  or  background  colours;  White,  Black,  Red,  Yellow,  Blue,  Green  or 

Orange. All text will be displayed in the colour chosen. Currently you cannot have different colours for 

different sections of the text. The size of the text can range from small (8pt) to large (72pt). However, 

you  need  to  experiment  a  little  to  find  the  text  font  and  size  that  you,  or  your  on-screen  talent,  can 

read comfortably at a distance away from the prompter or camera. 


NB:

 The wired remote control is approx. 3m long so this may be the maximum distance you want to 

work at on your own. 
 

Prompting Settings 

You  use  these  settings  to  change  the 

Orientation 

of  the  displayed  text  and  if  it  will  be 

mirror


reflected  off  the  60/40  Glass  or  just  used  as  a 

normal 

display.  You  can  also  set  the  text 

Scrolling 

Speed

 here which can be slowed down or made faster with the wired remote. A scrolling speed of 5 

should  be  a  good  starting  point. 

Slow  Time

  and 

Fast  Time

  are  used  to  set  the  speed  up  or  slow 

down features of the text scroll when using the speed buttons on the optional remote. If the on screen 

talent takes 5 to 8 seconds to read one page of text then set Slow Time to 8 seconds and Fast Time 

to  5  seconds.  Now  when  the  speed  buttons  are  pressed  on  the  remote  during  text  play  back  the 

speed will change in equal steps between 5 and 8 seconds.  


Summary of Contents for TP-500-B

Page 1: ...Prompter Kit for DSLR cameras TP 500 Instruction Manual Rev Date 29 05 2013 P N TP 500_E1_A4 WWW DATAVIDEO COM...

Page 2: ...instruction manual is intended as a guide only At all times Datavideo Technologies will try to give correct complete and suitable information However Datavideo Technologies cannot exclude that some i...

Page 3: ...the total amperes of all the units that are plugged into a single wall outlet do not exceed 15 amperes 11 Never push objects of any kind into this unit through the cabinet ventilation slots as they ma...

Page 4: ...free one year extension to the standard Warranty providing the product is registered with Datavideo within 30 days of purchase For information on how to register please visit www datavideo com or con...

Page 5: ...n and red stickers 1 K Micro fibre cloth pouch to hold items J L when packed 1 L Plastic card glass removal tool 1 M Spare screw to secure the hook plate to item F 1 plus Retail carton with protective...

Page 6: ...t A number of clear fonts colours and text sizes are available making reading comfortable from a variety of distances Features Simple software and remote allow users to produce professional results at...

Page 7: ...the tripod quick release plate 2 Now slide and secure the tripod plate with Item A on top onto the head of the tripod or dolly 3 Remove the sliding camera plate from the top of Item A Do this by pres...

Page 8: ...items E to plate item D Rod Items E screw to the front side of the plate D this side only has two screw threads The bent edge of plate item D is the top edge The rear side of plate item D has four scr...

Page 9: ...the rods in place 12 Now add the cloth lens snood Item G by marrying the velcro straps on the snood to the Velcro straps on the Hood frame Item C The cloth tube of the Lens Snood Item G should surrou...

Page 10: ...hooks in the top of Item F 15 Then slide item F until it clicks into its secured position on the bottom of item H 16 Now slide items F and H the right way up into place on the shorter rod items E 17 S...

Page 11: ...l see pages 15 and 16 21 Put the configured tablet into the mounting bracket and ensure it is held securely by adjusting the size of the bracket holders for a snug fit and locking them in place Use th...

Page 12: ...con on the device Home Screen to see the latest or popular App downloads Browse for Apps or tap on the magnifying glass icon to show the Search bar When searching type in DV Prompter then execute the...

Page 13: ...t a distance away from the prompter or camera NB The wired remote control is approx 3m long so this may be the maximum distance you want to work at on your own Prompting Settings You use these setting...

Page 14: ...amend the prompting text before pairing the device with the Bluetooth remote control as the device s own on screen keyboard will be disabled once paired Build Version Only confirms the version of the...

Page 15: ...s display press the Red Stop button on the remote Tapping on the back symbol on the device s display will return you to the Document list Controlling the scrolling speed To control the speed of the s...

Page 16: ...phone or tablet device 3 Go to the Bluetooth settings and turn Bluetooth On and ensure your device is visible 4 Press and hold the green button on the remote for 1 to 2 seconds until the LED starts fl...

Page 17: ...ed Stop button until the LED glows red NB The remote will automatically power off if it is not used for 30 minutes Controlling the scrolling speed To control the speed of the script whilst it is scrol...

Page 18: ...retain the required qualities of the glass and to avoid scratching the glass during cleaning Never use abrasive cloths pads or abrasive based cleaning fluids on the glass Never use cleaning fluids ba...

Page 19: ...ct resistant hinges with integrated feet Case can stand upright and level on hinge spine Solid core handle is both comfortable and durable Shock proof vibration proof dust proof and rust proof Low tem...

Page 20: ...Once transferred disconnect the apple device and restart DV Prompter you should now see a new document in the list Specifications Text File Format Copy and paste from email or text file Reading Range...

Page 21: ...00 Fax 44 1457 850 964 E Mail sales datavideo co uk Datavideo Technologies Co Ltd Tel 886 2 8227 2888 Fax 886 2 8227 2777 E mail service datavideo com tw Datavideo Technologies China Co Ltd Tel 86 21...

Reviews: