HD / SD Recorder HDR-60
9
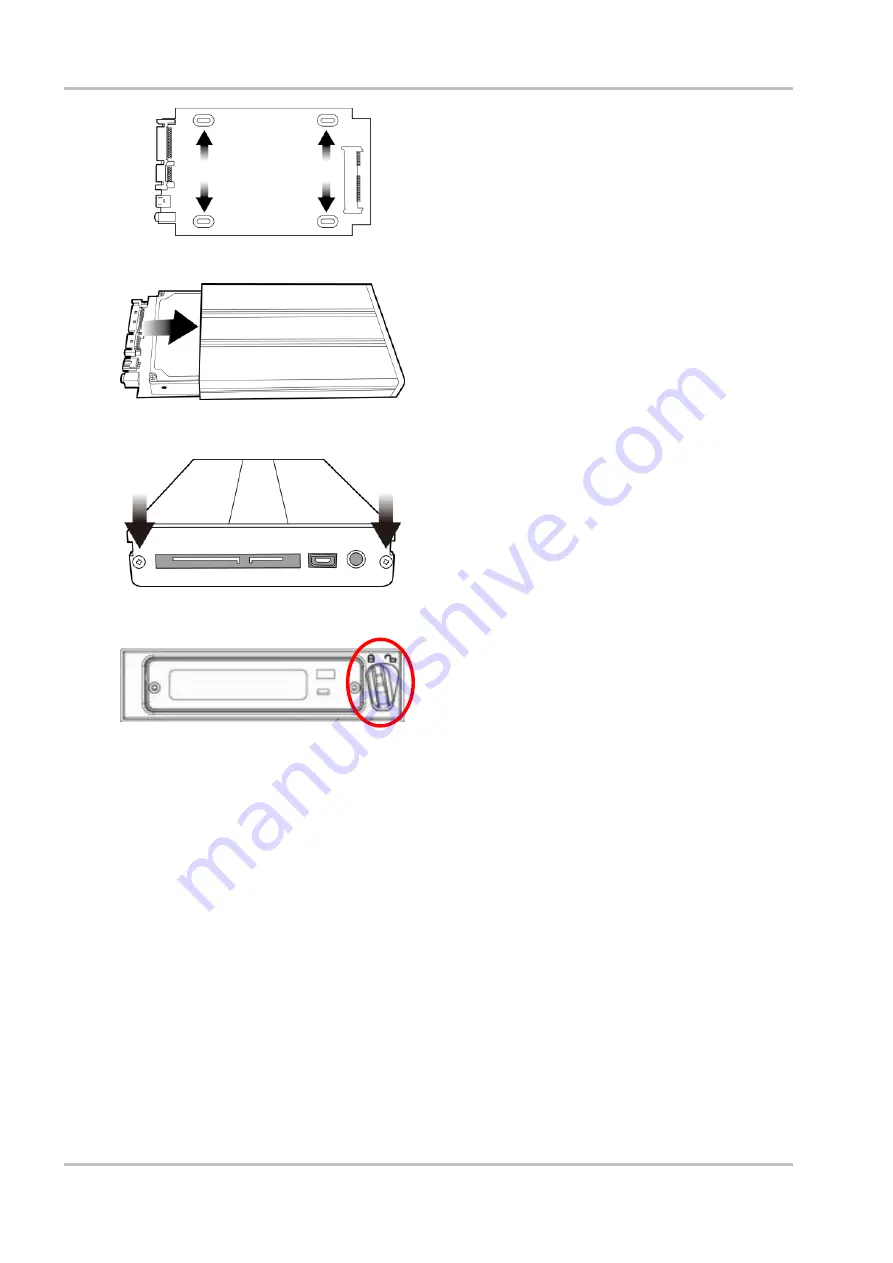
2. Place a
2.5” SATA HDD on the PCB and
then turn it over so you can secure the
drive to the PCB by screwing the four
screws (supplied) into the holes as shown
in the diagram on the left.
3. Re-insert the PCB, with HDD mounted, into
the enclosure.
4. Re-secure the back plate of the enclosure
using the two screws removed earlier.
5. Push the removable HE-3 enclosure into
recorder as shown. Now move the locking
lever from right to left side to secure the
HE-3 in place.
6. You are now ready to switch the unit on.
7. New drives will be formatted within the recorder upon first use. The LCD Clip Status display
is shown once the recorder becomes available for set up and use.


