Page 8
Page 5
STEP 6 CONFIGURE VIA A NETWORK
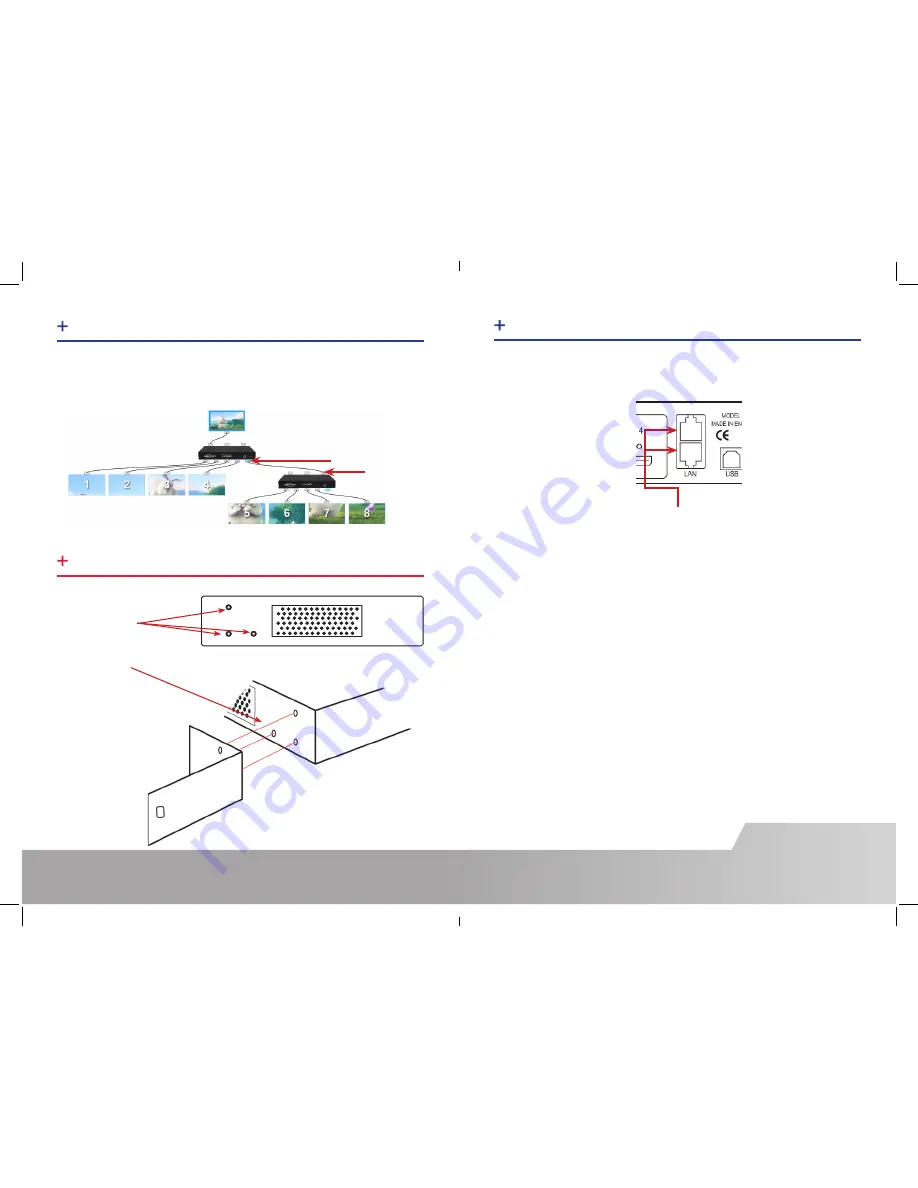
The Fx4 has dual ethernet ports to allow users to add the device to their network. Only one Fx4
in any chain requires connection to the physical LAN as ethernet loop through is supported on
the second LAN Port, meaning multiple devices can be connected.
Dual Ethernet Ports
Connect the Fx4 to a network using the top LAN connector then open Wall Designer and create
your display layout. At the point where you associate the virtual device with a physical device
the list will display all Fx4’s currently connected to the network either directly or daisy chained.
Click on the virtual device to display its properties, the
Device Properties
can be changed in
the same way as if connecting via USB. Once any changes have been made click on
Apply
Settings
to save.
See the Fx4 User Guide for information regarding network settings.
STEP 9 MULTIPLE DEVICES
Where more than four outputs are required, (the example below shows eight) the
Auto Config
Fx4
function will determine the most logical way to connect all devices. To daisy chain a
second Fx4, use a DisplayPort cable (not supplied) to connect the DisplayPort Out Loop on the
first Fx4 to the DisplayPort Input on the second Fx4.
DisplayPort Out Loop
DisplayPort In
STEP 10 RACK MOUNTING (OPTIONAL)
Remove the stud
screws on the side
of your Fx4 and
secure the rack
mounts using the
screws provided


