Datacard CD820 User Reference Guide
Replace the Cleaning Sleeve
13
12
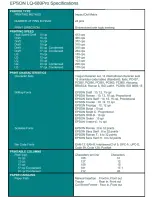
Load the Print Ribbon
1. Unlock the printer and open the printer supplies access door (multi-hopper)
2. Press the latch button to open the printer swingarm.
3. Remove the print ribbon cartridge.
4. Load a full roll of print ribbon (blue spool) onto the spindle closest to the
cartridge handle until it clicks into place.
5. Place the silver take-up spool on the spindle with the black gear until it clicks
into place.
6. Wind the take-up spool counterclockwise one full turn.
7. Load the cleaning sleeve. Refer to “Replace the Cleaning Sleeve” on page 13.
8. Replace the print ribbon cartridge.
9. Close the printer swingarm (and close the supplies door on the multi-hopper)
and lock the printer.
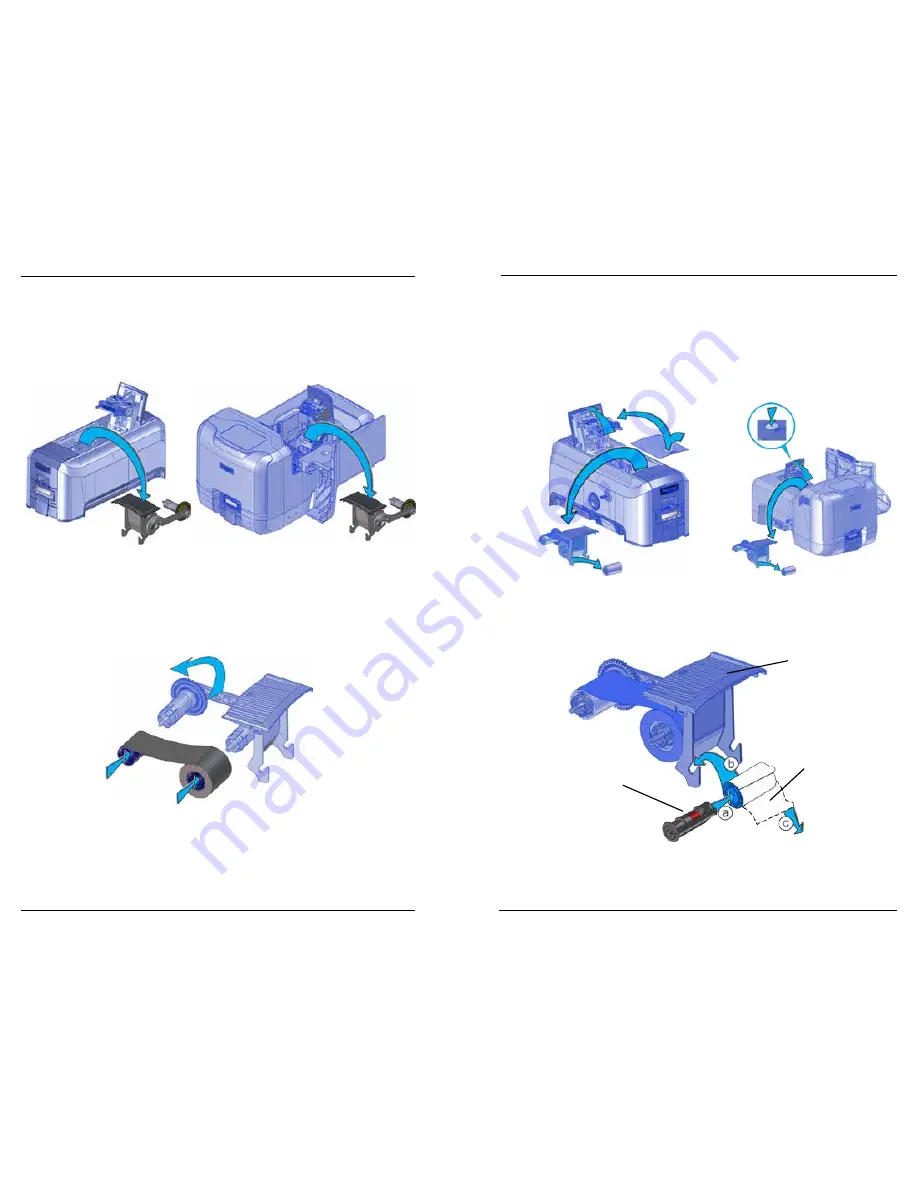
Replace the Cleaning Sleeve
1. Unlock the printer and open the printer supplies access door (multi-hopper).
2. Press the latch button to open the printer swingarm.
3. Remove the print ribbon cartridge.
4. Remove the cleaning roller spindle from the ribbon cartridge.
5. Slide the spindle into the cleaning sleeve (a).
6. Place the spindle back onto the ribbon cartridge (b).
7. Remove the protective wrapper (c).
8. Reinstall the ribbon cartridge.
9. Close the printer swingarm (and close the supplies door on the multi-hopper)
and lock the printer.
Cleaning Roller
Spindle
Print Ribbon
Cartridge
Protective
Wrapper