


Multiconn Srl
Pag. 5 of 23
DAS-M44HDCI -CAN- User Manual (EN)
Installation
Install DAS DVB-T receiver with ALL 4 antennas.
Connect the 4 antennas to the receiver before switching the unit on, but pay attention NOT TO FIX
immediately the antennas on windows or any other inside part (provided it’s not metal) until you have found
the proper location, as shielded glasses can strongly influence reception.
To find best suitable mounting position use the function on remote control “MENU 1-2-3” as shown
at page 11.
Only when a suitable position is found, carefully fix the 4 antennas and route the antennas cables
accordingly. It would probably need to try some mounting positions to determine which one provides the
strongest signal in your vehicle.
Connections
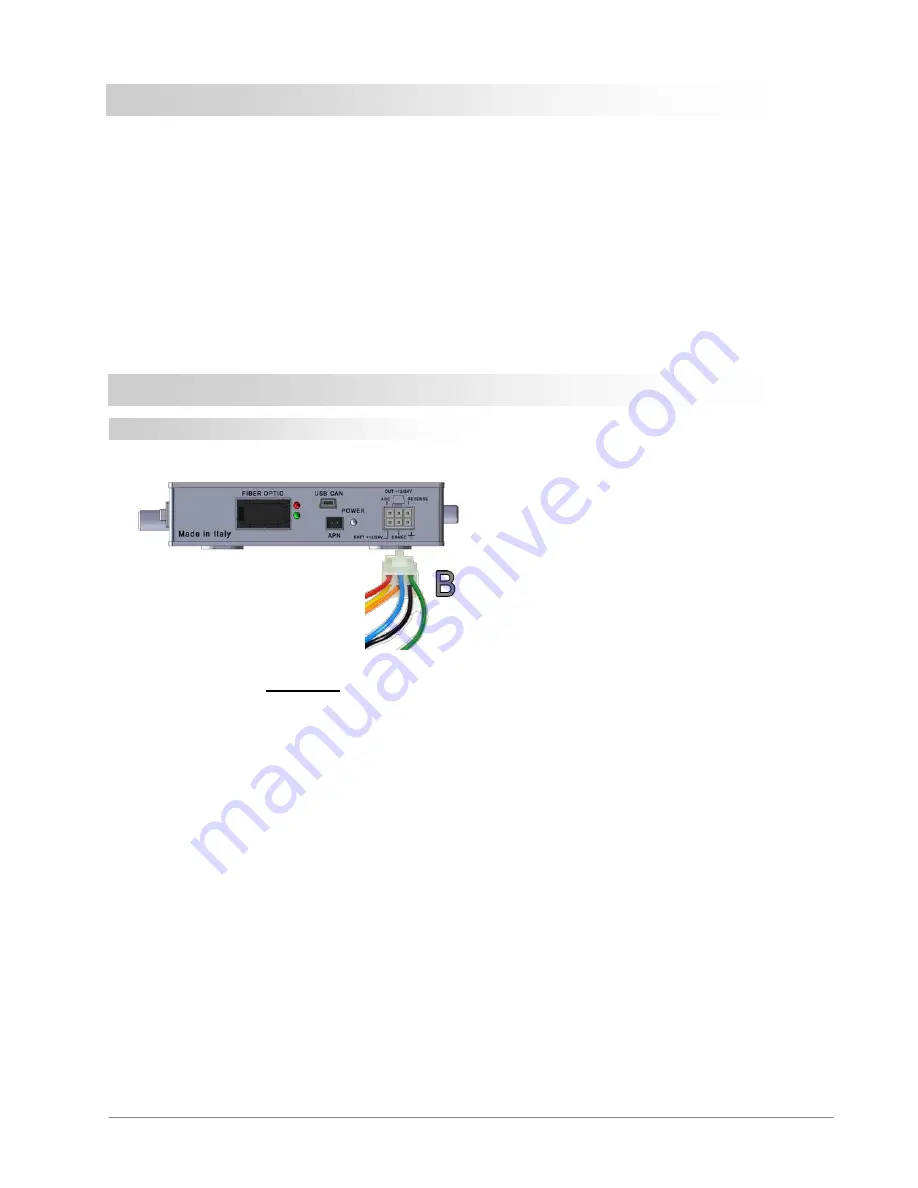
Power
M44HD-CI–CAN – power supply side
Ignition
The
RED wire must be disconnected,
because the switch ON/OFF of the
receiver is directly controlled by the Fiber Optic activity.
Reverse Gear
The device can be used with a reverse video camera (not included)
To see the video camera image shown on DRIVER monitor, the
GREEN
wire or
the power cable must be connected to a +12V signal activated by reverse gear
Handbrake
For safety reason the DRIVER’s monitor will not work while vehicle is moving;
It’s mandatory to connect the
ORANGE
wire of the power cable to a +12V signal
activated by handbrake.
•
Yellow
B12V/24V
•
Red
Acc (ignition) – DO NOT CONNECTED (see note below)
•
Orange
Parking Brake
•
Black
Ground
•
Green
Reverse Gear
•
Blue
Out +12/24V
Summary of Contents for DAS-M44HD-CI-CAN
Page 1: ......


