Take care of the following details and you will save many hours of labor time.
1. Use the correct size energizer. If your energizer is underpowered for the fence condition and
application you want to energize, your electric fence will not work to expectations.
2. Carefully install a complete ground system. Most electric fencing failures are due to improper
grounding.
3. Take time to properly connect lead out wire, ground wire, and fence line splices. This is the second
most common cause of electric fence failure. Use clamps, split bolts and taps. Make sure all
connection surfaces start with bare shiny metal.
4. When using wire for fence and earth connections, use adequately insulated hook-up or underground
wire (rated for at least 20,000 Volts) for lead out wires to ground and fence, or anywhere the hotwire
must travel underground. Never use standard household insulated wire, which is generally rated at
only 600 volts or less.
5. Maintain proper distances from buried and above ground utility company ground rods, water pipes,
metal siding, and telephone wire.
6. Use an Electric Fence Volt Meter to periodically check the condition of your fence and to diagnose and
repair shorts, poor connections and inadequate ground conditions.
7. Finally, it is important that an animal’s first experience with an electric fence shock is one of respect or
fear. Some animals require more than one shock experience for lasting respect of the fence line.
Always train the animal to the fence by insuring that the animal’s first approach to the fence is slow and
that an effective repelling shock is experienced.
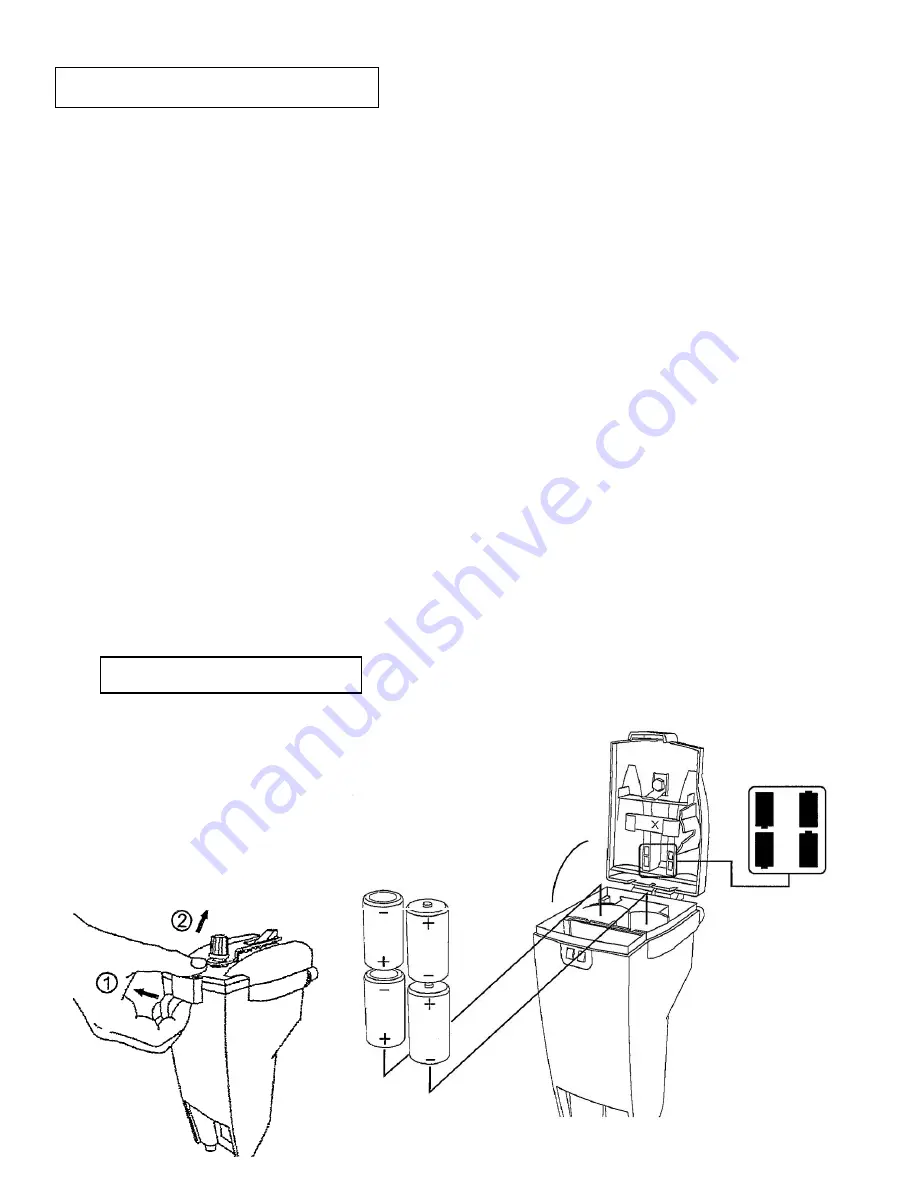
Battery insertion
symbols are shown on
inside of lid.
Both DS140 and DSX140 models operate with
either 4 D-cell batteries or an external 6-12V
battery.
Open Top Cover catch with finger nail or flat
screwdriver and rotate Top Cover backwards until
free.
Insert the 4 D-cells as shown with the '+' facing
down in the left column and the '+' facing up in the
right column.
Internal Battery Installation
Keys to Successful Energizer Installation


