background image

11 


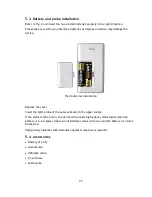
5.3. Battery and probe installation 

Refer to Fig. 4 and insert the two AA size batteries properly in the right direction. 

Please take care when you insert the batteries as improper insertion may damage the 
device.  


Fig.4 batteries installation


Replace the cover. 

Insert the SpO2 probe of the pulse oximeter in the upper socket. 

If the alarm function is on, the device will provide high-priority alarm signal when the 
battery is in low power status. An intermittent alarm will occur and the battery icon turns 
flashes red.  

High priority indicates that immediate operator response is required. 

5.4. Accessories 


Battery (2 x AA) 


User Manual   


USB data cable 


PC software 


SpO2 probe  


Summary of Contents for V60

Page 1: ...QAM V60 0915 4 V60 Pulse Oximeter Manual...

Page 2: ...2...

Page 3: ...DATA 9 5 INSTALLATION 10 6 OPERATION 12 7 MAINTENANCE TRANSPORTATION AND STORAGE 19 8 TROUBLESHOOTING 20 9 SYMBOLS 21 10 TECHNICAL SPECIFICATION 22 RETURNS POLICY 23 WARRANTY 24 WARRANTY REGISTRATION...

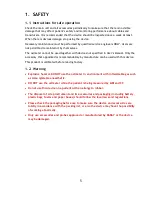
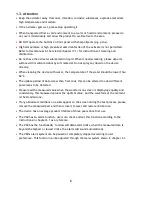
Page 4: ...r manual which describes the operating procedures should be followed strictly Failure to follow the user manual may cause abnormalities in measuring equipment damage and patient injury The manufacture...

Page 5: ...ndatory by manufacture can be used with this device This product is calibrated before leaving factory 1 2 Warning Explosive hazard DO NOT use the oximeter in environment with inflammable gas such as s...

Page 6: ...ter should be lower than 60 C The update period of data is less than 5 seconds this can be altered to allow different pulse rates to be detected Please read the measured value when the waveform on scr...

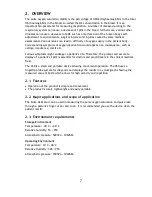
Page 7: ...herefore the prompt and accurate display of a patient s SpO2 is essential for doctors and practitioners in the clinical medical field The V60 is a small and portable device allowing convenient operati...

Page 8: ...ciple of the device is Photoelectric Oxyhemoglobin Inspection Technology this is adopted in accordance with Capacity Pulse Scanning and Recording Technology This provides two beams of different wavele...

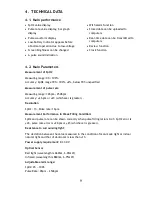
Page 9: ...elow 70 unspecified Measurement of pulse rate Measuring range 30bpm 250bpm Accuracy 2 bpm or 2 whichever is greater Resolution SpO2 1 Pulse rate 1bpm Measurement Performance in Weak Filling Condition...

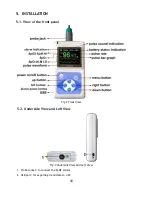
Page 10: ...TALLATION 5 1 View of the front panel Fig 2 Front View 5 2 Underside View and Left View Fig 3 Underside View and Left View 1 Probe socket to connect the SpO2 sensor 2 USB port for exporting trend data...

Page 11: ...tallation Replace the cover Insert the SpO2 probe of the pulse oximeter in the upper socket If the alarm function is on the device will provide high priority alarm signal when the battery is in low po...

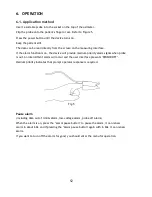
Page 12: ...e will provide medium priority alarm signal when probe is out An intermittent alarm will occur and the user interface presents SENSOR OFF Medium priority indicates that prompt operator response is req...

Page 13: ...The yellow line shows the SpO2 trend waveform and the red line shows the PR trend waveform The time underneath is the start time of the displayed data The centered and at the bottom of the screen indi...

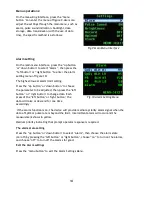
Page 14: ...ress the left button or right button to change data Each press of the left button or right button the data will raise or descend for one time accordingly If the alarm function is on the device will pr...

Page 15: ...atus shown in Figure 11 press left button or right button can change the setting of the item then press menu button to exit the status in Figure 11 and perform setting YES for starting recording NO fo...

Page 16: ...igure 13 the icon of SpO2 Review is a program for receiving stored data which is shown as figure 14 Fig 13 SpO2 program Fig 14 SpO2 Review program Connect the device with computer by the data line whi...

Page 17: ...o select the parameter that you want to change then adjust the data by press the left button or right button Exit the clock setting menu directly by press the menu button If you have reset the time or...

Page 18: ...may also affect the accuracy Please clean and disinfect the device after operating according to the User Manual 7 1 6 3 Clinical restrictions As the measure is taken on the basis of arteriole pulse su...

Page 19: ...shows Take out the battery if leave the equipment unused for long time The device should be calibrated once a year or according to the calibrating program of hospital 7 3 Transportation and storage Th...

Page 20: ...e are not stable 1 The measured part is not placed inside deeply enough 2 The measured part is shaking or the patient is moving 1 Place the measured part properly and try again 2 Keep the patient stil...

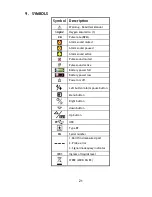
Page 21: ...ed Alarm sound active Pulse sound muted Pulse sound active Battery power full Battery power low Power on off Left button alarm pause button Menu button Right button down button Up button USB Type BF S...

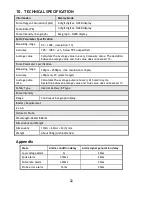
Page 22: ...meter Specification Measuring range 30bpm 250bpm the resolution is 1bpm Accuracy 2bpm or 2 select larger Average pulse rate Calculates the average pulse rate every 4th cardio cycle Deviation between a...

Page 23: ...of the above We will always try to help but we cannot normally offer a refund For additional clarification please refer to our terms and conditions at www daray co uk terms In a small number of cases...

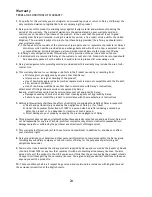
Page 24: ...ray s instructions Attachment of fittings and accessories not approved by Daray Repairs modifications carried out by service personnel not approved by Daray Damage caused by chemical corrosion from cl...

Page 25: ...25...

Page 26: ......

Page 27: ......

Page 28: ......

Reviews: