background image


15 

System Setup 


When you push the 

Setup (57)

 button, the setup menu will be displayed. You can select five tabs: 

A. General  
B.  Audio 
C. Video 
D.  Password 
E.  Exit 

 
When you have entered the setup menu you can use the 

cursor (39, 40, 59, 60) 

buttons to navigate and 

select the desired item. When you have selected an item, push the 

enter (47) 

button


to confirm the entry.


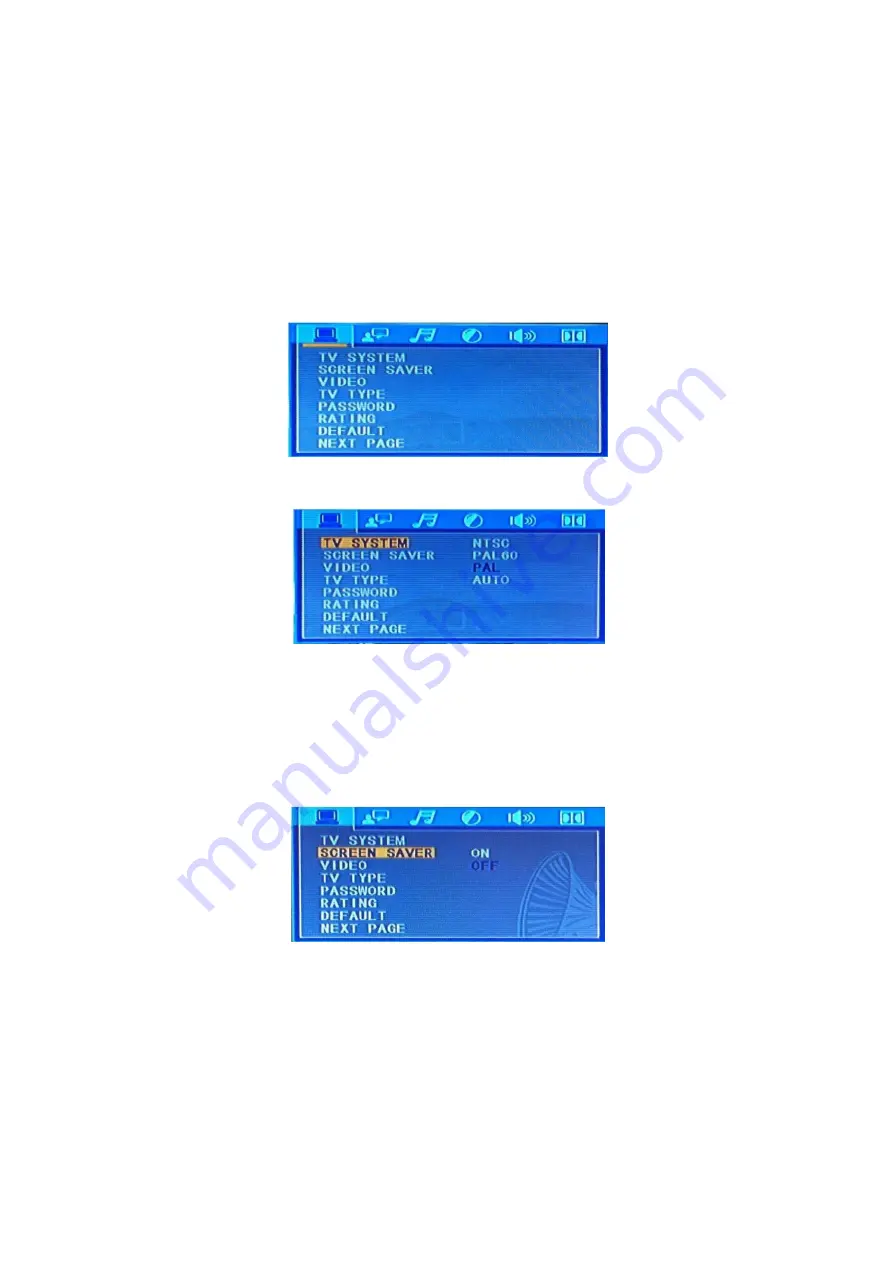
A. General Setup 


This menu is used for setting up the TV screen format, video functions and DVD functions and includes: 

1. TV Display 


Use the

 Cursor (30/40/59/60) 

buttons to select the format of the TV to which the DVD is connected. You 

can choose between: 


NTSC 


PAL60 


PAL 


Auto 

 
2. Screen Saver 


If the unit is not used for more than 2 minutes, the screen saver will be activated. This will prolong the 
service life of the connected TV set. The screen server is factory set to ON. Use the

 Cursor (30/40/59/60) 

buttons to switch the screen saver on or off. 


Summary of Contents for DVMP-150

Page 1: ...DVMP 150 ORDERCODE D1132 Highlite International B V Vestastraat 2 6468 EX Kerkrade The Netherlands...

Page 2: ...AP Audio for more excellent audio products We design and manufacture professional audio equipment for the entertainment industry New products are being launched regularly We work hard to keep you our...

Page 3: ...12 8 OSD On Screen Display 12 9 Subtitle 12 10 Step 12 11 Repeat 13 12 Loop play 13 13 Slow 13 14 Program 13 15 Zoom 13 16 Volume and Mute 13 17 Menu 13 18 Title 13 19 Angle 13 20 Language selection 1...

Page 4: ...s As a suggestion proper UPS packing or double boxing is always a safe method to use Note If you are given an RMA number please include the following information on a piece of paper inside the box 1...

Page 5: ...y cables lying around Do not insert objects into air vents Do not connect this system to a dimmerpack Do not switch the system on and off in short intervals as this would reduce the system s life Do n...

Page 6: ...ll one year after date of purchase Operating Determinations This system is not designed for permanent operation Consistent operation breaks will ensure that the system will serve you for a long time w...

Page 7: ...tion of the device Features The DAP audio DVMP 150 is a 1 U Karaoke DVD player Plays all common audio video formats Balanced XLR audio outputs 19 Rack mounts included IR Remote control included Overvi...

Page 8: ...5 Repeat button 6 Stop button 16 Slow button 7 Previous button 17 S C button 8 Next button 18 Loop button 9 Fast reverse button 19 L R button 10 Fast forward button 20 P N button Rearview Fig 3 21 Com...

Page 9: ...button 54 Zoom button 36 Prog button 55 Return button 37 Title button 56 P N button 38 Mute button 57 Menu button 39 Cursor up button 58 Setup button 40 Cursor left button 59 Cursor right button 41 En...

Page 10: ...4 30 Play Pause button This button allows you to toggle between pause mode and playback mode 15 45 Repeat button Use this button to repeat one track or all tracks of the medium See the section Repeat...

Page 11: ...een menu 41 Enter button Confirm your selection in the onscreen menu by pushing this button 42 Clear button Use this button to clear the numbers you just entered by using the direct access 5 33 button...

Page 12: ...V specification product on 230V power or vice versa Connections 1 Turn off the Power 1 switch 2 Connect the DVMP 150 to your amplifier using the proper cables CAUTION Be sure that the power is off whe...

Page 13: ...he start logo will appear on the TV screen Some discs offer the possibility of resuming from the same spot e g DVD s and music CD s Push Play pause 14 30 resume playback from where the playback was st...

Page 14: ...tton Use the on screen clear button to erase the complete program Abort program play by pushing the Stop 6 31 button twice pre stop and stop 15 Zoom Push the zoom 54 button to zoom the picture in out...

Page 15: ...o clean discs Always handle discs carefully to prevent damaging the surface in particular when removing a disc from its case or returning it Do not bend the disc Do not put the DVD near heating source...

Page 16: ...entry A General Setup This menu is used for setting up the TV screen format video functions and DVD functions and includes 1 TV Display Use the Cursor 30 40 59 60 buttons to select the format of the T...

Page 17: ...Note Available aspect ratio s will be printed on the back of the DVD packaging Some DVD s are recorded in the cinema widescreen format 16 9 and others in the standard format 4 3 Some DVD s are record...

Page 18: ...pushing the enter 41 button Now the DVMP 150 s default settings will be restored 8 Resume Power Select the next page using the Cursor 30 40 59 60 buttons and confirm by pushing the enter 41 button Now...

Page 19: ...hing the enter 41 button 2 Audio Language This menu item is not functional in this software version Use the language 49 button 3 Subtitle Language This menu item is not functional in this software ver...

Page 20: ...the digital surround receiver can t recognize the sound format Select the sound format of your preference using the cursor 30 40 59 60 buttons and confirm by pushing the enter 41 button 2 Mic Setup Th...

Page 21: ...t the brightness between 0 and12 2 Contrast Use the cursor 39 40 59 60 buttons to adjust the contrast between 0 and12 3 Hue Use the cursor 39 40 59 60 buttons to adjust the hue between 6 and 6 4 Satur...

Page 22: ...tereo RCA cables Stereo It is used when the unit is connected to a TV through a scart cable or when the unit is connected to a Dolby Pro Logic II receiver through stereo RCA cables Select the sound fo...

Page 23: ...for example be used for a VCD with two languages i e English on the right hand side and Dutch on the left hand side Select the mode of your preference using the cursor 30 40 59 60 buttons and confirm...

Page 24: ...liquid Do not use alcohol or solvents Keep connections clean Disconnect electric power and then wipe the audio connections with a damp cloth Make sure connections are thoroughly dry before linking equ...

Page 25: ...picture MPEG1 MPEG2 Audio MPEG1 MPEG2 Dolby Digital DTS Analog Frequency response 20Hz 20 kHz Mic input XLR balanced Jack unbalanced Audio output stereo RCA unbalanced Dimensions 482 x 56 x 260 mm LxW...

Page 26: ...2013 DapAudio...

Reviews: