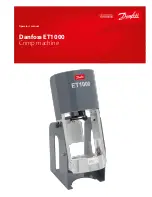
Danfoss ET1000 Crimp machine operator’s manual
4 | © Danfoss ET1000 Crimp machine operator’s manual | 2022.06.
AQ418954799548en-000101
Operating instructions
ET1000
Crimping procedures
Description of components
ET1000
Die Ring Adapter
Split Collet Assembly
Spacer Rings
Step 1:
Slide the pusher to the
back position.
Using the PowerSource crimp
spec tool, select the proper collet
assembly and spacer ring.
Lubricate the inside cone of the
die ring and external surfaces of
the collet assembly with a high-ef-
ficiency PTFE based lubricant.
Insert the collet assembly into
the base die ring.
Step 3:
Place the spacer ring in the appro-
priate position on top of the collet
assembly (either flat-side up or
flat-side down as referenced in the
PowerSource crimp spec tool).
Step 1A:
If using smaller collets, which
require an additional adapter
ring, lubricate the inside cone of
the base die ring and the outside
cone of the die ring adapter plate.
Place the die ring adapter plate
into the base die ring.
Step 4:
Pull the pusher forward into the
detent holding position with the
pusher positioning handle
Step 2:
Insert the hose assembly through
the bottom of the base die ring
and between the two
collet assembly halves. Align
the fitting with the top of the
collet halves.
Step 5:
Begin crimping by actuating
the pump. When the spacer ring
bottoms out against the base die
ring, the crimping
is complete.


