heating.danfoss.com/new-solutions/ectemp-smart
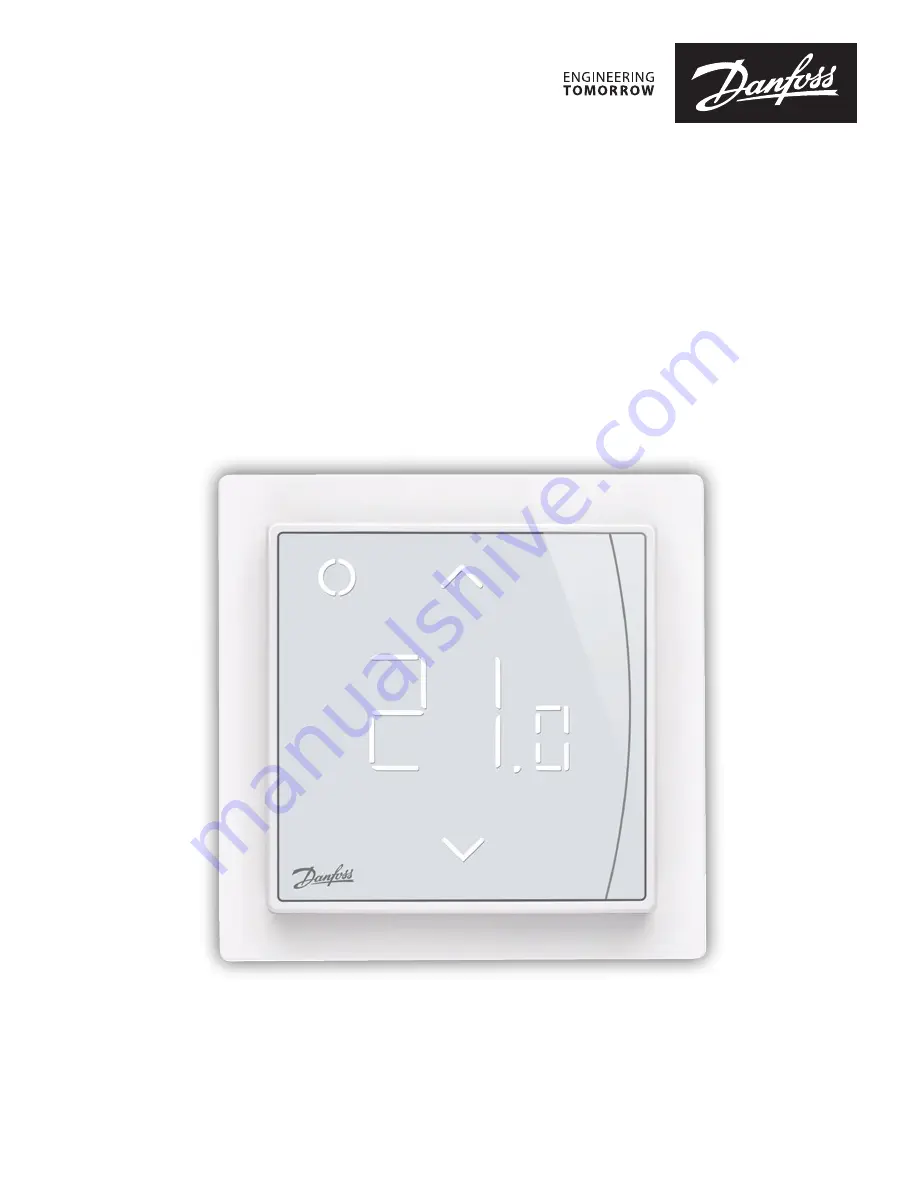
Danfoss ECtemp™ Smart
Intelligent Electronic Timer Thermostat
with Wi-Fi connectivity and App control
Installation Guide
Page 1: ...heating danfoss com new solutions ectemp smart Danfoss ECtemp Smart Intelligent Electronic Timer Thermostat with Wi Fi connectivity and App control Installation Guide...
Page 2: ...signed for fixed installation only and can be used for both direct heating of the entire room and for comfort heating of the floor Among others the thermostat has the following features 1 Introduction...
Page 3: ...tings can be specified before instal lation and imported to the thermostat using a web generated code or copied from a thermostat in a similar installation Smart access to thermostat settings after in...
Page 4: ...0 V 50 60 Hz Standby power consumption Max 0 40 W Relay Resistive load Inductive load Max 16 A 3680 W 230 V Max 1 A cos 0 3 Sensing units NTC 6 8 kOhm at 25 C NTC 10 kOhm at 25 C NTC 12 kOhm at 25 C N...
Page 5: ...up to 45 C Min floor 10 35 C only with combination of room and floor sensor Sensor failure monitoring The thermostat has a built in monitoring circuit which will switch off the heating if the sensor...
Page 6: ...IEC Standard Automatic electrical controls for household and similar use EN IEC 60730 1 general EN IEC 60730 2 9 thermostat 3 Safety Instructions Make sure the mains supply to the thermostat is turne...
Page 7: ...hermostat to moisture water dust and excessive heat This thermostat can be used by children aged from 8 years and above and persons with reduced physical sensory or mental capabilities or lack of expe...
Page 8: ...placed outside zone 2 Place it in an adjacent room and use floor sensor only Always place the thermostat according to local regulation on IP classes Do not place the thermostat on the inner side of a...
Page 9: ...ensor in a protecting plastic conduit in the floor construction in an appropriate place where the floor is not exposed to sunlight or draft from door openings Equally distant and 2 cm from the heating...
Page 10: ...install the floor sensor in a conduit in the floor 3 Fasten the thermostat firmly to a flush mounted wall box or an exterior wall box by driving the screws through the holes in each side of the thermo...
Page 11: ...stat Important Do NOT press in the center of the display screen Press your fingers under the side of the front part and pull toward you until it releases from the snap lock To ensure that the batterie...
Page 12: ...onalities are to support user interface through display and hold all the controller logic Display main functionalities are to show the current status of the Thermostat and recognize the user actions f...
Page 13: ...comma separator Symbol indications Indication Mode State Description Blue blinking Access Point Mode Thermostat ready for set up Blue Access Point Mode Smart phone connected directly to thermostat fo...
Page 14: ...irectly on thermostat Function Button Description Turn thermo stat on 1 Touch any button 2 Touch control button 1 Thermostat switch on and display temperature Turn thermo stat off 1 Touch any button 2...
Page 15: ...activate safety lock Factory restore Touch and hold Control 1 Up 2 for 5 sec After that touch Control 1 again to confirm Activates factory restore state Away mode Touch and hold Control 1 for 1 sec to...
Page 16: ...cuited E2 Sensor short circuited Contact service The thermostat requires a restart to operate again Ther mostat over heated E3 Thermostat is over heated heating is turned off Wait until ther mostat co...
Page 17: ...rror Codes Communication error Nr Description Wrong SSID or password C1 STA trying to connect to the AP No IP address C2 STA connection acquired no IP yet waiting for configuration data No internet co...
Page 18: ...etwork administrator or internet service provider Identify your floor sensor type in kOhm Identify your installed heating output inW from label on the heating element Power on the thermostat and it wi...
Page 19: ...room only option is also avail able but requires that you have to break the small plastic seal on the back of the display module e g us ing a screwdriver it will be possible to set the maximum floor...
Page 20: ...set the maximum floor temperature to more than 35 C Note Please contact the floor supplier before changing the maximum floor temperature and be aware of the following The floor temperature is measured...
Page 21: ...g Details kg m3 Approximate setting for 25 C floortemperature 0 05 8 mm HDF based laminate 800 28 C 0 10 14 mm beech parquet 650 800 31 C 0 13 22 mm solid oak plank 800 32 C 0 17 Max carpet thick ness...
Page 22: ...o a manufacturing defect in the Danfoss product be repaired or replaced free of charge To apply for this warranty the installation must be performed by an authorized installer and the warranty certifi...
Page 23: ...Danfoss ECtemp Smart 23 Installation Guide...
Page 24: ...material Danfoss reserves the right to alter its products without notice This also applies to products already on order provided that such alterations can be made without subsequential changes being n...