background image

31

CUIDADOS Y LIMPIEZA (cont’d)

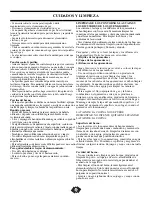
Quitar la puerta del horno:

La puerta del horno se puede quitar para su limpieza.

Cómo quitarla:

• Abra la puerta del horno hasta su posición de máxima apertura.
• Levante las horquillas localizadas en los soportes de las bisagras y engánchelos en  los brazos de las bisagras.
Después aplique una pequeña presión en la puerta hacia abajo para enganchar completamente las horquillas a los 
ganchos de los brazos.
• Sujete la puerta por los lados; jale la puerta hacia usted para soltar las bisagras de los soportes. Continúe jalando la
puerta y gire el lado superior de la puerta hacia la estufa para soltar completamente las bisagras de los soportes.

Cómo instalarla:

• Para instalar la puerta del horno siga de forma contraria los pasos indicados arriba. Asegúrese que las bisagras estén
introducidas completamente en los soportes antes de desenganchar las horquillas.

Para limpiar la puerta interna:

• Utilice agua y jabón. Para salpicaduras o derrames más difíciles puede ser necesario utilizar un limpiador abrasivo
suave.

Para limpiar la puerta exterior:

• Utilice agua y jabón para limpiar el lado superior, el lado inferior, los costados y el frente de la puerta del horno.
Enjuague bien. 
• Elimine las gotas de agua en las ranuras de ventilación.

¡PRECAUCIÓN! 

Tenga cuidado, al volver a colocar la tapa del quemador, de no dañar el electrodo. De 

hacerlo, el quemador podría tardar más en encenderse o no llegar a encenderse.

¡PRECAUCIÓN! 

Cualquier complemento, cambio o conversión necesarios para cumplir satisfactoriamente

los requisitos del aparato deben ser realizados por un distribuidor autorizado o una agencia calificada.

Summary of Contents for DR2009WGLP

Page 1: ...3 Instructions d installation 16 Consignes d utilisation 17 Soins et Entretien 19 D pannage 21 Garantie 22 COCINA DE GAS Informacion Importantes de Seguridad 24 Instrucciones de Instalaci n 27 Instruc...

Page 2: ...bill of sale The date on the bill establishes the warranty period should service be required If service is performed it is in your best interest to obtain and keep all receipts PLEASE DO THIS NOW The...

Page 3: ...ANSI Z223 lasted edition or in Canada CAN CGA B149 1 and CAN CGA B149 2 and the National Electrical Code ANSI NFPA No 70 lasted edition or in Canada CSA Standard C22 1 Canadian Electrical Code Part 1...

Page 4: ...e aluminum foil to line the oven bottom except as suggested in the cleaning section of this manual Improper use of aluminum foil may result in a fire hazard Foil may also interfere with heat circulati...

Page 5: ...Care should be taken not to rub damage or move the gasket Flexible Connectors If the gas range oven is connected to a gas supply with a metal flexible connector move the range oven with CAUTION for se...

Page 6: ...the dealer where you purchased your new range install or recommend a qualified installer Installation must conform with local codes The range should be connected to a supply line with 1 2 inch black i...

Page 7: ...e oven Preheat for 10 to 12 minutes Opening the Oven Door Let hot air steam escape before removing replacing food Arranging Oven Rack The oven rack should be arranged before the oven is turned ON Plac...

Page 8: ...pan into the recessed section of the broiler rack Slide the pan in place under the pan retainers Push the pan to the rear of the broiler compartment Close the broiler door 7 USING YOUR RANGE cont d Ec...

Page 9: ...teps above CLEANING THE CONTOURED WELL AREAS BURNER CAPS AND BURNER HEADS The contoured well areas burner caps and burner heads should be routinely cleaned Keeping the burner ports clean will prevent...

Page 10: ...ver the hooks Grasp the door by the sides pull the bottom of the door up and toward you to disengage the hinge supports Keep pulling the bottom of the door toward you while rotating the top of the doo...

Page 11: ...llow the oven to preheat to the set temperature before placing food in the oven Try adjusting the recipes recommended temp or baking time See Installation Instructions 5 Flames inside oven or smoking...

Page 12: ...anties conditions representations or guaran tees express or implied made or intended by Danby Products Limited or its authorized distributors and all other warranties conditions representations or gua...

Page 13: ...factura se utiliza para calcular el per odo de garant a en caso de que necesite servicios de mantenimiento o de reparaci n Es muy recomendable que cuando le presten dichos servicios solicite y conser...

Page 14: ...gas combustible ANSI Z223 o en Canad CAN CGA B149 1 y CAN CGA B149 2 y la ltima edici n de la Normativa nacional el ctrica ANSI NFPA n 70 o en Canad CSA Standard C22 1 Normativa el ctrica canadiense p...

Page 15: ...te manual El uso inadecuado del papel de aluminio puede implicar un peligro de incendio Adem s el papel puede afectar la circulaci n del calor y da ar la cocina Colocaci n de bandeja en el horno coloq...

Page 16: ...ado de no frotarla da arla o moverla Conectores flexibles Si la cocina el horno a gas est n conectados al suministro de gas mediante un conector met lico flexible mueva con CUIDADO la cocina el horno...

Page 17: ...jo IMPORTANTE Conserve los niveladores de las patas Es muy importante mantener la cocina nivelada CONEXIONES DE GAS Pida en el concesionario donde compr su nueva cocina que se la instalen o le recomie...

Page 18: ...e el aire y el vapor calientes salgan antes de sacar o de colocar los alimentos C mo colocar la rejilla del horno Se debe colocar la rejilla del horno antes de encender el horno Coloque la rejilla de...

Page 19: ...bandeja Empuje la bandeja hasta el fondo del compartimiento Cierre la puerta de la parrilla 29 C MO USAR LA COCINA continuaci n Parrilla de bajo consumo Es posible que su cocina venga equipada con es...

Page 20: ...acenamiento Tire del caj n hasta que se detenga Lev ntelo por el asa y tire de l hasta sacarlo Para volverlo a poner siga las pasos anteriores en orden inverso LIMPIEZA DE LOS CONTORNOS LAS TAPAS Y LO...

Page 21: ...orno siga de forma contraria los pasos indicados arriba Aseg rese que las bisagras est n introducidas completamente en los soportes antes de desenganchar las horquillas Para limpiar la puerta interna...

Page 22: ...ada Centre los alimentos en el horno y espacie los recipientes para que circule el aire Precaliente el horno hasta la temperatura deseada antes de introducir los alimentos Intente ajustar la temperatu...

Page 23: ...o representaciones expl citas o impl citas concretas o intencionales por parte de Danby Products Limited o sus distribuidores autorizados y todas las dem s garant as condiciones o representaciones in...

Page 24: ...rmine la p riode de garantie dans le cas o un entretien serait n cessaire Si un entretien est effectu il est dans votre int r t d obtenir et de conserver tous les re us NOUS VOUS PRIONS DE VOUS CONFOR...

Page 25: ...uel Gas Code derni re dition ou du Canada CAN CGA B149 1 et du CAN CGA B149 2 et la derni re dition N 70 de la norme ANSI du Code national de l lectricit National Electrical Code ou de la NFPA ou de l...

Page 26: ...user la formation d manations et les d p ts graisseux peuvent s enflammer Un ustensile de cuisson peut galement fondre quand son contenu s est vapor Servez vous d une flamme dont la hauteur est approp...

Page 27: ...ge Les raccords flexibles ne sont pas destin s tre pli s plusieurs reprises vitez que les agents nettoyants n entrent en contact avec les raccords flexibles Le raccord et ses accessoires de canalisati...

Page 28: ...ins des pieds Il est tr s important de mettre la cuisini re niveau RACCORDS DE GAZ Demandez au distributeur du magasin o vous avez achet votre nouvelle cuisini re de l installer ou de vous recommander...

Page 29: ...temp rature au stade d bullition lente paississement des sauces des jus cuisson la vapeur Bas Cuisson des aliments art de pocher les aliments pr paration de rago ts Pour allumer les br leurs sup rieu...

Page 30: ...toirs de casserole Poussez la casserole derri re le compartiment de grilleur Fermez la porte de grilleur Grilleur d conomie Votre four peut tre quip e de ce grilleur facultatif L aspect ext rieur du f...

Page 31: ...ES ET DES T TES DE BR LEUR Les zones de contour des cupules des cuvettes et des t tes de br leur doivent faire l objet d un nettoyage r gulier Le fait de garder les orifices de combustion des br leurs...

Page 32: ...essus des crochets Saisissez la porte par les c t s tirez le fond de la porte vers le haut et vers de vous pour d sengager la charni re appuis Continuez tirer le fond de la porte vers vous tout en tou...

Page 33: ...les aliments au centre du four et m nagez de l espace entre les ustensiles de cuisson pour permettre l air de circuler Faites chauffer le four l avance la temp rature pr d termin e avant de placer les...

Page 34: ...imit e Canada ou Danby Products Inc E U d A ou ses distributeurs agr s De m me sont exclues toutes les autres garanties conditions ou repr sentations y compris les garanties conditions ou repr sentati...

Page 35: ...umber CUISINI RE DE GAZ Le num ro de mod le de votre Cuisini re lectrique est localis sur la plaque en s rie Toutes les pi ces de rechange sont disponibles imm diatement ou peuvent tre command es de v...

Page 36: ...GAS o Do not try to light any appliance o Do not touch any electrical switch do not use any phone in your building o Immediately call your gas supplier from a neighbor s phone Follow the gas supplier...

Page 37: ...nts cabinet storage space above the cook top should be avoided If cabinet storage space is to be provided above the cook top the risk can be reduced by installing a range hood that sticks out at least...

Page 38: ...tion CAUTION Never leave children alone or unattended in the area where an appliance is in use As children grow teach them the proper safe use for all appliances Never leave the oven door open when th...

Page 39: ...or gas conversion LP Propane or Natural Open end wrench Additional materials you will need Gas line shut off valve Pipe joint sealant that resist action of LP Propane gas A new flexible metal applianc...

Page 40: ...closed edge of the bracket is against the rear wall and its right side against cabinet adjacent 3 If the range is not place into a range opening just place the anti tip bracket so that the closed edge...

Page 41: ...ustion and ventilation air For proper operation the maximum inlet pressure to the regulator should be no more than 14 inches of water column pressure The inlet pressure to the regulator must be at lea...

Page 42: ...ng its individual manual shut off valve during any pressure testing of the gas supply piping system at test pressures equal to or less than 14 of water column pressure approximately psig If it should...

Page 43: ...ce The customer should have the wall receptacle and circuit checked by a qualified electrician to make sure the receptacle is properly grounded and polarized Preferred Method Where a standard 2 prong...

Page 44: ...lotted screw inside Flame size can be increased turning counterclockwise or de creased creased turning clockwise with the turn the turn of the screw Adjust flame until you can quickly turn knob from t...

Page 45: ...f the oven burner flame is proper remove the oven bottom and set the oven to bake at 300 F To remove the oven bottom slide it back into place to disengage front of oven bottom from oven front frame an...

Page 46: ...will require the replacement of the orifice hoods and adjustment of air shutters on the burners and adjustment of the appliance pressure regulator converter cap Inlet pressure to the appliance pressur...

Page 47: ...rner size 9 K BTU Natural replace with orifice stamped 0 80 for LP 6 K BTU Natural replace with orifice stamped 0 65 for LP Turn the orifice hood clockwise by hand approximately one turn Tighten the o...

Reviews: